Chromebooks are far more versatile than they were when they first came onto the market. There’s actually little you can’t do with these cost-effective, secure devices. Case in point, there is even a tool that allows you to mount a Shared Network Folder (SFTP) onto your Chromebook. That means you’re not limited to only working with the likes of Google Drive or SMB shares on your network. In fact, with this particular tool, you can mount these SFTP via the SSHFS protocol for extra security.
Cloud: Must-read coverage
- CrowdStrike Outage Disrupts Microsoft Systems Worldwide
- Quick Glossary: Cloud Platform Services
- Achieving Cost Efficiency in Cloud Storage: The Role of Western Digital’s Hard Drive Portfolio
- Still Not Backing Up Microsoft 365 Data? Here’s Why That’s a Risky Move
- Verito vs. Rightworks: Which IT Provider Is Best for Your Firm?
But how do you do this? First you must install a necessary extension. Let’s do that, and then we’ll mount a remote directory.
Installation
The first thing you need to do is install the Shared Network Folder (SFTP) extension. To do this, follow these steps:
- Point Chrome (on your Chromebook) to the Shared Network Folder (SFTP) extension page
- Click ADD TO CHROME
- When prompted, click Add app
- Allow the installation to complete
That’s all there is to the installation. You will find the extension in your Chromebook menu. Open the desktop menu and type SFTP. Click on the extension launcher, and you’re ready to connect.
SEE: Glossary: Hybrid cloud (Tech Pro Research)
Mounting the remote drive
When the window opens, you’ll see that it’s only a matter of filling in the blanks (Figure A).
Figure A
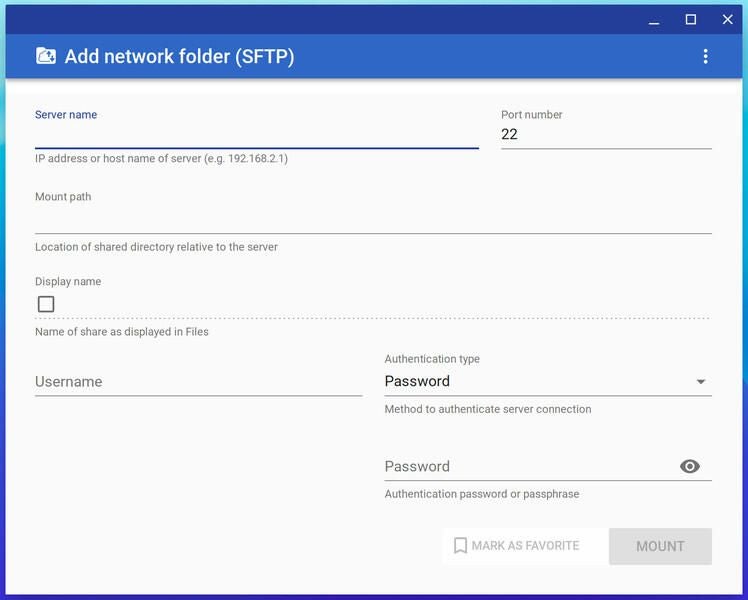
I’ll connect to a Linux machine that has an SSH server running and accepting connections. For this, fill out:
- Server name — host or IP address of server.
- Port number — port accepting connections on the server.
- Mount Path — the remote directory to be mounted.
- Display Name — a name for the share that will be displayed in the Chrome OS file manager.
- Username — remote username.
- Authentication type — the type of authentication used on the remote server (Password, Publickey, Keyboard-interactive).
- Password — password for the remote user.
Once you’ve filled everything out, click the MOUNT button. You can also add this mount point as a favorite by clicking the MARK AS FAVORITE button. If you don’t click this button, you will have to manually enter the information for the connection every time you reboot the Chromebook. By adding it to favorites, the remote drive will auto-mount after a reboot.
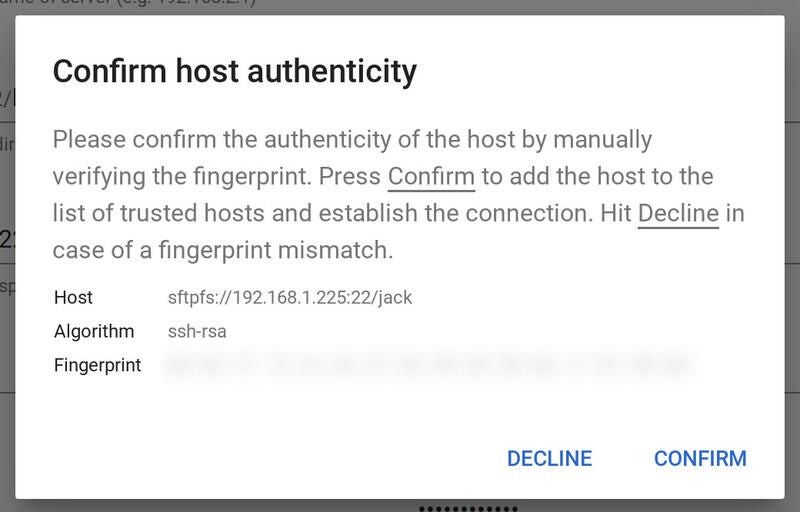
Since this will be the first time you’ve connected to the remote server, you have to confirm the host authenticity. When prompted, click the CONFIRM button (Figure B).
Figure B
The SFTP mount window will go away. If you open the file manager, you will see the remote directory now mounted and listed in the left pane (Figure C).
Figure C
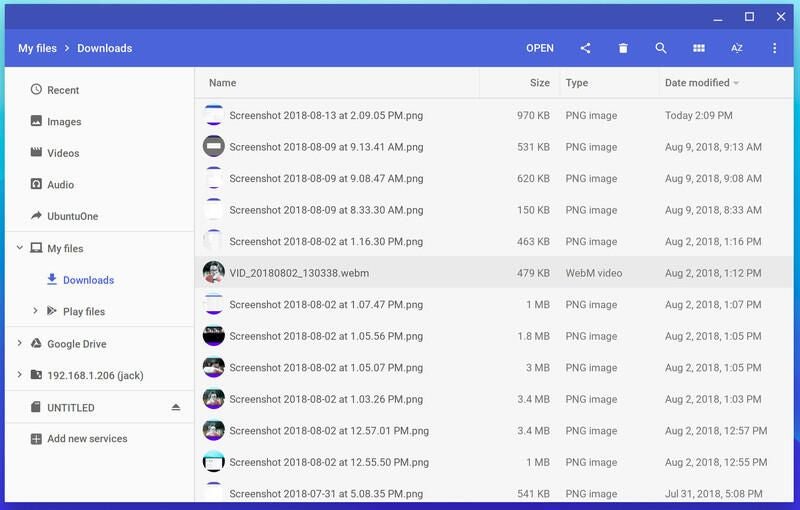
You can now use that mounted remote directory as if it were on the local machine.
One caveat
If you find that you’re unable to create new folders or files on the mounted drive, you might have to reboot the machine (after creating the connection). I ran into this issue once, where even though I knew I was within a directory I had permission to write to I couldn’t. After a reboot, that problem was resolved.
Outside of that, the Shared Network Folder (SFTP) extension is a great way to extend the cloud/remote functionality of your Chromebook (so long as you have an SFTP-enabled server available with shares to mount).