You’re running into errors or glitches in Microsoft Outlook and suspect the issue may be due to corruption in your personal folder file, which houses all your email and other content. To help track down the cause of the problem, Microsoft offers the built-in Inbox Repair tool, also known as ScanPST.
SEE: Windows, Linux, and Mac commands everyone needs to know (free PDF) (TechRepublic)
The ScanPST tool can scan a PST or OST file to diagnose and repair errors in the file. If it finds any corruption, the tool offers to repair the errors. Here’s how it works.
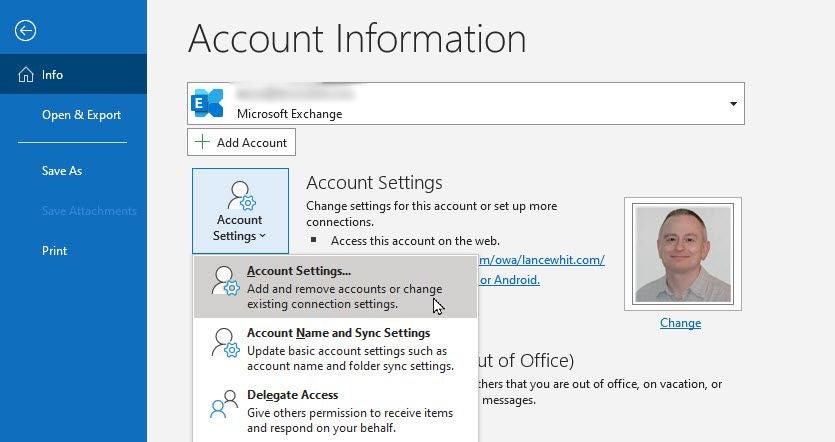
Before it attempts to repair a file, the tool automatically creates a backup. But you may want to have your own backup as an additional safety precaution. To find the location of the PST or OST file, open Outlook and click the File menu. Click the button for Account Settings and then select the command for Account Settings (Figure A).
Figure A

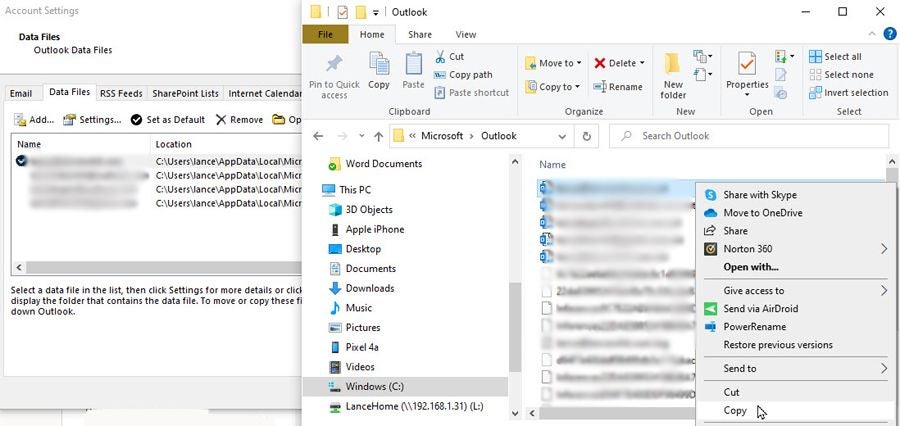
At the Account Settings window, click the tab for Data Files. Examine the path for the file you wish to scan and open it in File Explorer. Close Outlook. Then simply create a backup copy of the file. If you bump into an error about the file being locked when trying to back it up, make sure Outlook and any applications that use or integrate with Outlook are closed. If necessary, open Task Manager to check for any programs that need to be shut down (Figure B).
Figure B

In File Explorer, browse to the folder that contains scanpst.exe to launch the tool. The location varies slightly based on your flavor of Outlook and whether it’s the 32-bit or 64-bit version. For the 64-bit version, start by browsing to C:\Program Files\Microsoft Office\. For the 32-bit version, browse to C:\Program Files (x86)\. From there, drill down to the following locations:
Microsoft 365, Outlook 2019, and 2016 – ..\root\Office16.
Outlook 2013 – ..\Office15
Outlook 2010 – ..\Office14
Outlook 2007 – ..\Office12
If you’re unable to locate the file through a specific path in File Explorer, simply run a search for scanpst.exe. Double-click the file. The window lists the path for the PST or OST file. If it’s pointing to the wrong file, click the Browse button and select the correct file (Figure C).
Figure C

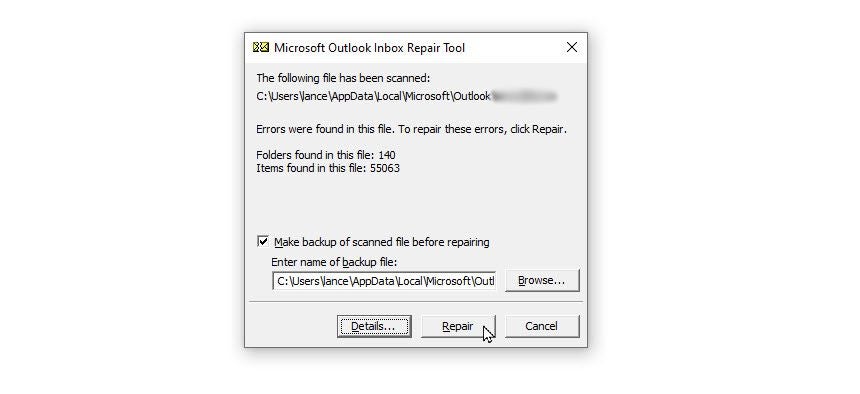
With the correct PST or OST file listed, click the Start button. The tool goes through eight phases. Assuming the file is corrupt, the tool will stop at some point and tell you that it found errors in the file. Clicking the Details button may or may not provide more information. Either way, click the Repair button (Figure D).
Figure D

The tool will then display a notice telling you when the repair is complete. Click OK. Run the tool again to see if your PST or OST file now passes the test. If additional errors are found, click the Repair button again (Figure E).
Figure E

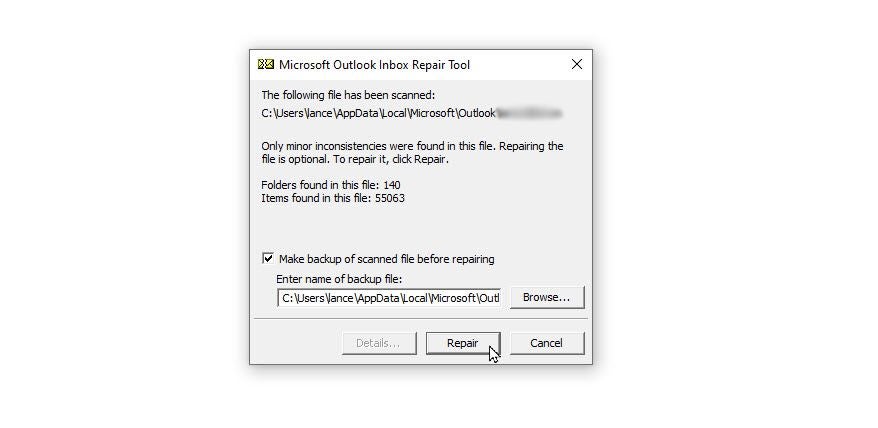
At some point, the tool may indicate that it’s found only minor inconsistencies in the file and that repairing it is optional. Instead of repairing it again, you may want to check the app’s log file to view the results of the scan. To do this, go to the same folder that contains your PST or OST file. Double-click the log file that starts with the same name as your mailbox. The log file contains plain text, so you can read it in Notepad or a similar text editor. Then open Outlook and try to replicate the behavior that caused the problems in the first place. If Outlook is working properly, then you’re set. If not, you may want to try another repair or consider other reasons for whatever glitches are plaguing Outlook.
