
To smoothen the decision-making process, we use all sorts of insights, analyses and visualizations. However, the decision-making process is not enhanced if all these findings and insights fail to reach decision-makers. Fortunately, Power BI makes it simple to share these reports with various people inside or outside the organization.
What you need to know
To share content within or outside your organization, you will require a Power BI Pro or Premium Per User license. You will also need to allocate the recipient a workspace role that allows them to edit a shared report if you desire to permit recipients to edit reports.
SEE: Windows, Linux, and Mac commands everyone needs to know (free PDF) (TechRepublic)
You can share reports from My Workspace and other workspaces. However, an Admin or Member workspace role makes the latter feasible. Additionally, the Power BI mobile apps allow you to share reports, while are impossible to share directly from Power BI Desktop. You would have to publish reports from the Power BI Desktop app to the Power BI service.
How to share a Power BI report
We’ll be using the Power BI service to share a report in this walkthrough, as this is the most common sharing method.
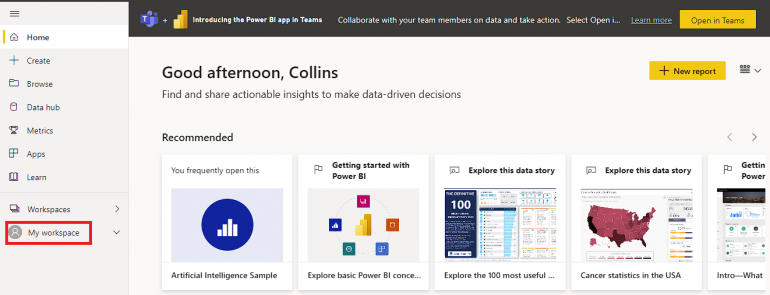
You first have to log in to your Power BI service account, then select My Workspace from the pane on the left (Figure A). As the reports you published from Power BI Desktop should be available in My Workspace, sharing a report becomes a straightforward process.
Figure A
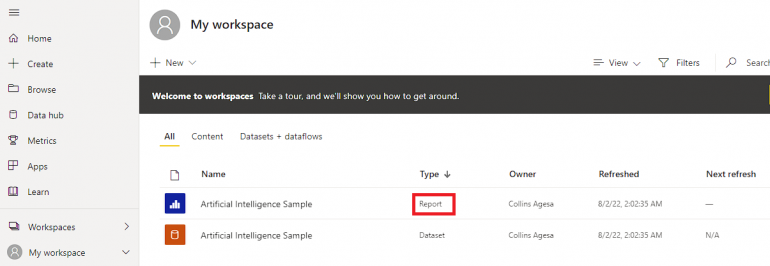
From the content displayed, select the report you want to share (Figure B) and open it. For this example, we’re using an Artificial Intelligence Sample report.
Figure B
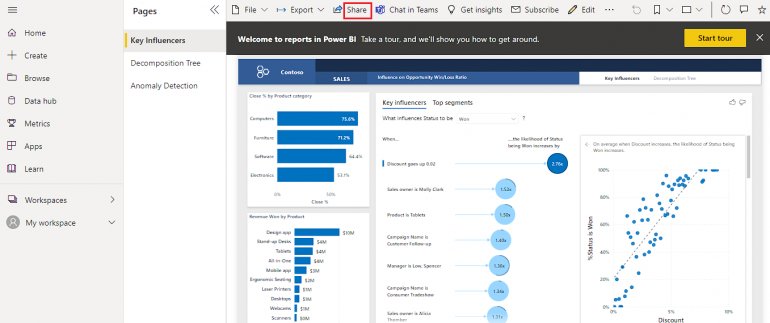
Click on Share (Figure C) to access the sharing options available.
Figure C
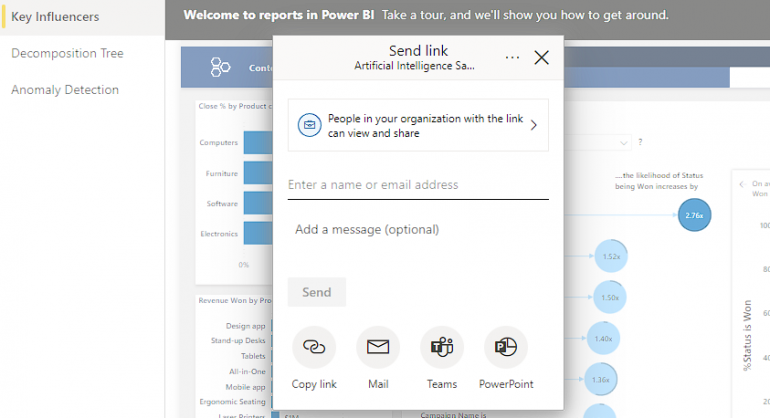
The Send Link (Figure D) dialog pops up to present a few options on how to share your report. You can either copy the sharing link or share it through Microsoft Outlook, PowerPoint and Teams with members of your organization.
Figure D
Selecting People In Your Organization presents a new dialog (Figure E) with additional sharing options. The first of the three options is People In Your Organization, which allows you to share access to a report through a link sent to members of your organization. This means that you cannot use this link to grant access to guest users as well as external users.
This link is used when:
- The recipient is a member of your organization.
- The sender is comfortable with other people within the organization accessing the link.
- You want a guarantee that the link will not leave the organizational boundary.
Figure E
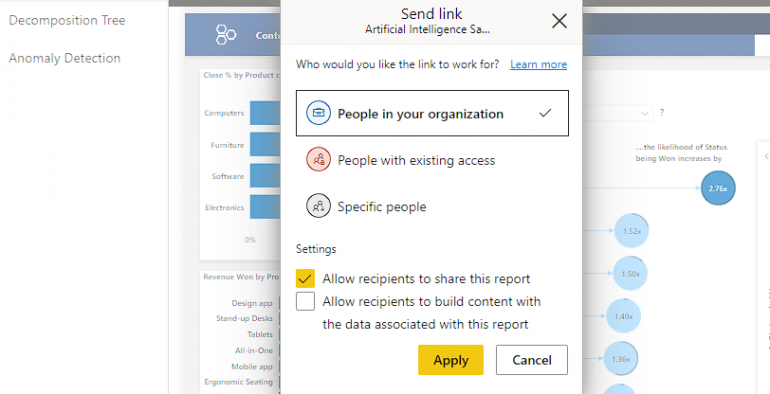
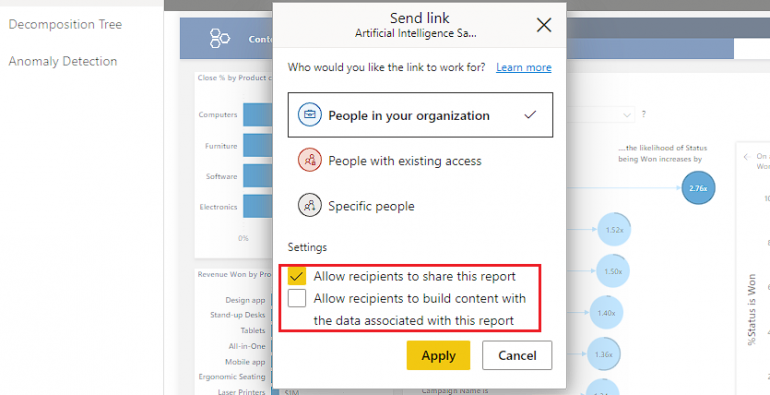
The People In Your Organization option presents a couple of settings (Figure F) at the bottom of the dialog box to control how the report is shared. Check the first one to enable recipients to share the report with others and the second one if you have no problem with the recipient building content using the report’s data.
Figure F
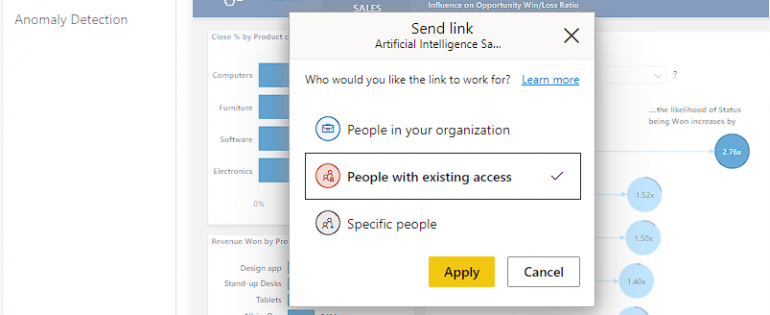
The second option is People With Existing Access. Selecting this option (Figure G) creates a URL to the report, minus access to the report as it is meant for sending a link to someone who already has access to the report. This option lacks the settings that People In Your Organization and Specific People options have.
Figure G
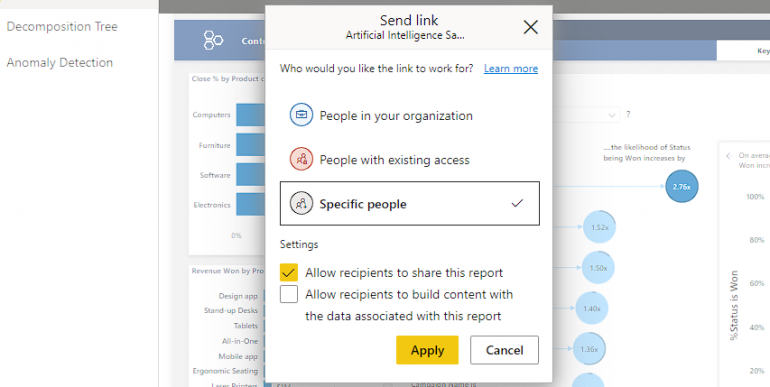
Option three involves choosing Specific People (Figure H) as the recipient(s) of the report. This option considers instances where you would want to share reports with certain people or groups. If this is the option that works for you, you will need to type the names or email addresses of the recipients.
This kind of link is shareable with guest users in your organization’s Azure Active Directory. However, sharing it to users that are neither internal to nor guests in your organization is not possible.
Figure H
After selecting which of the three options suits you, click Apply. If you selected either People In Your Organization or Specific People, clicking apply will take you back to the Send link dialog (back to Figure D).
At this point, you can enter an email address and click send, with the option of including a message. However, this is dependent on the sharing options you selected. If you selected People In Your Organization or Specific People and input an email address with a domain outside your organization, you will not be able to share your report.
Clicking Copy Link automatically creates and copies a link (Figure I) to your clipboard. You can share this link with the correct recipients.
Figure I

Your recipients will access the link to the shared report through the method you choose. However, it is worth noting that the recipients should also have Power BI Pro or PPU licenses. Users will not be able to use a link that is not directly shared with them to gain access to a report.
If you have gotten to this point without any problems, you will have shared your first Power BI report.

