You can call on Amazon Alexa for help in Windows 11 or 10 without an Echo device nearby. The secret lies in Amazon’s Alexa app for Windows. Through this app, you can summon Alexa either by clicking an on-screen button or just saying “Alexa” via a hands-free mode. After Alexa pops up, you can ask questions, request information, check your calendar and other personal services, and access different skills and tasks. You can also tweak various options to control the Alexa app.
Can I get the Alexa app on my PC?
Maybe you have an Echo device through which you access your calendar, to-do list and other information. Maybe you find Alexa more helpful than Cortana. Or maybe you’d just like to try out another voice assistant beyond Cortana. To use the Alexa app in Windows, you don’t need an Echo, but you do need an Amazon account. Once installed, the Alexa app works the same in both Windows 11 and 10.
How do I install Alexa in Windows 11 or 10?
To get started, download and install the Alexa Windows app from the Microsoft Store. The first time you launch the app, you’re asked to set it up. Click the Get Started button to set up Alexa. Sign in with your Amazon account, then click Agree & Continue to accept the terms and conditions.
SEE: Google Workspace vs. Microsoft 365: A side-by-side analysis w/checklist (TechRepublic Premium)
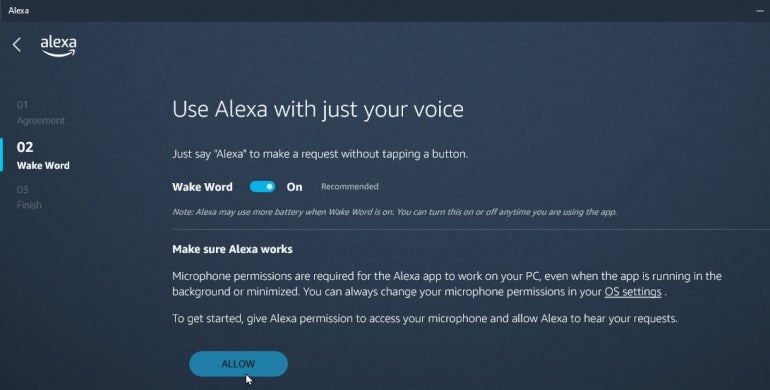
The next screen asks if you want to use Alexa hands-free or by clicking a button. The hands-free option is easier since you can trigger Alexa by voice, just as you do with an Echo device, but this may chew up more battery power because the app is always listening. To activate this, turn on the switch for Wake Word: You can always turn it off in the future. The app also asks for permission to let Alexa access your microphone. Click Allow to permit this (Figure A).
Figure A
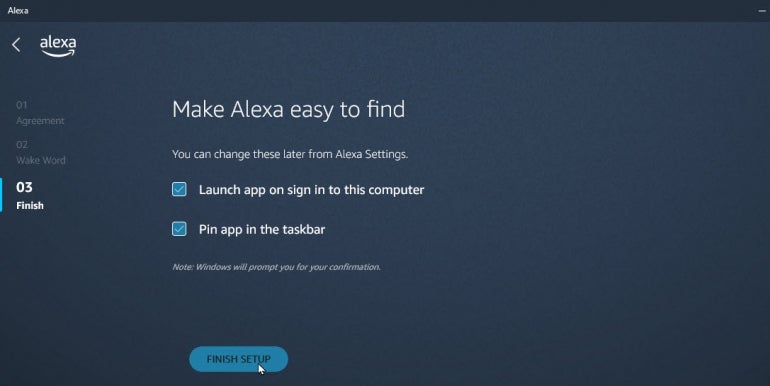
The final setup screen presents two options, both of which are selected by default: Launch App On Sign-in To This Computer and Pin App In The Taskbar. You can uncheck either option or change them later. Click the button for Finish Setup (Figure B).
Figure B
A couple of messages pop up to confirm the two options. The first message asks for confirmation that you want the Alexa app to run when you log in to Windows. Click Enable to confirm. The second message asks if you want to pin the app to the taskbar. Click Yes. The Alexa app opens. Click the Get Started button to dive in (Figure C).
Figure C
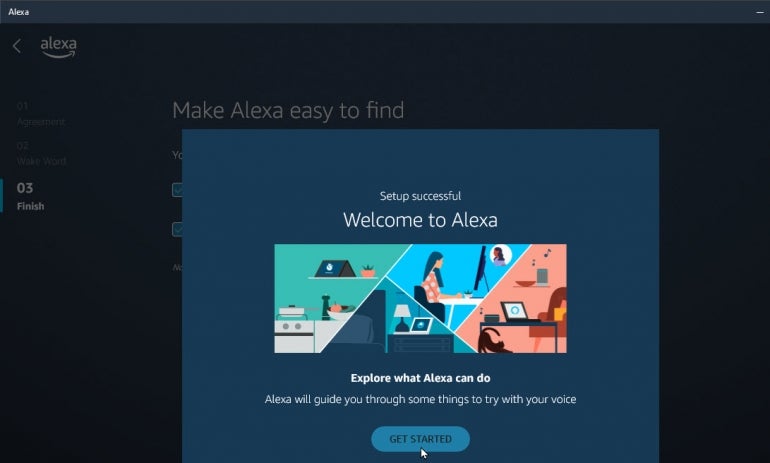
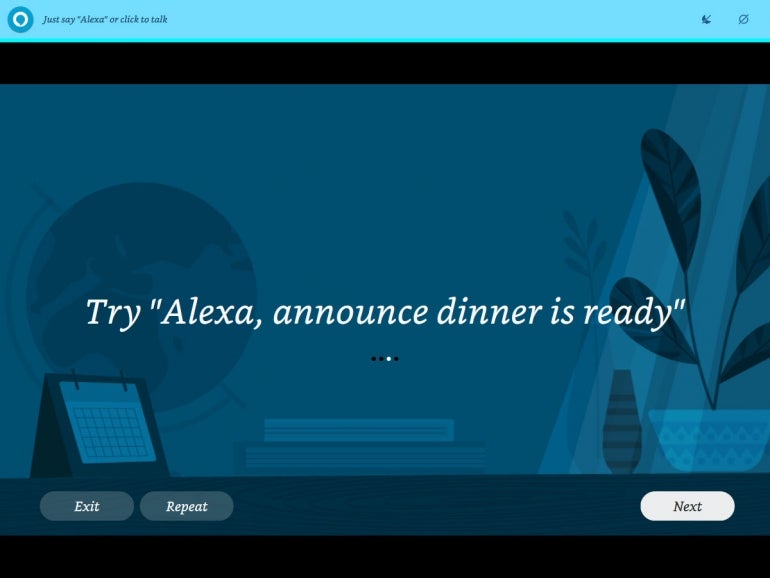
Alexa invites you to try out different requests by speaking them. Speak each request that appears on the screen to see how the app works and make sure that it’s able to respond to your voice (Figure D).
Figure D
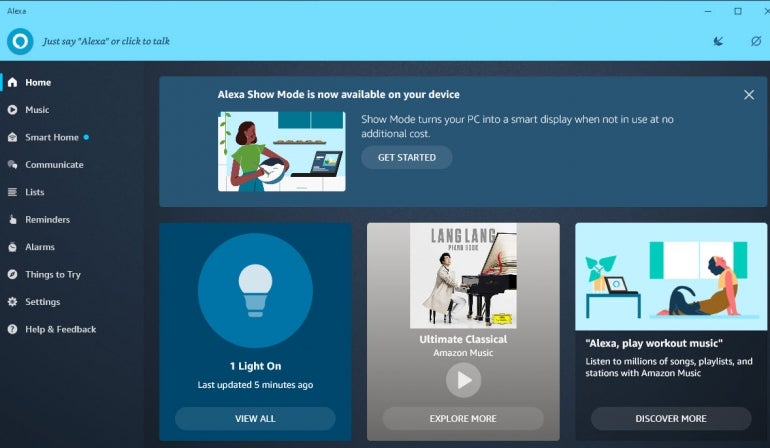
The Alexa app then displays different categories and settings. You can check out the various features to learn more about the app and review your history with Alexa. The app offers several suggestions on what you can ask Alexa, but you may want to know more about the types of questions and requests the app can handle (Figure E).
Figure E
What can you ask the Alexa app?
In the Alexa app, you can request many (but not all) of the same things you might request from Alexa through an Echo device: Ask for location-based information, such as the weather or local restaurants; request your personal information, such as appointments and to-do list; conduct research on general topics; and request music and other content.
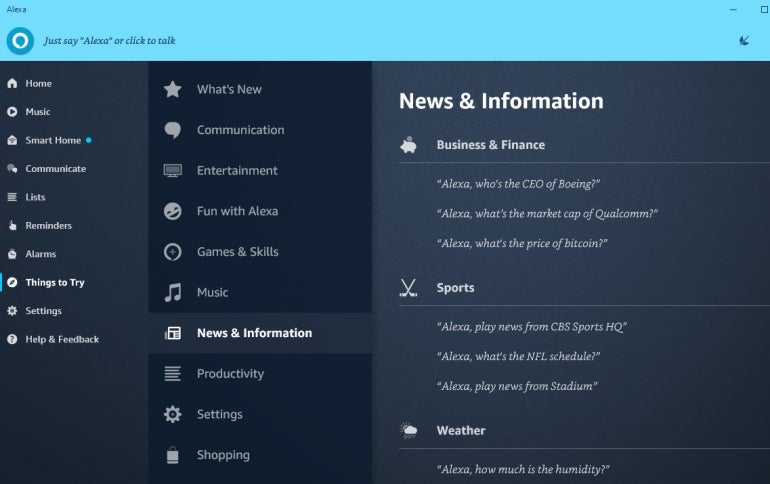
To see a few examples of things you can ask, tap the entry in the app for Things To Try. That takes you to an Amazon web page with phrases, questions and other tasks that the app can handle. From this page, you can also view and set up other Alexa Skills and features, such as music, lists, reminders, contacts and smart home (Figure F).
Figure F
How to customize settings in this Alexa app
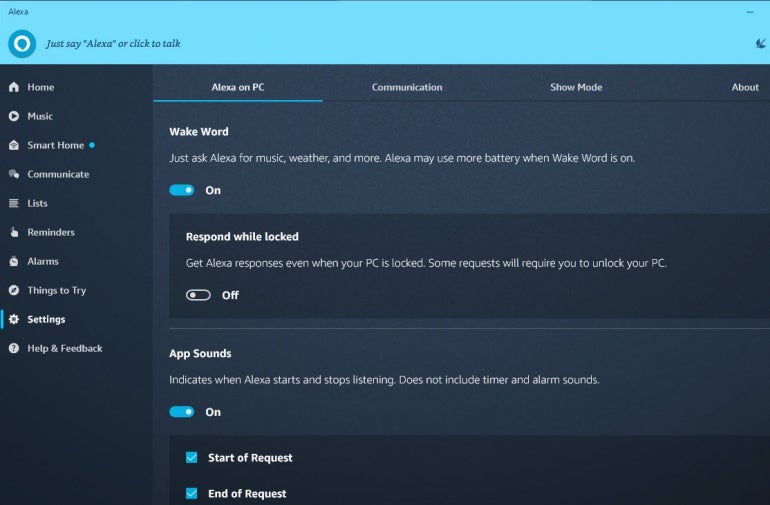
Finally, click the entry for Settings. At the Settings screen, you can turn the hands-free mode on and off through the Wake Word switch. You can enable or disable the sound Alexa makes when it starts and stops listening. You can view and change the keyboard shortcut used to trigger Alexa, and you can enable or disable the app from launching when you sign into Windows (Figure G).
Figure G
