


Must-read Windows coverage
- CrowdStrike Outage Disrupts Microsoft Systems Worldwide
- 10 Best Project Management Software for Windows in 2024
- Windows 10 Extended Security Updates Promised for Small Businesses and Home Users
- Securing Windows Policy
One of the new features added to the Windows 10 Anniversary Update is called Projecting To This PC. It’s designed to allow you to use a Wi-Fi connection to project the display from a Windows 10 computer or phone to another Windows 10 computer using a wireless network. In essence, this allows you to create a multiple-monitor configuration. Let’s take a closer look.
Editor’s note: This article was first published in 2016 just after the Anniversary version of Windows 10 was released by Microsoft.)
Defining terms
To help explain how the Projecting To This PC feature works, I’m going to define the two computers in this configuration as the Host and the Guest. The Host computer is the one that is sharing its screen; the Guest computer is the one that is connecting to the Host and using the screen as a second monitor.
Caveats
The Windows 10 Projection to this PC software is no longer installed by default. It is now considered to be an optional Windows 10 feature. Therefore, you may find you have to install it manually. Check out the TechRepublic how-to tutorial explaining how to install and activate the Windows 10 Projecting to this PC software.
After the Windows 10 Projecting to this PC software is installed, follow the steps as outlined below to create a wireless multimonitor display.
SEE: How to set up Windows 10 on the Raspberry Pi
Setting up the Host
To begin, select Settings from the Start Menu. When the Settings screen appears, select the System tab and then choose Projecting To This PC, as shown in Figure A. (You’ll probably notice that my System screen looks different. I resized the window to make it smaller for the screen shots.)
Figure A
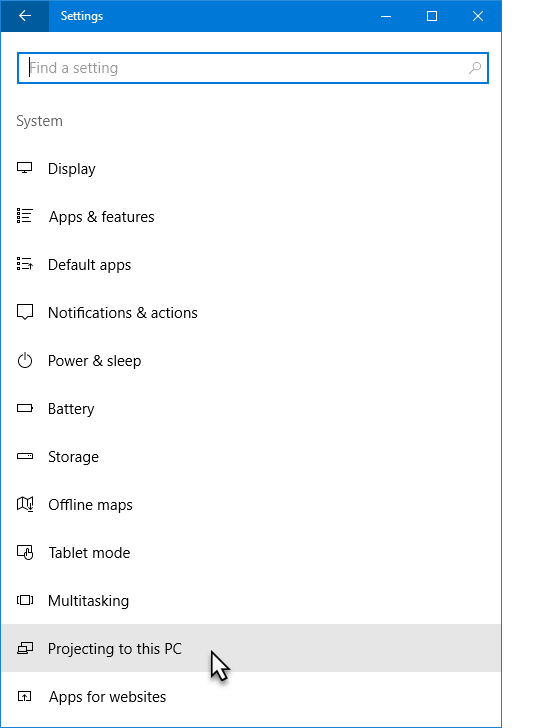
Once you access the System screen, select Projecting To This PC.
You’ll then see the Projecting To This PC screen shown in Figure B. As you can see, by default the Projecting To This PC feature is turned off. So, the first thing that you need to do is turn it on.
Figure B
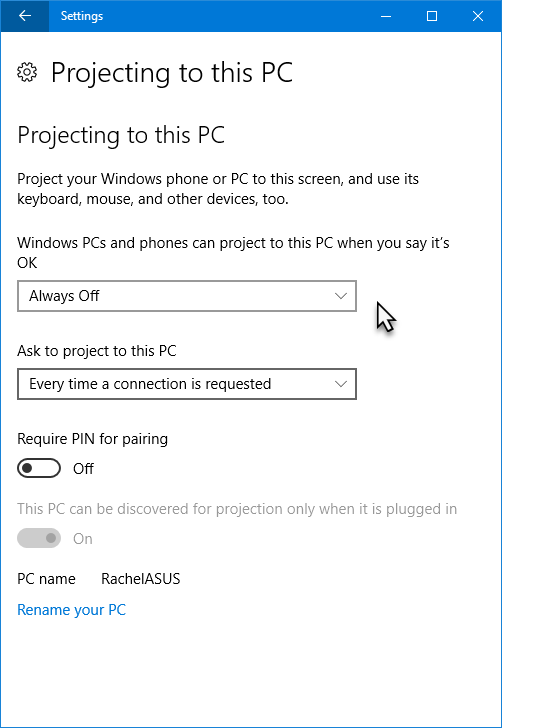
By default, the Projecting To This PC feature is turned off.
To enable Projecting To This PC, select Available Everywhere On Secure Networks from the list box, as shown in Figure C. When you do, you’ll see a warning message in red text that informs you that you might encounter display problems. Despite the message, the Asus X540S worked perfectly as the Host computer.
Figure C
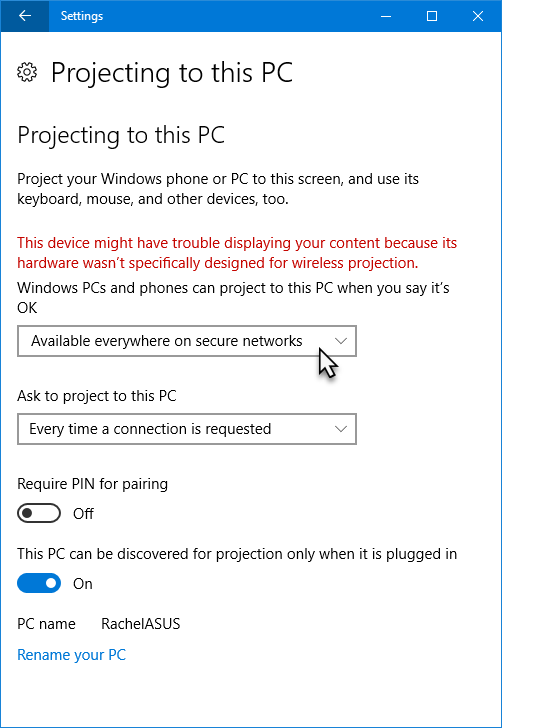
Despite the red warning message, my Asus laptop worked fine.
You can leave the rest of the settings as they are and everything will be ready to go. However, let’s look at all the settings on the Projecting To This PC page.
In addition to the Always Off and Available Everywhere On Secure Networks, you can select Available Everywhere from the Windows PCs And Phones Can Project To This PC When You Say It’s OK dropdown. Using the secure networks setting indicates that the Projecting To This PC feature will work only on a secure wireless network. i.e., one the requires a password to connect to it. Selecting Available Everywhere would basically allow the Projecting To This PC feature to work on an unsecure wireless network as well as a secure one. In addition to the Every Time A Connection Is Requested setting, you can select First Time Only from the Ask To Project To This PC dropdown. As we’ll see in a moment, this controls the permission prompt that displays on the Host computer.
By default, the Require Pin For Pairing switch is Off. I turned it On but was unable to get it to work. I’m not sure why, but I’ll continue to investigate this. Since the Host is a laptop with the potential to be running on battery power, This PC Can Be Discovered For Projection Only When It Is Plugged In is set to On.
The name assigned to the system is shown along with the Rename Your PC command. Clicking it will take you to the Settings > System > About page, where you can rename your system if you want.
Setting up the Guest
Setting up the Guest system is a simple operation as well. As I mentioned, I’m using the Dell Inspiron laptop as the Guest computer.
To begin, access the Action Center by pressing [Windows]+A. When the Action Center appears, select the Connect tile, as shown in Figure D.
Figure D

Select the Connect tile in the Action Center.
When the Connect panel appears, Windows 10 will immediately search for and display the Host computer, as shown in Figure E. To continue, click the Host computer name.
Figure E
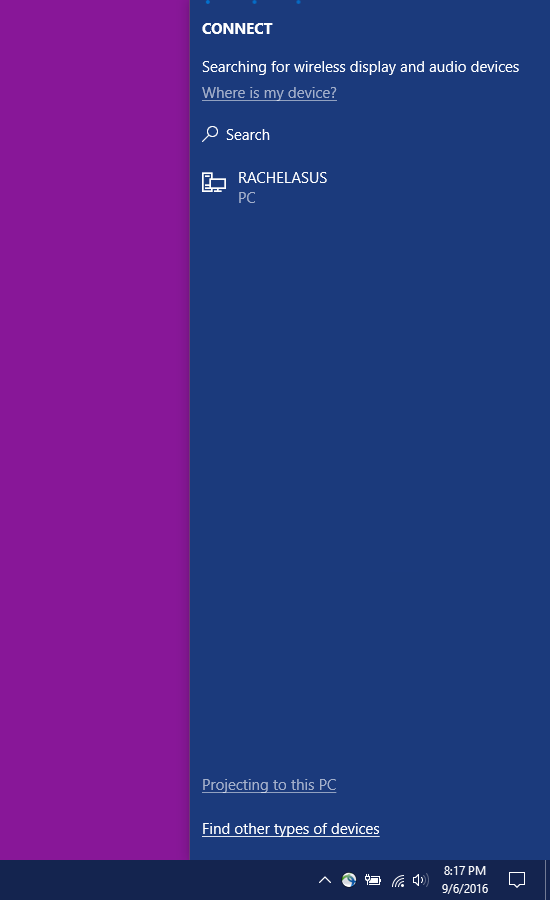
Windows 10 will locate the Host computer and display it in the Connect panel.
SEE: Microsoft Ink improvements foreshadow the end of the keyboard and mouse
Establishing the connection on the Host
As soon as you select the name on the Guest, a Connect permission prompt will display on the Host computer, as shown in Figure F. To continue, click Yes.
Figure F
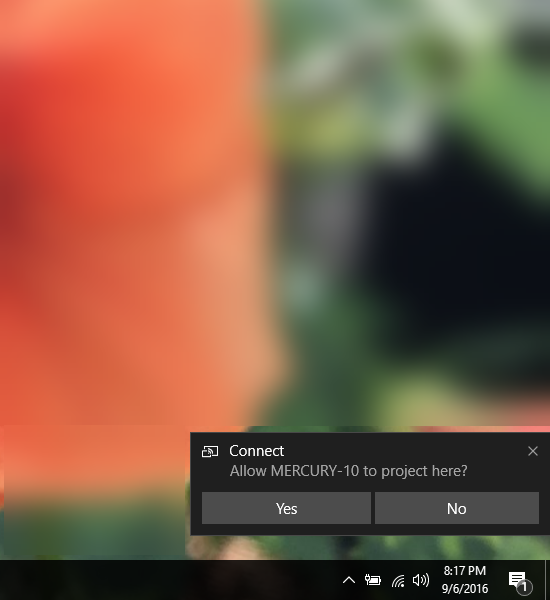
On the Host, you’ll be prompted to allow the Guest to project to this screen.
While the initial connection is being established, you’ll see a screen like the one shown in Figure G, which informs you that the Guest system, in this case MERCURY-10, is about to use the Host computer’s screen.
Figure G

You’ll see this screen while the initial connection is being established.
Configuring the connection on the Guest
When you return to the Guest, you’ll see that the Connect panel indicates that you are connected to the Host, as shown in Figure H. By default, the projection mode is set to Duplicate, which means that the Host computer’s screen is mirroring what is on the Guest computer.
Figure H
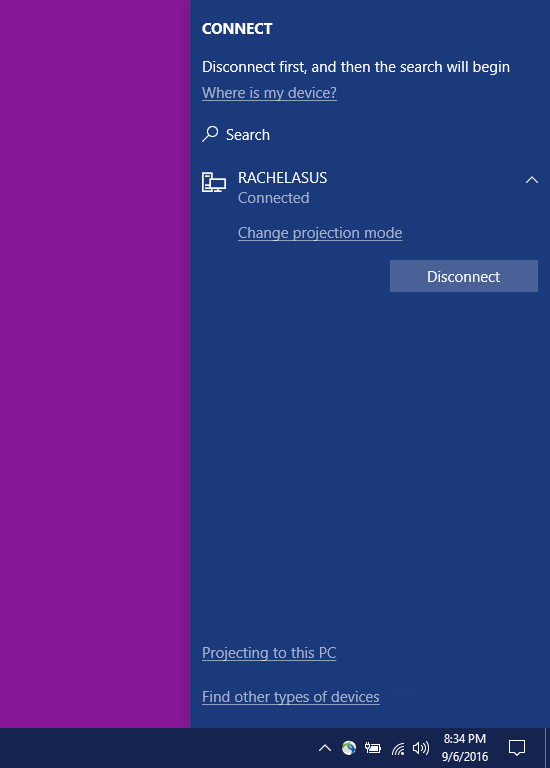
The Connect panel shows that you are connected to the Host.
To alter that, select Change Projection Mode to open the Project panel. There, you can select the Extend option, as shown in Figure I.
Figure I
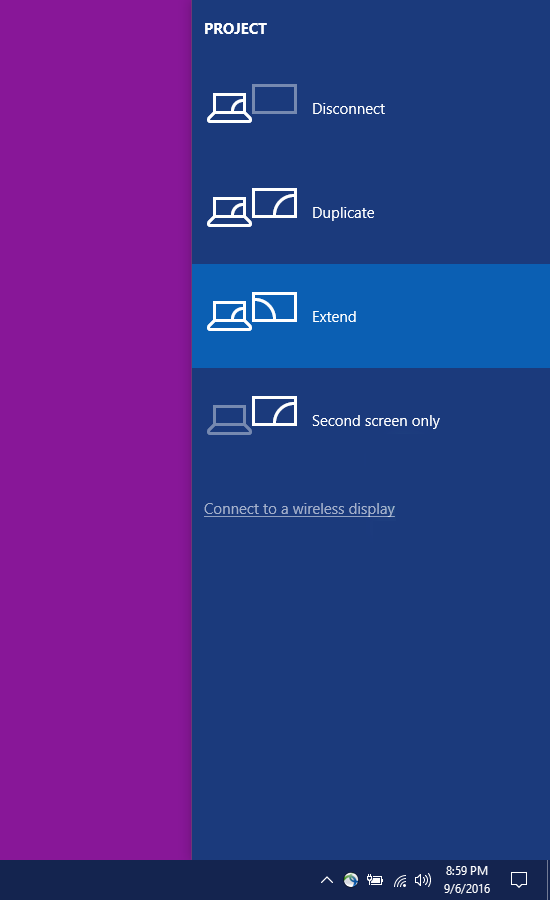
You’ll want to change the projection mode to Extend.
Now, the Projecting To This PC feature will allow you to create a multiple-monitor configuration, as shown in Figure J, using your wireless network.
Figure J
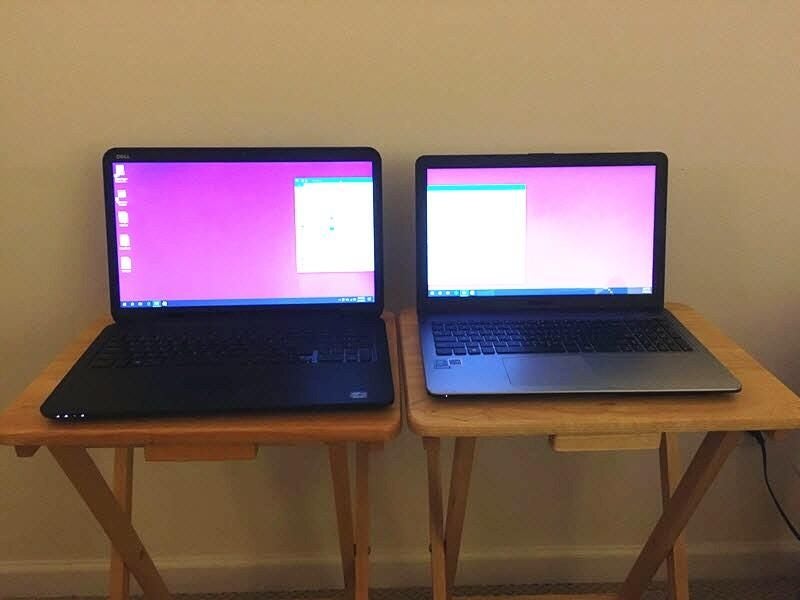
The Projecting To This PC feature will let you create a multiple-monitor configuration.
Also read…
- How to customize the Windows 10 Anniversary Update Start menu using the “Pare It Down” technique (TechRepublic)
- Windows administrator’s PowerShell script kit (Tech Pro Research)
- Troubleshooting and repairing Windows 10 problems (ZDNet)
- How to use Task Manager to monitor Windows 10’s performance (TechRepublic)
What’s your take?
What do you think of the Projecting To This PC feature in the Windows 10 Anniversary Update? Will you use it to configure a multiple-monitor configuration? Share your thoughts with fellow TechRepublic members.
Editor’s note: This article has been updated.