


You can use Word’s label wizard to generate business cards, postcards, event tickets, shipping labels, and more. To Word, those items are all the same thing, whether you use a wizard or mail merge to generate them. Word positions each element in the cell of a simple table based on the dimensions and content you provide. It’s extremely easy, but you might have avoided this route because the wizard won’t let you insert a logo (graphic file) or otherwise format the content. Fortunately, there’s a super quick remedy. In this article, I’ll show you how to create the contents–including any graphics and formats–before launching the wizard.
More about Software
- Software Installation Policy
- Five Methods to Insert a Checkmark Into Microsoft Office Products
- How to Hide and Handle Zero Values in an Excel Chart
- How to Use Section Breaks to Control Formatting in Word
I’m using Word 2016 (desktop) on a Windows 10 64-bit system. Download the demonstration .docx or .doc file to work through this technique, if you’d like. You can open a document of labels in the browser version, but the Mailings tab won’t be available; you can’t create a label document in the browser. The drawing layer in the earlier menu versions might cause you trouble, too. You can try this in those older versions, but I can’t guarantee graphic files will convert as cleanly as they do in the Ribbon versions.
SEE: 10 all-purpose keyboard shortcuts to boost your Word efficiency (free TechRepublic PDF)
What you might try… but it won’t work
To keep things simple, we’ll generate a label document we can print as business cards on perforated card stock. By label document, I mean the results of the label wizard. Now, let’s get started:
- Click the Mailings tab.
- In the Create group, click Labels.
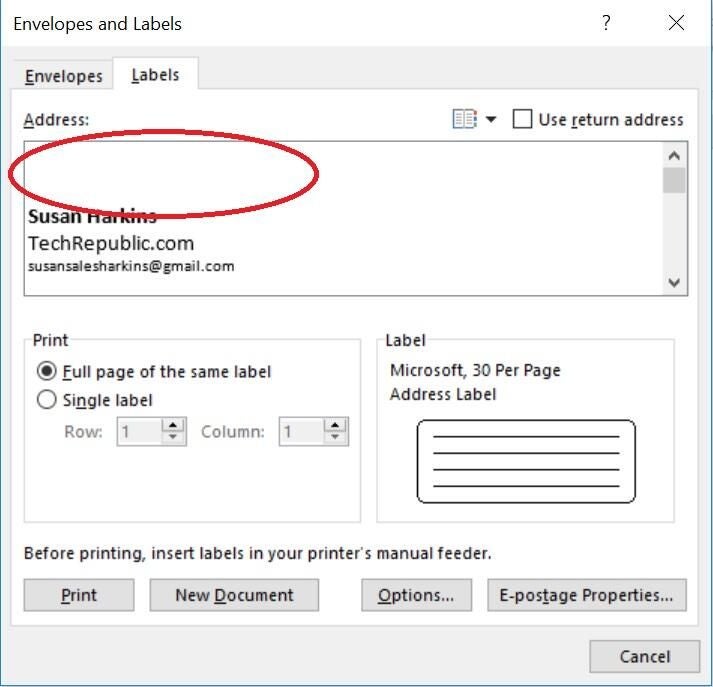
- In the resulting dialog, enter the card information: name, company, phone number, and so on. At this point, you might try to insert a graphic file, but you can’t.
- Click Options and choose a label. As you can see in Figure A (to the left), I chose the second 30 Per Page option. Click OK to close the Options dialog. To the right, you can see the label preview and the business card information. Make sure the Full Page Of The Same Label option is selected.
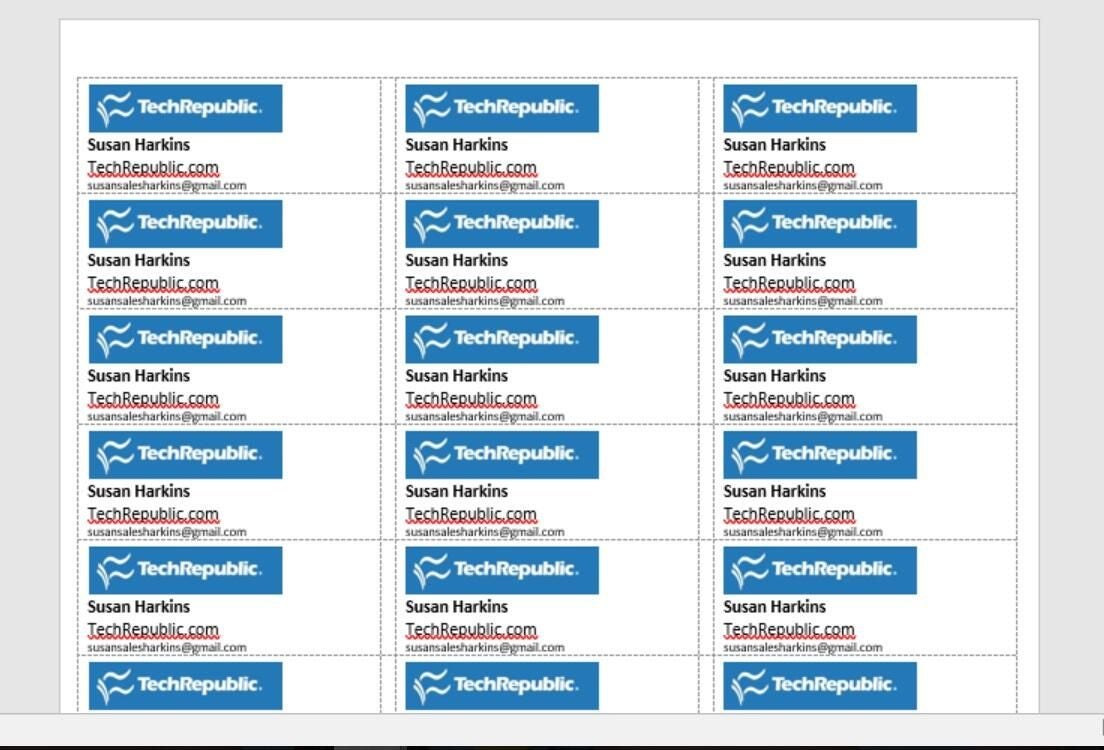
- Click New Document to create your business card document (Figure B). Save the new document if you intend to reuse it.
Figure A

Set the label options.
Figure B

We’ll add graphics to each card in the example document.
The resulting text isn’t formatted. The card doesn’t contain a logo either. As business cards go, it’s a flop.
You could format one card, insert the logo, and copy it to the remaining labels–ugh. Depending on the graphic, you might end up with a big mess. Fortunately, what I’m about to show you is simple and reliable.
SEE: Cost comparison calculator: G Suite vs. Office 365 (Tech Pro Research)
Create one card
The key here is to format the content and arrange the logo as if you were creating a single business card before you run the wizard. Figure C shows an example of a simple format.
Figure C

Format the content and insert the graphic before running the wizard.
Once the card content and graphics look the way you want, select them. If the document doesn’t contain anything else, you can press Ctrl+A. If the content already exists in a document, you don’t have to re-create anything; simply open the document and select only the content you want in the label. Then, do the following:
- Click the Mailings tab.
- In the Create group, click Labels.
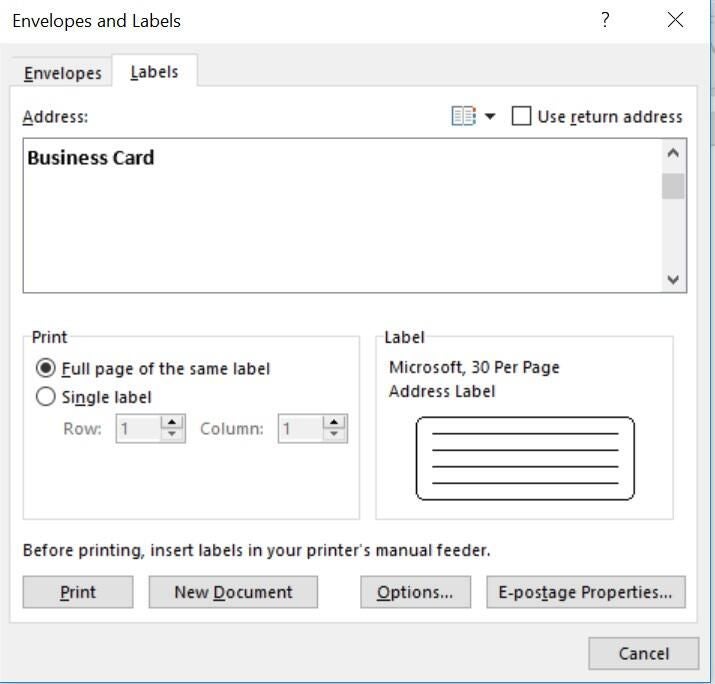
- The dialog opens with the selected content and graphic, as shown in Figure D. Don’t worry if you don’t see the logo.
- Click Options, choose a label as you did earlier, and click OK. Make sure the Full Page Of The Same Label option is selected.
- Click New Document to create your business card document (Figure E). Save the new document if you intend to reuse it.
Figure D
The wizard uses the selected content.
Figure E
Each label is formatted and contains the logo.
As you can see, the resulting document contains a full sheet of formatted labels with graphics. It’s ready to print to perforated card stock and you’re in business!
AutoText tip
If you want to reuse the formatted text and graphics, you can save them as an AutoText entry, which you can use when running the wizard.
To save selected text and graphics as AutoText, press Alt+F3 (or access the feature via the Text group on the Insert tab). In the resulting dialog, enter a name for the AutoText entry. Choose Insert Content In Its Own Paragraph from the Options dropdown if the card content contains a graphic, as shown in Figure F, and click OK.
Figure F

Give the AutoText entry a name.
When running the wizard, enter the AutoText name, as shown in Figure G, and press F3. Word will replace the name with the full card content and label. Again, you won’t see the logo. Finish setting options and then click New Document as before.
Figure G
Enter the AutoText name and press F3.
Easy labels with graphics
There’s no reason not to use Word to generate your business cards, return address labels, shipping labels, and so on. The technique is one of the simplest Word has to offer and the rewards in time and money saved are enormous. Although we used a simple example, you can use this technique when merging as well. In addition, you can do much more with your own cards and labels. I kept the formatting and graphics simple on purpose so as not to distract from the simplicity of the technique.
Send me your question about Office
I answer readers’ questions when I can, but there’s no guarantee. Don’t send files unless requested; initial requests for help that arrive with attached files will be deleted unread. You can send screenshots of your data to help clarify your question. When contacting me, be as specific as possible. For example, “Please troubleshoot my workbook and fix what’s wrong” probably won’t get a response, but “Can you tell me why this formula isn’t returning the expected results?” might. Please mention the app and version that you’re using. I’m not reimbursed by TechRepublic for my time or expertise when helping readers, nor do I ask for a fee from readers I help. You can contact me at susansalesharkins@gmail.com.
Also read…
- Hackers are using recent Microsoft Office vulnerabilities to distribute malware (ZDNet)
- Make Office 2016 work your way by changing these default settings (free TechRepublic PDF)
- How to create two advanced dynamic lists in Excel (TechRepublic)
- Five readers add value to 2017 Office articles (TechRepublic)