


By now most Mac professionals understand they can choose from a variety of image-editing applications. While Adobe Photoshop remains a front runner, many users seek a more approachable alternative, one that’s not only less expensive but an option operating outside Adobe’s ecosystem. Skylum’s Luminar, now available in its latest incarnation dubbed Neo, packs a multitude of features and functionality within its $79 offering.
Must-read Apple coverage
- Nearly 7 in 10 iPhone Owners Plan iPhone 17 Upgrade
- Apple Prepares AI-Powered Siri Upgrade With Google Search Integration
- Apple’s Xcode 26 Beta Now Supports GPT-5 and Claude
- Apple’s Vision Pro Adoption Stalled As Content Released ‘Drip by Drip’
The photo-editing platform benefits from several artificial intelligence-assists, including:
- Dust spot removal —Automatic identification and removal of small image artifacts.
- Mask—an AI-powered feature in which the application identifies multiple elements and creates a contextual mask to determine how a tool or effect is applied, thereby permitting more precise adjustments.
- Power line removal —Automatic identification and removal of power lines from landscape images.
- Relight—an AI-powered feature that builds a three-dimensional map of two-dimensional images to better enable adjusting an image’s lighting and color warmth, and fixes portraits in which foregrounds are underexposed.
Because many graphics and photo professionals work with RAW minimally processed images, Luminar’s developers have tweaked the program to open manufacturers’ proprietary versions of such images more quickly. For example, when using Luminar on a Mac, Fuji’s RAF images open 75% faster, while Nikon’s NEF images open 58% faster. Further, peak memory consumption editing RAW photos is 18% less than previous versions, making RAW photo-editing easier.
SEE: Setapp’s Mac software service confirms app subscriptions are here to stay (TechRepublic)
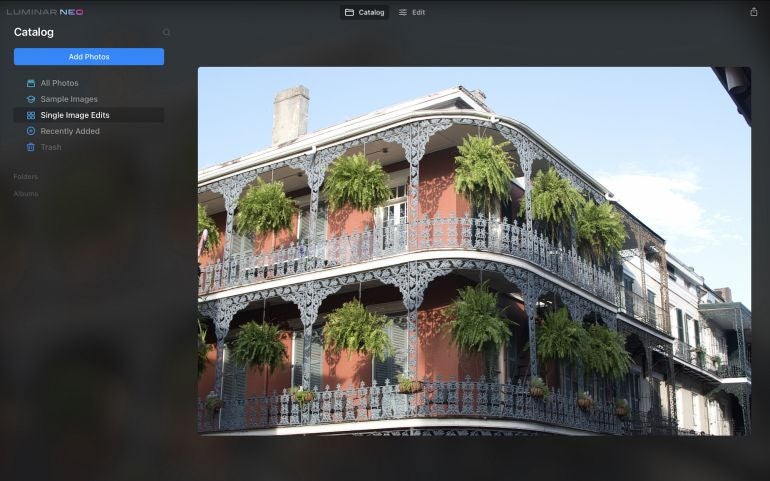
To edit a RAW image using Luminar Neo, first open the application, then click the blue Add Photos button, as shown in Figure A. Next, navigate to the location in which the RAW or your camera manufacturer’s version of a RAW file—such as ARW (Sony), CR2 (Canon), NEF (Nikon) or RAF (Fuji)—is located, highlight the image, then click the Add button.
Figure A
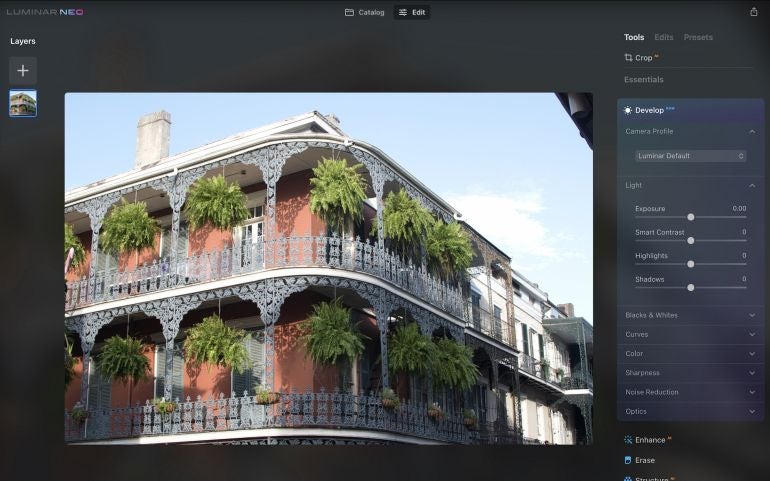
Luminar Neo then displays the image. Click the Edit tab at the top of the window to display Luminar Neo’s various editing tools and options, as shown in Figure B.
Figure B

When editing RAW images, which contain far more unprocessed image information than standard photo files such as JPGs, a few elements are particularly important: exposure and contrast. Because JPGs created by a digital camera typically include less information, the actual unprocessed RAW image the sensor captures is often dramatically enhanced by adjusting those two elements.
Using Luminar Neo, users can adjust RAW images by selecting the corresponding Develop option from the right-hand navigation menu, as shown in Figure C. Simply adjusting the provided slider bars for Exposure and Contrast can yield striking changes within the image.
Figure C
Other RAW adjustments available to Luminar Neo users include the program’s new Structure tools and Relight, Sky and Atmosphere creative effects, all of which leverage AI to assist creators in building more compelling images. The differences between a regular, even JPG image, and an alternative edit using Luminar Neo can prove arresting, indeed, as shown in Figures D and E, in which Figure D represents an unedited image and Figure E is a prime example of an image edited to favor stronger colors and a more striking presence using Luminar Neo’s AI-aided capabilities.
Figure D
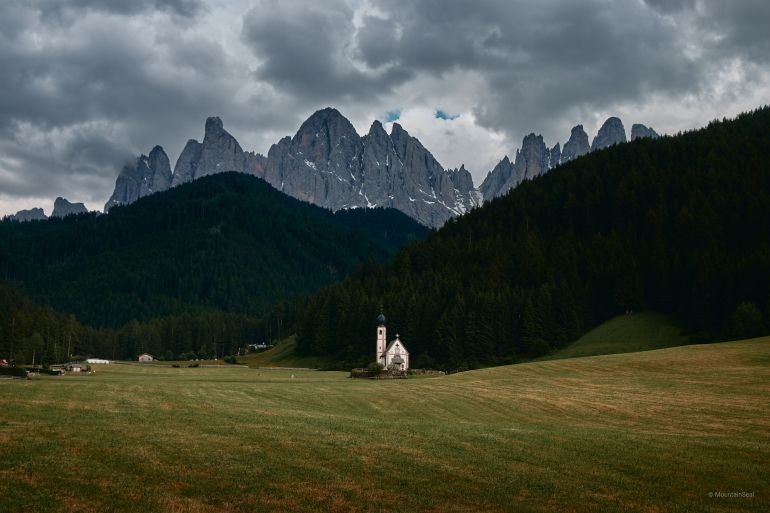
Figure E
Experienced graphics professionals will already be familiar with the various interrelationships between exposure, saturation, contrast and other filter effects. They’re also typically familiar with working with layers, applying third-party filters and performing other image-editing practices, too. For everyone else, Luminar Neo aids the process. Many public relations practitioners, advertisers, marketers, website administrators and other professionals simply need to clean up a photo, punch up a few highlights and complete a few tweaks to correct for common digital photography shortcomings. Luminar Neo, with its various AI-aided advancements, helps level the playing field, particularly when working with RAW unprocessed images.
Fortunately, the program is a low-risk bet. Luminar offers a free 30-day money back guarantee in which you can receive a full refund if you’re not satisfied. And if you’re just seeking to kick the tires, you can download and use Luminar 4 free.