


Microsoft Power Automate is a workflow system that allows you to automate processes. A workflow system manages repetitive processes and tasks. That means you can create a workflow to do some of your tedious tasks for you.
If you’re familiar with VBA procedures, it is similar, but there’s no code here. Microsoft Power Automate is a web-based system outside Office 365 apps. In this tutorial, I’ll introduce you to Power Automate by creating a workflow that converts Word files into PDFs. Once you’ve worked through the example, you should be able to apply workflows to some of your own tasks.
SEE: Windows, Linux, and Mac commands everyone needs to know (free PDF) (TechRepublic)
I’m using Microsoft 365 with Power Automate on a Windows 10 64-bit system and OneDrive for Business. You must have Microsoft 365 or Dynamics 365 to have access to Power Automate freely. You can also sign up and pay for a plan. However, you must also have OneDrive for Business and a Microsoft account.
Must-read Windows coverage
- CrowdStrike Outage Disrupts Microsoft Systems Worldwide
- 10 Best Project Management Software for Windows in 2024
- Windows 10 Extended Security Updates Promised for Small Businesses and Home Users
- Securing Windows Policy
When signing in, be sure to use your Microsoft account email address and not your personal or work address. There’s no demonstration file; you won’t need one.
How to prepare Word files and OneDrive folders
To demonstrate how to use Power Automate with your Office apps, we’ll create a workflow that converts Word files to PDF files and then saves them into a target folder on OneDrive for Business.
Saving a single file to a PDF is a simple task and creating a workflow won’t save you any time. However, let’s suppose that every day, you receive dozens or more Word files that you must convert to PDF files and then save them to OneDrive, SharePoint or some other cloud storage. Doing so is tedious because you have more important tasks to complete.
To prepare the pieces for this example, first, create a local folder named Holding and add a few Word documents to it. You can use any local folder you like, but this folder must be local, which will make sense later.
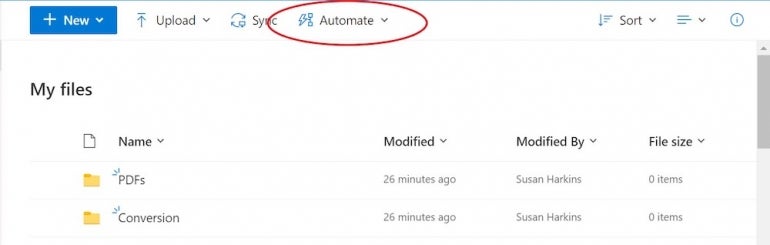
Next, create two OneDrive for Business folders: One to convert the Word documents into PDF files, and one where the workflow will store the converted PDF files — the target folder. So, open your OneDrive for business site and create these two folders: Conversion and PDFs (Figure A).
Figure A
If you haven’t signed into your Microsoft account, go ahead and do so now to avoid repetitive steps later.
How to create Power Automate workflow
You may have noticed that I circled Automate in the image above. This is where you’ll start the workflow. In your OneDrive for Business site, click Automate, choose Power Automate and then choose Create a Flow, as shown in Figure B.
Power Automate will display a set of templates. In general, it’s easier to begin with a template and tweak as needed. In fact, there’s a template for converting Word files to PDF and storing them in SharePoint. We’re going to create a workflow from scratch instead, so click Show More Templates until you launch Power Automate.
Figure B

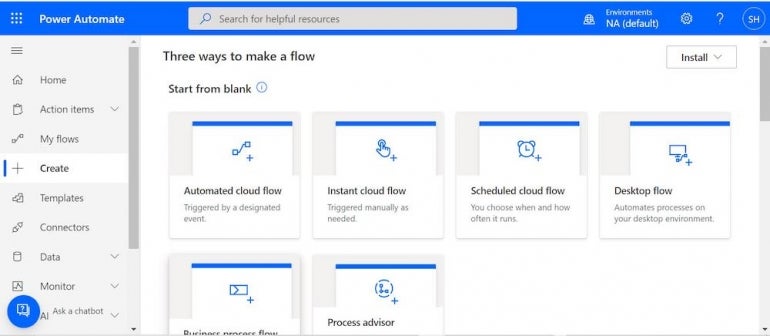
In the left pane, click Create. To the right, you’ll see several blank workflows with different triggers. A trigger is an event that starts the workflow. Our trigger is moving Word files from a local folder into the Conversion folder on OneDrive. There are six blank workflows (Figure C).
Figure C
To create the workflow, do the following:
- Click the first workflow: Automated Cloud Flow (Triggered by a Designated Event).
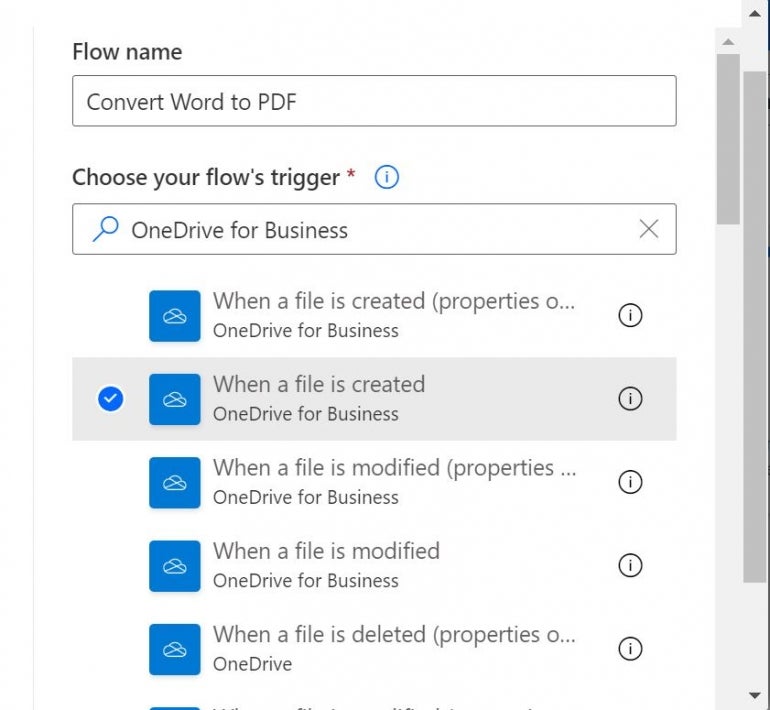
- Enter a name for the workflow: Convert Word to PDF.
- Next, identify the trigger. Remember, this is the event that will kickstart the workflow. Instead of trying to find the right trigger from the list — because there are triggers for many apps — you can limit the list to an app, which is OneDrive for Business.
- Enter OneDrive for Business in the trigger field.
- Click the When A File Is Created trigger. If you click the information icon to the right, you’ll learn that Power Automate will launch your workflow when you create a new file, but it specifies that files copied from one OneDrive folder to another will not trigger a workflow, as shown in Figure D. That’s why you must save the original Word files are on your local system.
- Thumb down and click Create.
Figure D
Power Automate is ready to create the workflow now and will prompt you for several bits of information. First, identify the folder where the files are located. Technically, you’ve already created the files, but moving the files from the local folder to OneDrive will trigger this event.
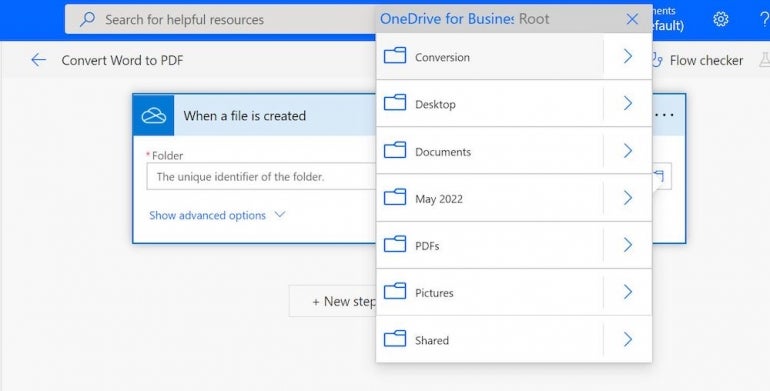
Click the folder icon to the right: Show Picker. Then, click Root to display a list of folders on OneDrive for Business, as shown in Figure E.
Choose the Conversion folder. Power Automate will connect to the folder, which is currently empty. There are advanced options, but don’t expand those because we don’t need them. Instead, click New Step.
Figure E
The next step is to add the action Power Automate will take when the trigger launches the workflow. In this case, we want to convert a file to a PDF. Again, the list of actions is huge, so enter OneDrive for Business and then click the OneDrive for Business icon to limit the items in the list.
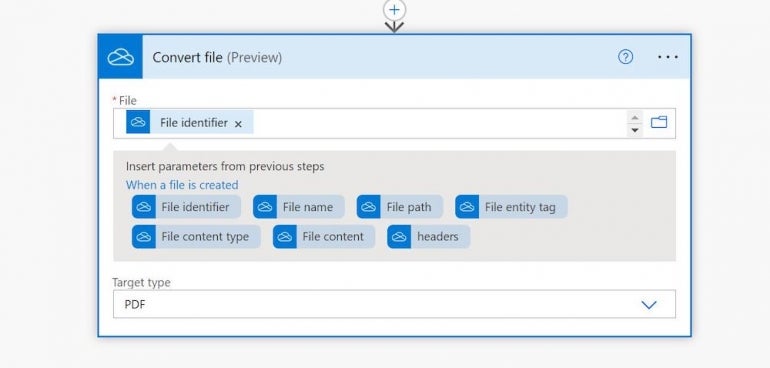
Click Convert File (Preview). Fortunately, Power Automate anticipates the PDF conversion, but we still need to identify the file. This part gets tricky because we need a dynamic file identifier, as the file names will always be different — we won’t be identifying each Word file by its actual name.
Click inside the File field to open a list of possibilities. We want Power Automate to identify the file, so click File Identifier, as shown in Figure F. That’s a special dynamic placeholder that allows Power Automate to save each file using its name. You can change PDF when converting to another format, but for now, leave it as is.
Figure F
Let’s take just a minute to review what we’ve done so far. We have the trigger, which is “creating” a new file in the Conversion folder on OneDrive for Business. We just added the conversion event that converts the Word files to PDFs.
Now, we need to tell Power Automate where to save the converted PDF files. That requires another step, so click New Step. Enter OneDrive for Business and click the OneDrive for Business icon to see the list of actions.
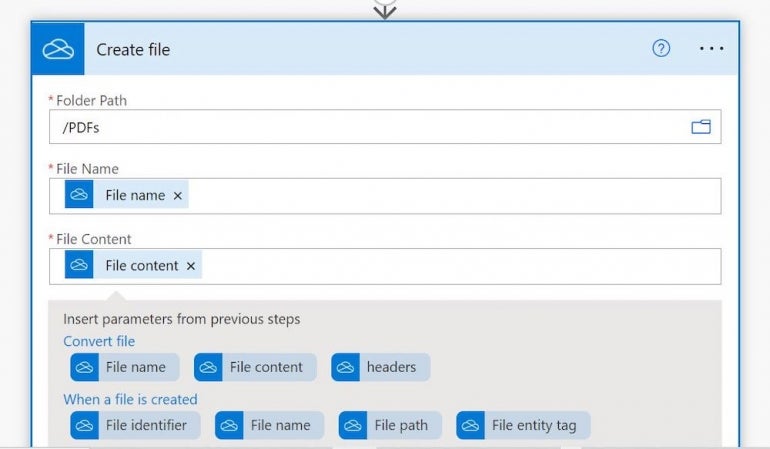
From the list of actions, click Create File. Again, click Show Picker and this time, click the PDFs folder — this is where you want to save the converted files. We don’t want to change the file name or content, so we need a dynamic identifier again.
As shown in Figure G, choose File Name and File Content dynamic identifiers. All this step will do is create the new PDFs in the PDFs folder. These two dynamic placeholders use the file’s original name and don’t change any of the content.
Figure G
The workflow is complete now, so click Save. If you don’t see the Save button, scroll down a bit. Now it’s time to test the new workflow.
How to test the workflow
You’ll want to test the workflow before relying on it to work as expected. We already have Word files waiting to be moved to the Conversion folder on OneDrive for Business, so let’s do that and see what happens.
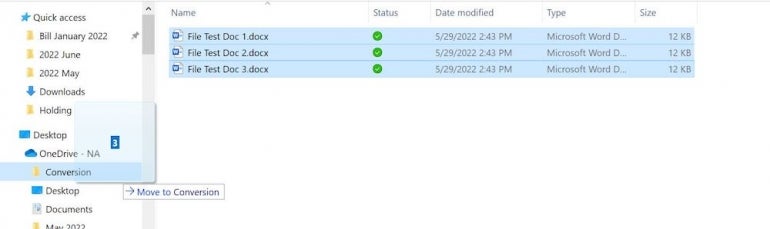
If you created Word files on your local folder, open File Explorer and locate the local folder named Holding. Press Alt + a to select them all and then drag them to the OneDrive for Business Conversion folder as shown in Figure H.
Figure H
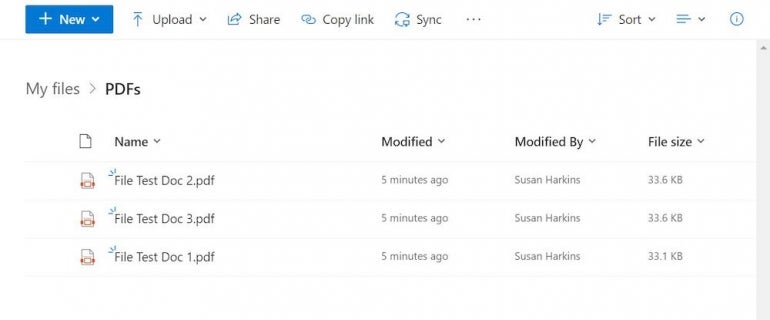
Return to your OneDrive for Business site and check the PDFs folder; you should see three new PDF files, as shown in Figure I.
Figure I
The Holding and Conversion folders should be empty. You can also check the workflow itself, as shown in Figure J.
Figure J

Our venture into Power Automate took a few steps to set up, but once the workflow is in place, you can copy one, 10 or even 100 Word files into the Conversion folder on OneDrive for Business and you’re done!
If you want to notify someone when the PDF files are ready, simply add a new step to the workflow: You can even send a confirmation email to yourself.
If you’re new to Power Automate, this might seem like a difficult process, but that’s because it’s brand new and there are so many possibilities. Spend some time thinking about the Office tasks that you might like to automate using Power Automate. The more you explore, the easier and quicker creating workflows will become.