
By default, Microsoft Outlook calendars display all events. Most of the time that’s what you’ll want, but occasionally you’ll want to customize the view. For instance, in the monthly calendar view, there’s no way to distinguish between all-day events and those that only last a few hours. Consequently, when trying to schedule new events, you won’t know whether an existing event lasts all day if it’s the only one scheduled that day. Fortunately, creating a custom view can help.
In this tutorial, I’ll show you how to create two custom calendar views in Microsoft Outlook. The first only displays all-day events. While scheduling, you can see immediately that the entire day is filled. I’ll also show you a view that displays events that aren’t all-day events. It won’t be as helpful when scheduling, but you might run into a use for it.
SEE: Windows, Linux, and Mac commands everyone needs to know (free PDF) (TechRepublic)
I’m using Microsoft 365 on a Windows 10 64-bit system, but you can use earlier versions. Currently, you can’t create custom views in Mail.
How to only display all-day events in Outlook
By default, Outlook calendars display all events and appointments. If you only want to see all-day events, you must create a new view and apply it. Fortunately, the process is simple, but it’s not intuitive, because there’s not an all-day field available in most of the places you’ll look.
If you want to follow along, you’ll need some all-day events, even if they’re dummy events. If necessary, create a few before continuing. Likewise, if you’re interested in filtering out all-day events, make sure you have a few shorter ones.
To create a view that displays only all-day events in an Outlook calendar, do the following:
- Open Outlook’s Calendar window, and if you have multiple calendars, select the one you want to filter.
- Click the View tab and then click Change View in the Current View group.
- In the resulting dropdown, choose Manage Views so you can create a custom view. In the resulting dialog, you’ll see a list of the existing views.
- Click New and give the new view a name, such as All-day Events.
- Choose Day/Week/Month in the Type of View list.
- All Calendar Folders is the default Can Be Used On setting, so leave it as is. (Figure A).
- Click OK and then click Filter in the resulting dialog.
- In the next dialog, click the Advanced tab.
- From the Field dropdown, choose All Appointment fields and then choose All Day Event from the resulting submenu (Figure B). This is one of the few places you’ll find this field offered for customizing views.
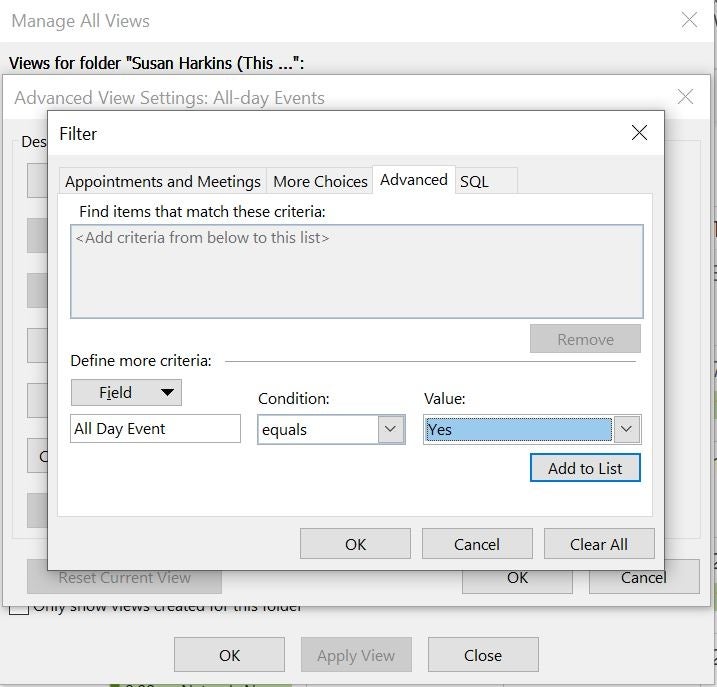
- The default Condition is equals, so don’t change that setting.
- Choose Yes from the Value dropdown (Figure C).
- Click OK and then Yes to confirm.
- Click OK twice to return to the calendar.
Figure A
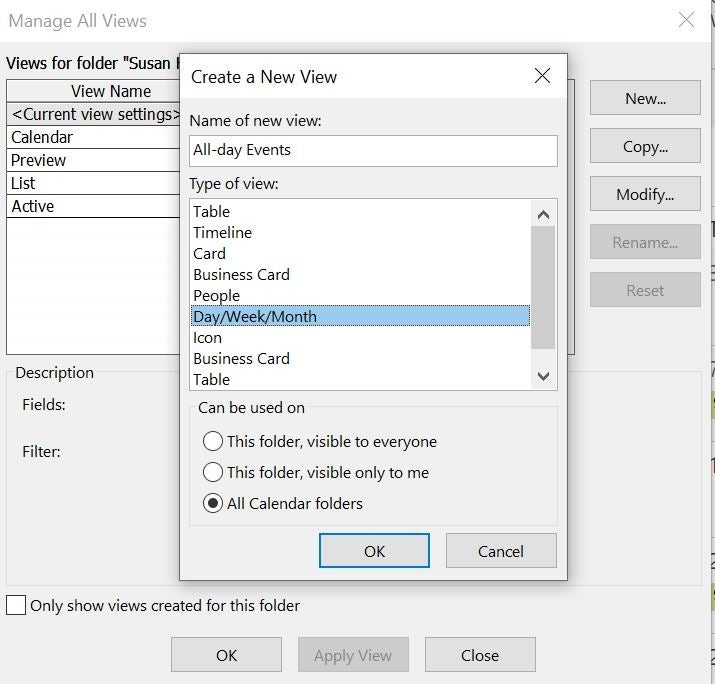
Figure B
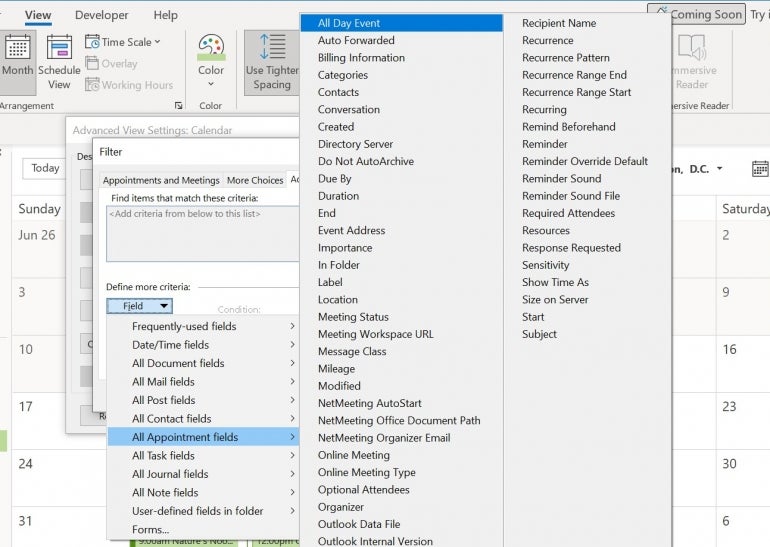
Figure C
Nothing happens until you apply the custom view. To do so, click Change View in the Current View group. From the dropdown, click the new view shown in Figure D. The dropdown shades the current view. When you click another view, Outlook shades them both.
Figure D
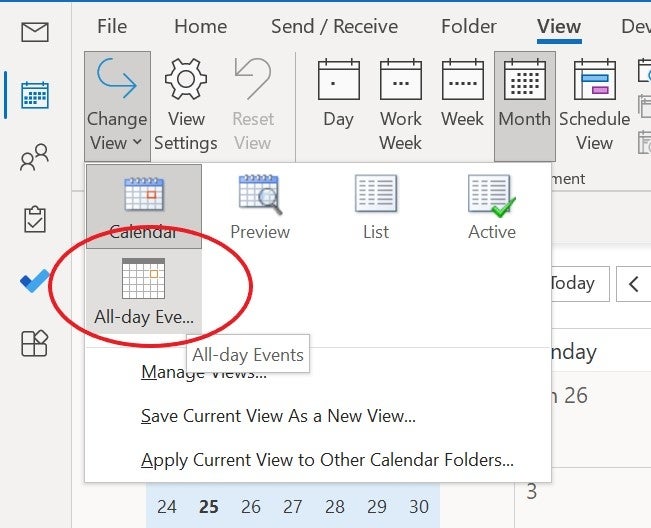
Figure E
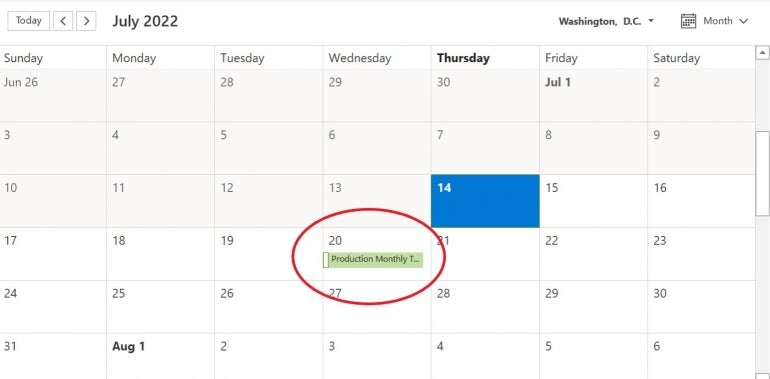
Figure E shows the resulting calendar. As you can see, there’s only one all-day event in July. You can apply this view to all calendars. If you view multiple calendars, you’ll need to add the view to each individually.
To display no all-day events, create a second view.
How to filter out all-day events in Outlook
You can create a second view to remove all-day events. Follow the instructions in the previous section except for the following:
- In Step 4, name the new view No All-day Events.
- In Step 11, choose No.
By changing one setting — Value in Step 11 — the view filters out all-day events from the calendar display. You can apply either custom view as needed. Apply it while needed and then reapply the view you normally use the most.


