Everyone’s familiar with the checkbox–it’s a small square that displays a checkmark, an X, or remains blank, depending on its state. These controls are great for automating all sorts of lists and choices. You can print a form and manually check off each item or update them electronically with a single click. In this article, I’ll show you two ways to add checkboxes to a simple To-Do list–how you’ll use them determines which method you’ll use. First, we’ll add a checkbox symbol that you can print. Then, we’ll add a checkbox control that you can update onscreen by clicking.
I’m using Office 365 Word (desktop) on a Windows 10 64-bit system, but you can use earlier versions of Word. You can create your own To-Do list or download the demonstration .docx or .doc files. The browser edition will display both types of checkboxes, but you can’t add either in the browser. Nor can you click the content control in the browser to change its state.
How to add a checkbox symbol that you can print
If you plan to print your list and use a writing utensil to mark each item as you complete it, you can add checkbox controls via a bullet list, as follows:
- Select the list–the textual list of items.
- Click the Home tab if necessary.
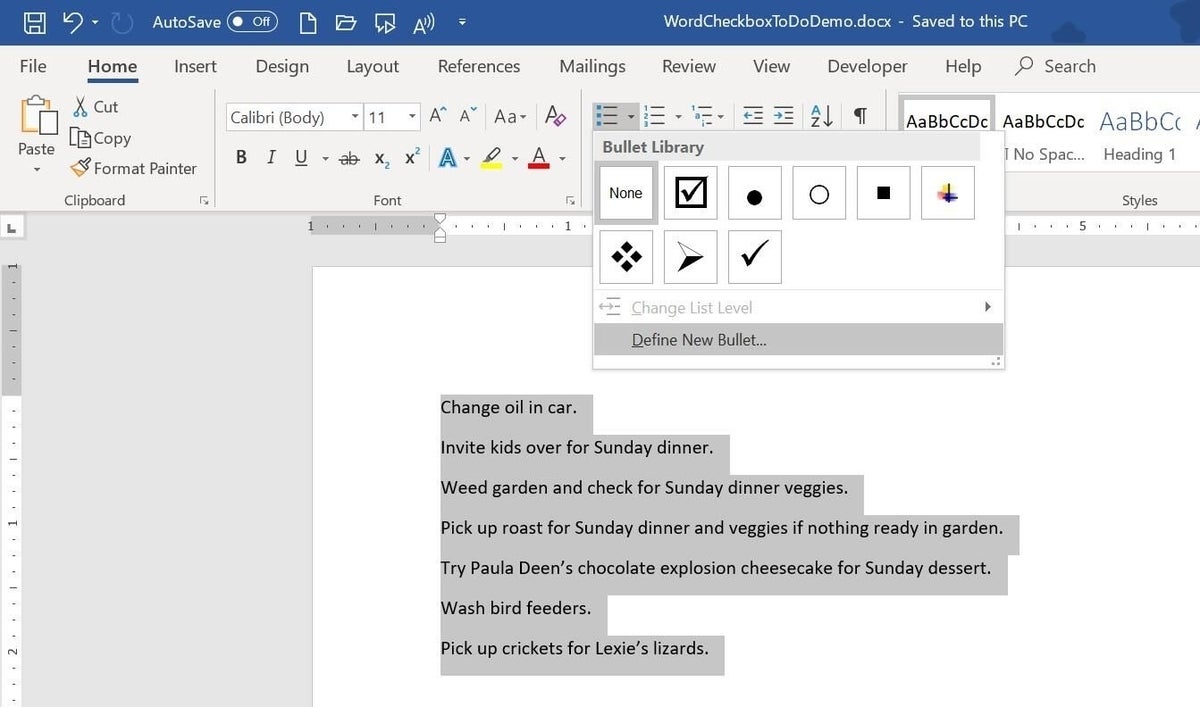
- Click the Bullets dropdown in the Paragraph group. (Don’t just click the option–doing so will automatically insert the default bullet.)
- Choose Define New Bullet from the dropdown list (Figure A).
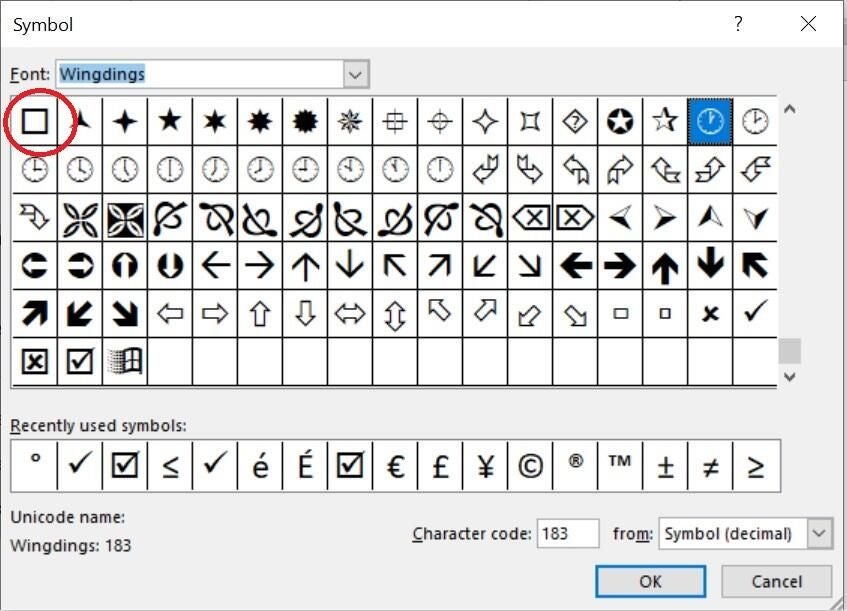
- In the resulting dialog box, click Symbol.
- Choose Wingdings from the Font dropdown.
- Select the checkbox in the first row (Figure B). The symbol might be in a different spot in your list.
- Click OK twice.
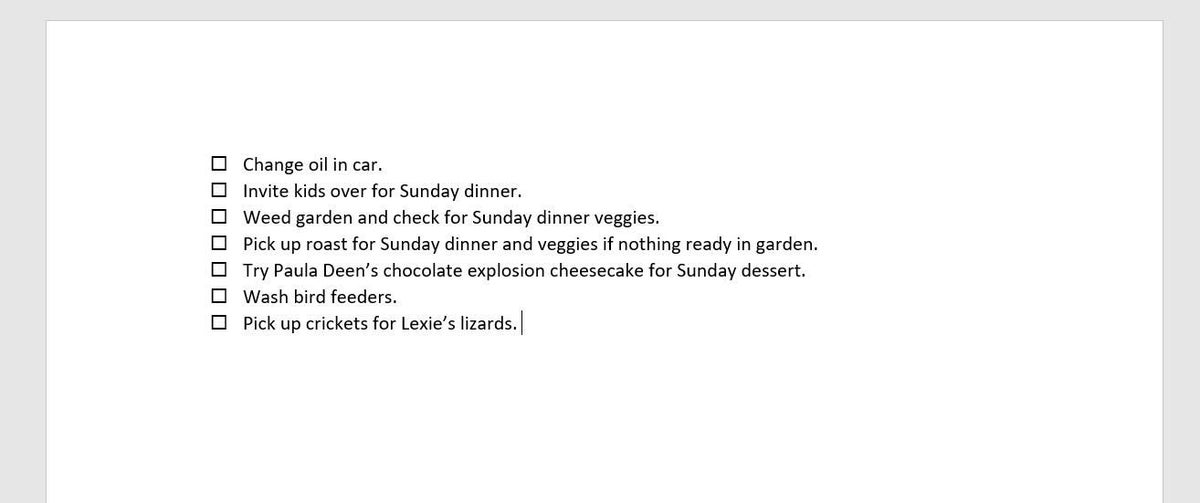
Word will replace the default bullet character with the selected checkbox (Figure C). This particular symbol won’t let you check anything in the actual document, but it’s great for printing.
Figure A

Figure B

Figure C

SEE: Cost comparison calculator: G Suite vs. Office 365 (Tech Pro Research)
How to add a checkbox control that you can update onscreen
If you want to check or uncheck the checkbox with a simple click within the Word document, use a content control. These controls are available on the Developer tab, which isn’t visible by default. To display the Developer tab, if necessary, do the following:
- Right-click anywhere on the ribbon’s background and choose Customize the Ribbon.
- Check the Developer item in the list to the right.
- Click OK.
Once the Developer tab is available, you can add a checkbox content control, as follows:
- Position the cursor where you want the first control. (You can’t enter multiple controls.)
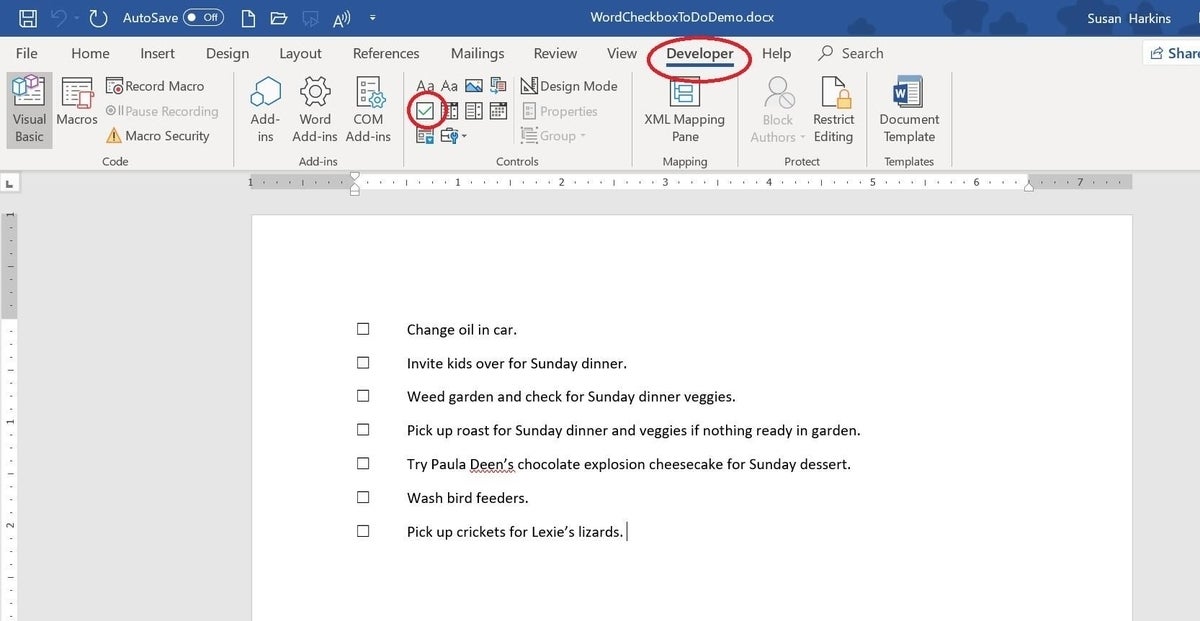
- Click the Developer tab.
- Click the Checkbox content control in the Controls group.
Figure D shows a completed list. Unfortunately, you can’t insert content controls to the entire group of items, as a group, similar to the way you’d add bullets. You must insert each control individually. Selecting the checkbox content control toggles between checked and unchecked. Don’t limit checkboxes to just To-Do lists–anytime you have a two-state choice, consider using a checkbox.
Figure D

Send me your question about Office
I answer readers’ questions when I can, but there’s no guarantee. Don’t send files unless requested; initial requests for help that arrive with attached files will be deleted unread. You can send screenshots of your data to help clarify your question. When contacting me, be as specific as possible. For example, “Please troubleshoot my workbook and fix what’s wrong” probably won’t get a response, but “Can you tell me why this formula isn’t returning the expected results?” might. Please mention the app and version that you’re using. I’m not reimbursed by TechRepublic for my time or expertise when helping readers, nor do I ask for a fee from readers I help. You can contact me at susansalesharkins@gmail.com.
Editor’s note: This article has been updated, and we added a video tutorial.

