
Have you ever wanted to hide text in a Microsoft Word document? It doesn’t seem reasonable at first, but there are uses for hidden text. You might want to pass out a meeting agenda but hide your notes from the audience, or you might want to create a quick quiz that contains the questions and the answers. A more complex use might be to use the same Word document but display different sections to specific people.
You can do all three without creating two different Word documents for each situation. Your master document will contain everything, but the recipients will see only what you want them to see.
SEE: Windows, Linux and Mac commands everyone needs to know (free PDF) (TechRepublic)
In this Word tutorial, I’ll show you how to hide text in a Word document. You’ll also learn how to print hidden text without unhiding the hidden text in the document. I’m using Microsoft 365 on a Windows 10 64-bit system, but you can use older versions. Word for the web doesn’t support hidden text. You download the demo for this Word tutorial.
What is hidden text in Word?
Hidden text in Word is exactly what it sounds like: By applying a specific format to text, that text disappears from view without a trace. Word even closes up the gap where the hidden text is so there’s no clue left behind to suggest that something else is there. You’ll hide text by applying a format.
We’ll create a short quiz and hide the answers. Students receiving the test on paper will see only the questions. You, the author, will have access to the answers in the electronic file.
Anyone with access to the electronic file can unhide hidden text. Don’t use this feature to hide confidential information. Hidden text is not secure text.
The only downside to this feature is forgetfulness. You can’t grow complacent just because everything worked as expected the last dozen times you printed the document. It only takes seconds to check.
How to hide text in Word
Once you’ve discovered a use for hidden text, you’ll need to know how to apply the hidden format. Fortunately, doing so is simple. Using the simple quiz show in Figure A, let’s hide the answers to each question as follows:
- Select only the answers by holding down the Ctrl key and clicking in the left margin (Figure B) beside the answers. Click the first answer before pressing the Ctrl key or you’ll select the entire document. If you can’t do this, you can select each answer individually and hide all of the answers that way.
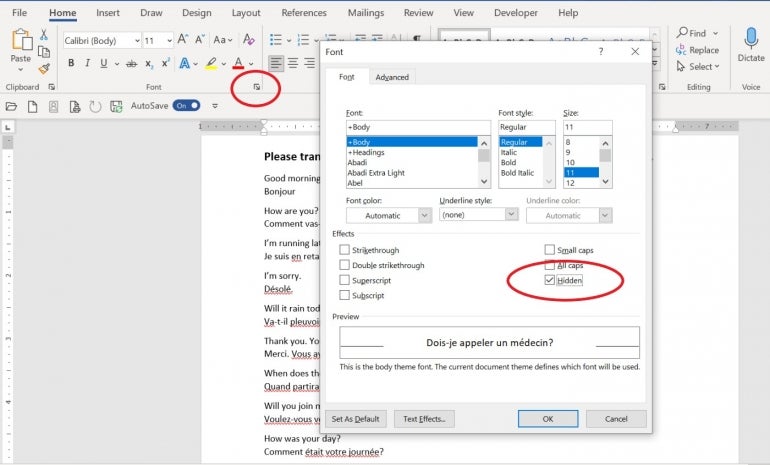
- On the Home tab, click the Font group’s dialog launcher.
- In the Effects section, check Hidden (Figure C).
- Click OK.
Figure A
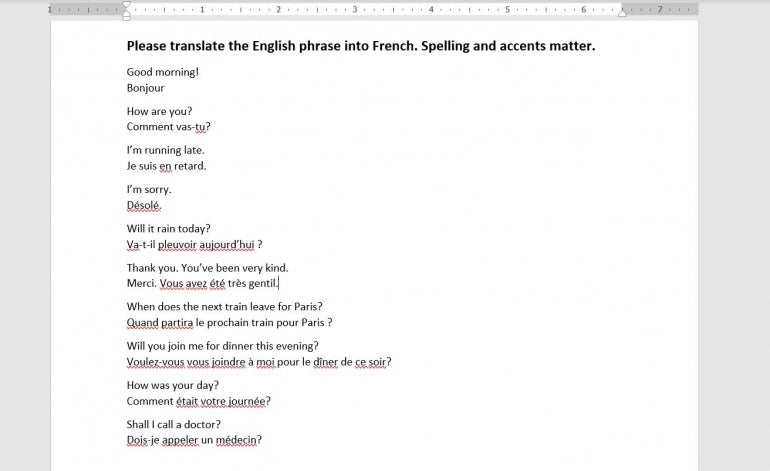
Figure B
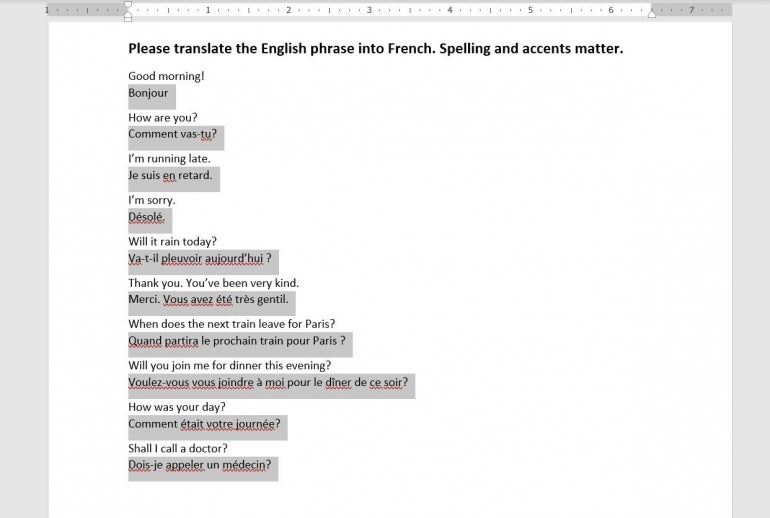
Figure C
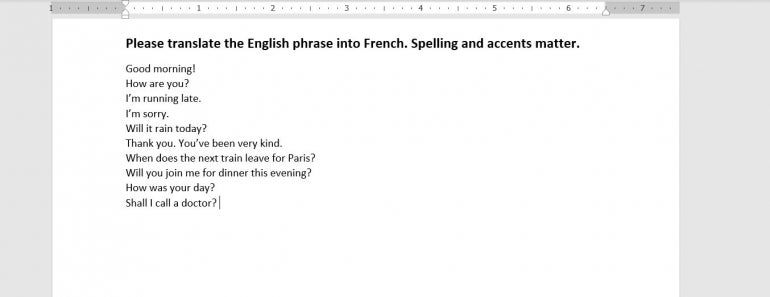
As you can see in Figure D, the selected answers are no longer visible, and we’ve lost the answer spacing between each question. Sometimes this won’t matter, but in this case it does. It’s easy to fix, but how you reformat will depend on the document, so I can’t provide a solution that will work in every situation.
Figure D
How to format the document after hiding text in Word
What this document needs now is adequate spacing for students to write their answers. We’ll do so by adding multiple lines — white space in this case — to each question as follows:
- Select the entire list.
- Click the Paragraph group’s dialog launcher.
- In the Line Space section, enter 5 as the At setting (Figure E).
- Click OK.
Figure E
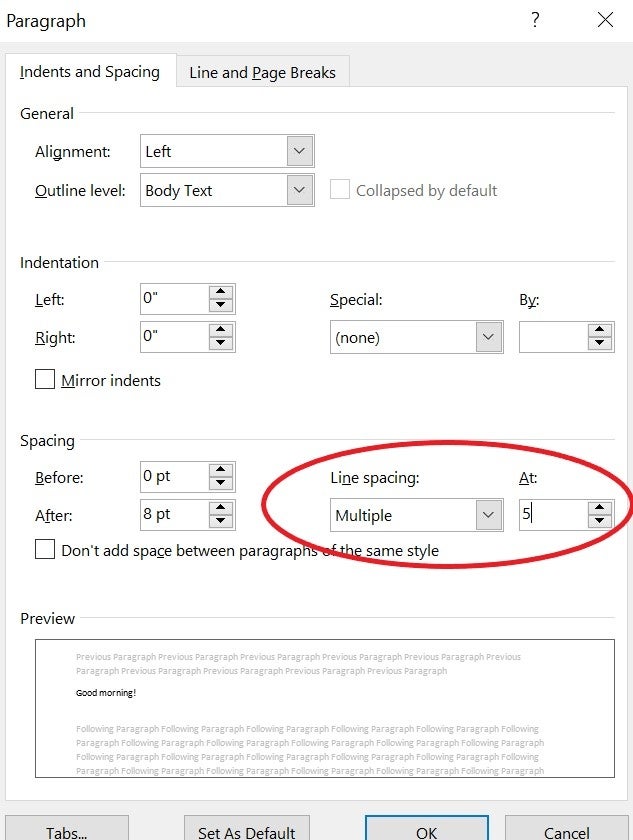
Figure F
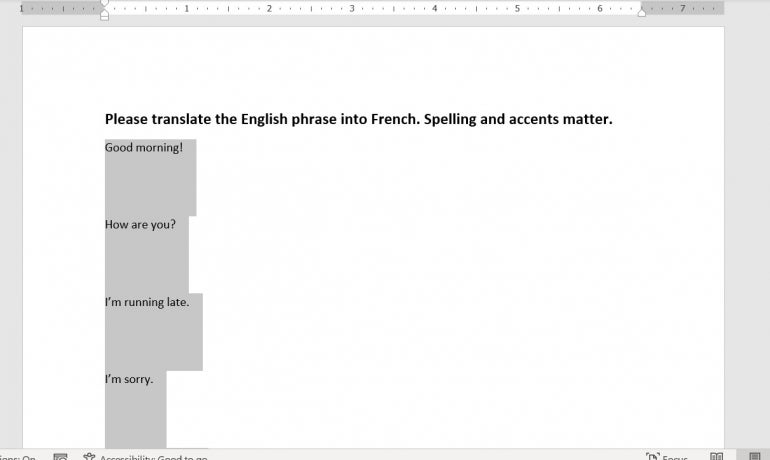
As you can see in Figure F, there’s now plenty of space for answering questions. Spacing will be an issue when hiding and unhiding, and there’s no silver bullet. When you unhide the answers, you may want to fix the spacing for that document.
To unhide the answers repeat the steps for hiding them, except instead of checking the Hidden option, you will click it twice to unhide text. You must click twice because the selection contains hidden and unhidden text.
How to print hidden text
You’ll print the quiz with hidden answers as you would any other document. In the event that you want to keep the text hidden, but print the questions and the answers, you can do so as follows:
- Click the File menu and choose Options. Then choose Display in the left pane.
- In the Printing Options section, check Print Hidden Text (Figure G).
- Click OK.
Figure G
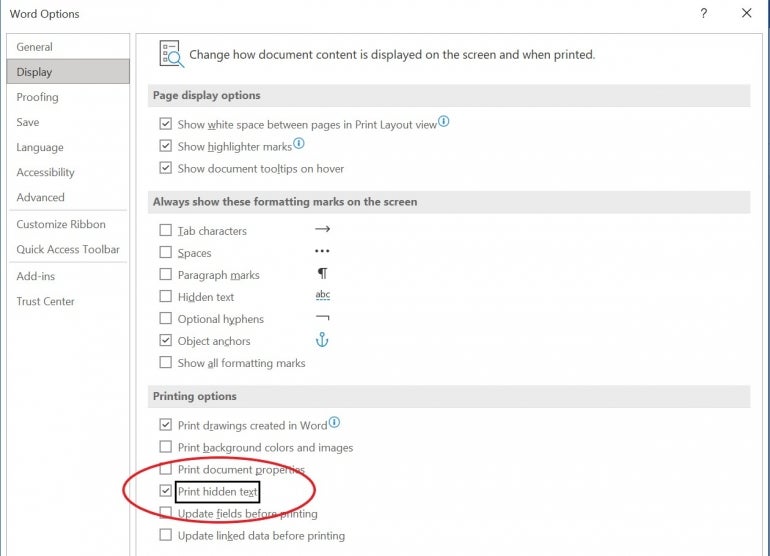
Figure H
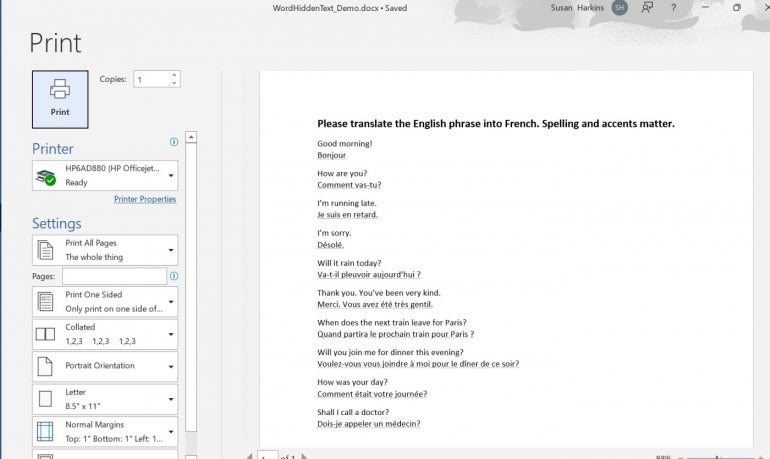
At this point, you can print the document as you would any other Word document. Figure H shows the document in Print Preview with both answers and questions, even though the answers are still hidden in the electronic file. Don’t forget to reset the Print Hidden Text option when you’re done printing. It’s safest to work without that setting enabled.
How to remove hidden text in Word
You can view the document with the answers hidden or unhidden, but deleting the hidden text, in this case, the answers, would require selecting them all and clicking Delete — tedious work if you have several instances of hidden text.
It’s unlikely that you’ll want to delete all the hidden text, but if you do, you can do so quickly using Word’s Replace feature as follows:
- On the Home tab, click Replace in the Editing group.
- Click the Find What control.
- Click More to open more options.
- Click the Format button and then choose Font from the resulting menu.
- Check the Hidden option in the Effects section.
- Click OK.
- Click Replace All and Word will delete any hidden text.
You can press Ctrl + Z if you change your mind about deleting the hidden text. Removing the hidden text will most likely change the document’s spacing, as you saw earlier, so be prepared to fix that before distributing or printing the document.


