Image: AndreyPopov, Getty Images/iStockphoto
Microsoft announced in 2019 that it would renew the popular and sorely missed tradition of releasing specially developed PowerToys utilities, features, and tools for its Windows 10 operating system. The original PowerToys were released for Windows 95 and quickly became popular with so-called “power users” of that era. A set of PowerToys has been released for each Windows version since.
PowerToys for Windows 10 will likely achieve the same level of appreciation among current users as it did so many years ago. Users are consistently looking for ways to get their PCs to work the way they want them to. As of September 2019, the first two Windows 10 Power Toys are available in preview form: FancyZones and the Windows key shortcut guide. However, FancyZones requires configuration before it can be truly useful.
This tutorial explains how to configure and use the FancyZones PowerToy for Windows 10.
SEE: Windows 10 May 2019 Update: 10 notable new features (free PDF) (TechRepublic)
How to configure the FancyZones PowerToy for Windows 10
While PowerToys are designed for use with Windows, they traditionally have been available as a download—not as an integral part of the OS. PowerToys for Windows 10 takes a similar, but slightly different approach. This new set of PowerToys will be delivered as a separate application, with each utility or tool available as an add-on module.
The current download for Windows 10 PowerToys is available on GitHub.
When the download and installation is complete, double-click the icon on your desktop, taskbar, or start menu, depending on the choices you made during the installation process. The PowerToys application looks similar to a typical Windows 10 configuration screen (Figure A).
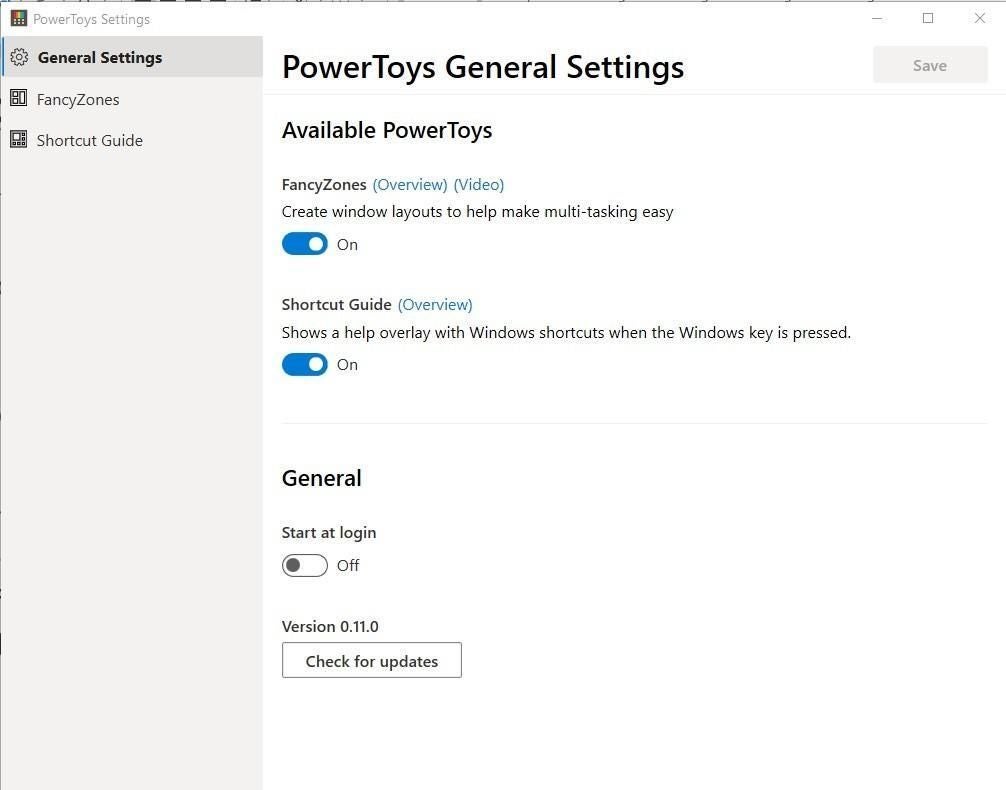
Figure A
FancyZones allows users to set up preconfigured windows on their Windows 10 desktop. Once configured, users can drag and snap applications into a zone without having to resize windows.
For example, a user could drag Twitter to a right-hand zone while reserving a larger working zone for other applications. FancyZones eliminates the need to resize windows as you want them for each session start—your preferred configuration is remembered permanently so you can get to work quicker.
The first thing you should do is click the On button for FancyZones on the General Settings page (Figure A). Once that it is done, click the FancyZones item in the left navigation bar to reveal the full set of configuration settings (Figure B).
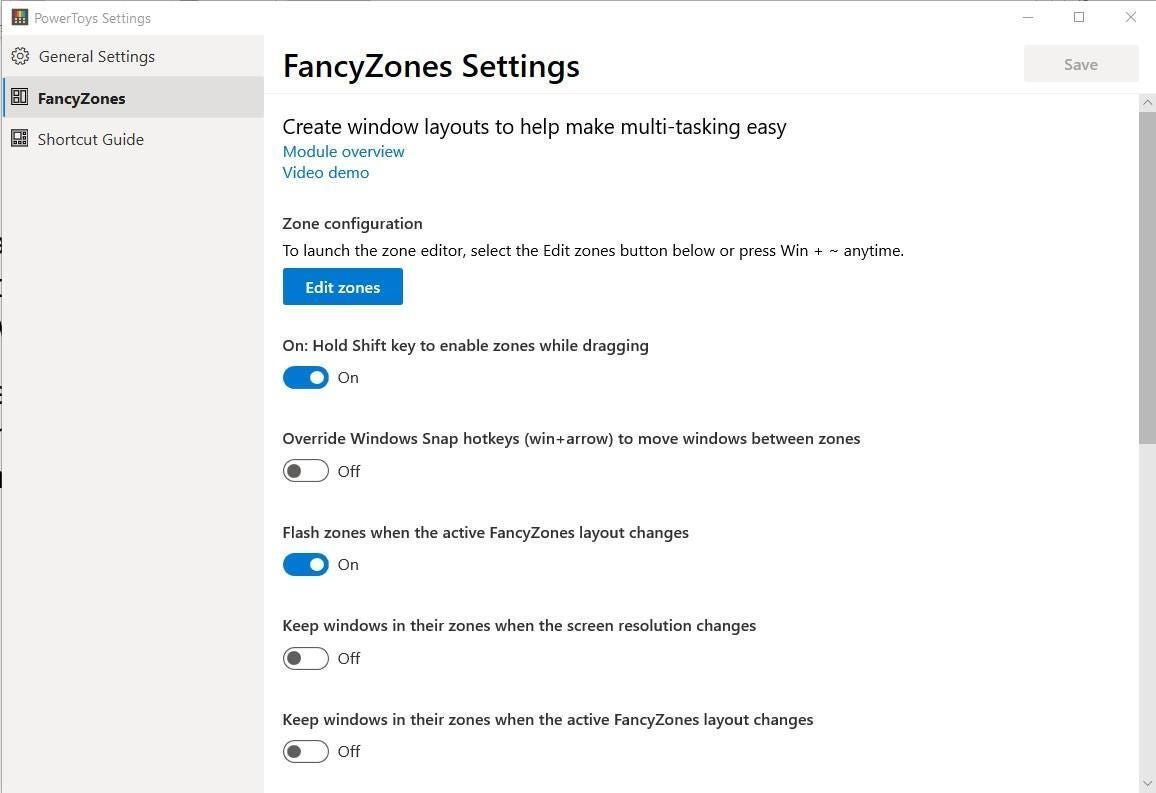
Figure B
Zone configuration
Going down the page, Zone configuration allows you to pick a zone pattern from one of the pre-configured templates or to create one of your own. Click the Edit Zones button to see a substantial list of available templates (Figure C). When you find or create the template you want, click the Apply button.
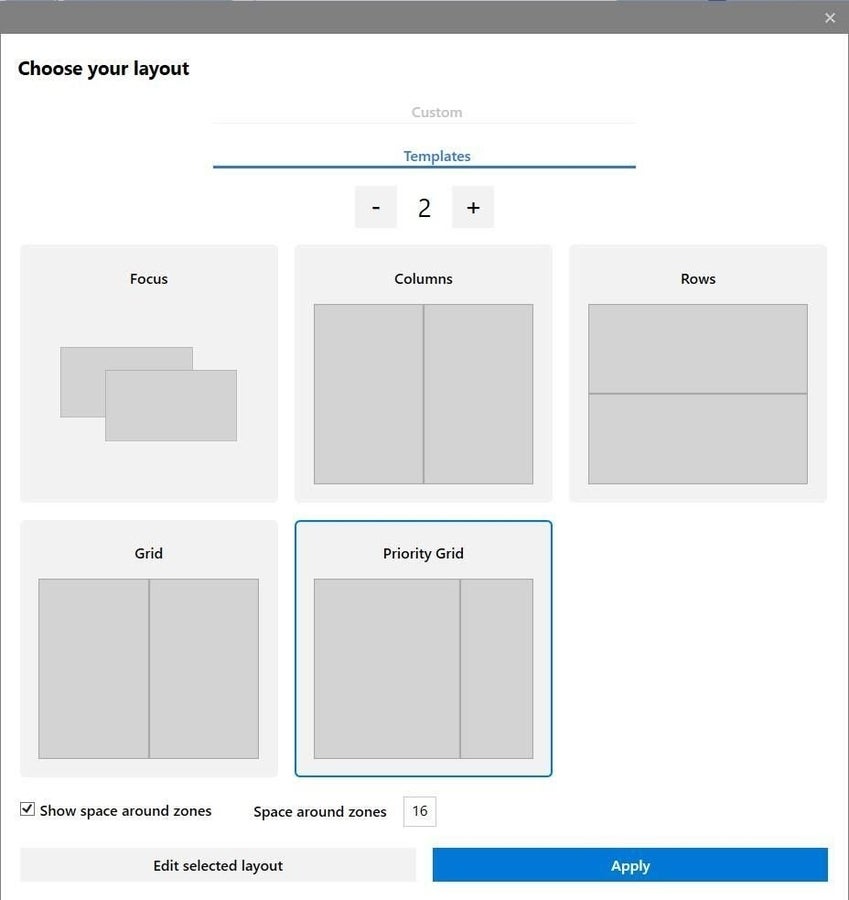
Figure C
When editing zone sizes or locations, grab the edges with a click and hold and then move it to your desired location. The experience is similar to the crop function of an image editing app. When you are satisfied with your choices, give the configuration a name, and then click the Save and Apply button.
On: Hold Shift key to enable zones while dragging
The next on/off button asks if you want FancyZones to require you to use the Shift key to activate the drag, drop, and snap feature. If you leave this setting off, FancyZones will be active for every Windows movement, which could get frustrating, so leaving this set to On is recommended.
Override Windows Snap hotkeys (win+arrow) to move windows between zones
Normally, when you use the Windows Key and the left or right arrow, the current application window will move from one half of the screen to the other. With this configuration set to the On position, those key combinations will move between the windows you have configured with FancyZones.
Flash zones when the active FancyZones layout changes
This setting allows you to see what your new layout looks like as you make changes to your FancyZones configuration.
Keep windows in their zones when the screen resolution changes
This setting will lock in your FancyZones configuration regardless of display resolution. This setting will be handy for users who switch monitors frequently, say from laptop to monitor and then back again.
Keep windows in their zones when the active FancyZones layout changes
This setting will allow you to make FancyZones layout changes without having to then rearrange your application locations. The application goes where the zone goes.
Keep windows pinned to multiple desktops in the same zone when the active desktop changes
This is an important setting if you use several desktops across more than one monitor. With this setting, you can designate a certain zone for a specific application regardless of which desktop is on which monitor.
Move newly created windows to their last known zone
With this FancyZones set to the On position, any new instances of an application created will automatically snap into their last known zone. This setting will help users get their desktop up and running as they like, more quickly.
Use new zone editing experience (Preview)
Turning this setting to the Off position will revert FancyZones to its original editor, which is not as easy to work with for multi-monitor situations. Unless you have a specific need tor it, this setting should remain off.
Zone Highlight Color (Default #0078D7)
This last setting is self-explanatory. You can use any color from the palette.
Click the Save button at the top FancyZones configuration screen when you have finished. You can close out the configuration app, but it will reside in your system tray ready to apply your zone settings when called upon. Figure D shows how you can use FancyZones to do work and keep track of social media at the same time.
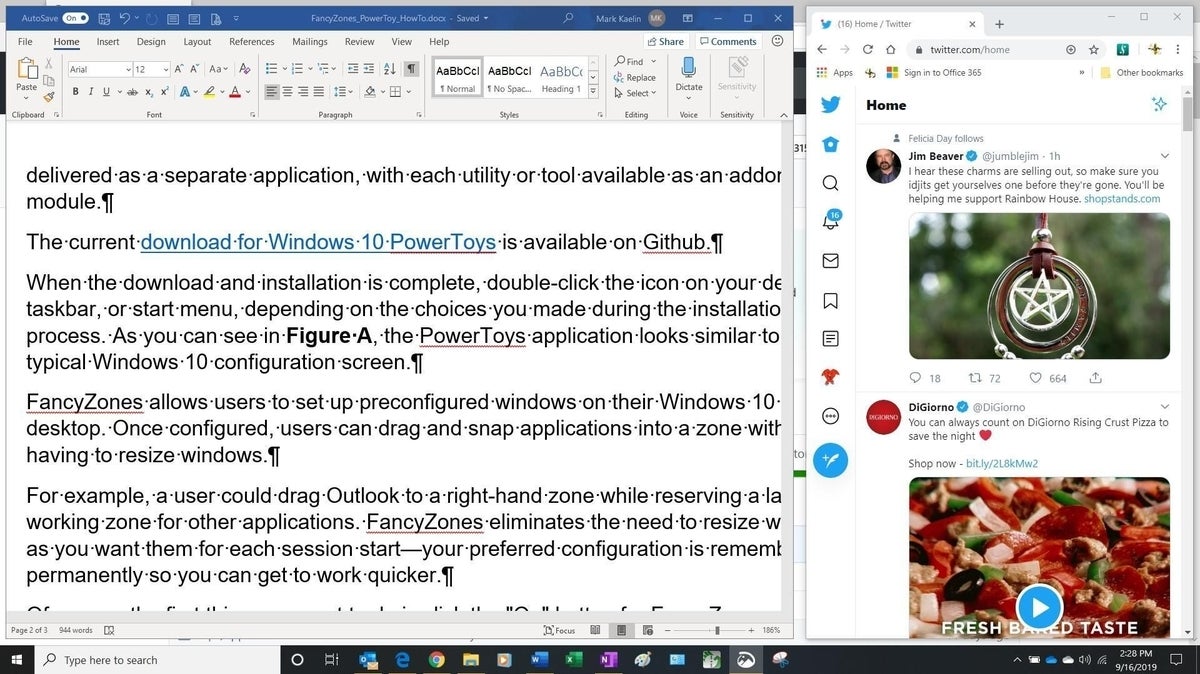
Figure D