
Newspaper columns are a great way to format content in brochures, flyers, newsletters and so on. They’re especially useful in a document that is text-heavy because the narrow columns are more readable. Fortunately, it’s easy to create newspaper columns in a Microsoft Word document.
In this tutorial, I’ll show you how to format an entire document or part of a document with newspaper columns. I’ll also point out a few problems that you’ll need to deal with.
I’m using Microsoft 365 Desktop on a Windows 10 64-bit system, but you can use older versions. Word for the web doesn’t support columns. You can make changes to the document without harming the columns, but you won’t see them, nor can you add or change them in the web version. You will see them noted however, as “column break” in the document. You can download the Microsoft Word demo file for this tutorial.
SEE: Become a Microsoft Office pro with this training certification bundle (TechRepublic Academy)
How to enable newspaper columns for an entire document in Word
Newspaper columns allow content to flow from one column to the next. You read the content in the first column and then continue to the beginning of the second column.
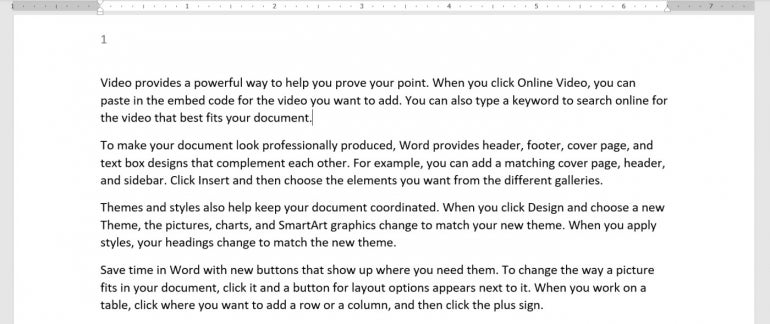
You see these columns everywhere, and depending on the document type, narrow columns are easier to read than text that stretches from the left to right margins. Figure A shows a simple document with default margins of one inch.
Figure A
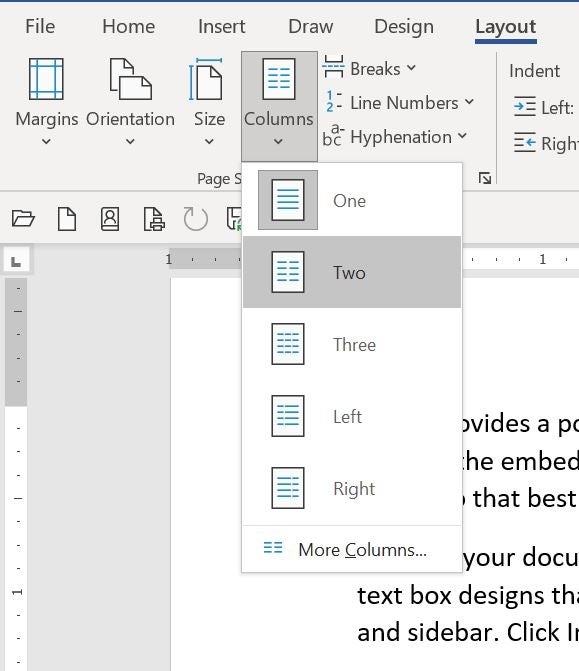
To layout the entire document in columns, click the Layout tab, and then click the Columns dropdown in the Page Setup group. Choose the number of columns you want (Figure B). As you can see, you can choose up to three.
Figure B
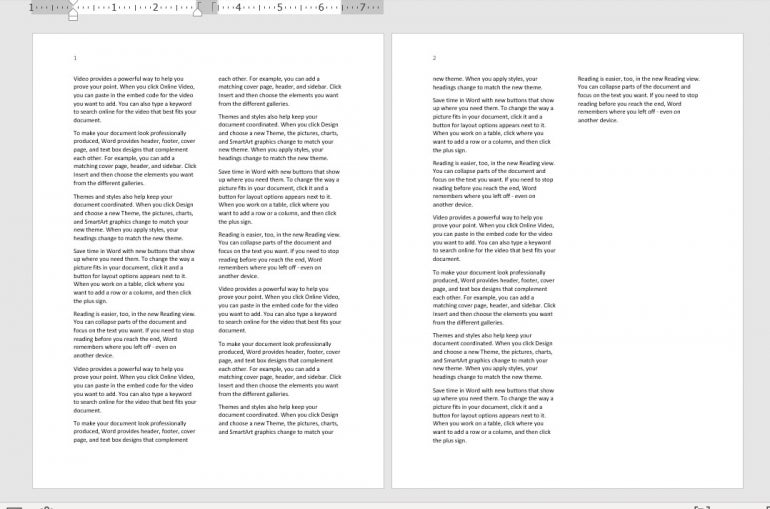
In Figure C, the content for the entire document now flows through two columns on each page. Page two doesn’t look balanced because the second column is so short. This is one of those problems I alluded to earlier, but the fix—a column break—is easy.
Figure C
How to insert a column break in Word
When you format content into columns, Word completely fills the columns until it runs out of text. Consequently, the last column is often shorter than the others. Sometimes that won’t matter because you plan to insert a graphic or some other content to fill the column.
If you want the last column to be of similar length as the others, you can add a column break. Doing so is easy, but you might not get it right on the first try. It’s unrealistic to try for an exact match; even when the columns are full, both margins won’t always match.
The bottom of page one is a good example. The bottom lines are close, but the right column is a bit shorter. That’s because Word automatically pushes a line to the next column to avoid a widow—the last line of a paragraph that’s alone at the top of a page.
When trying to decide where to insert the column break, you’ll usually want the two columns to be about the same length. That means pushing content in the left column into the right column. As a general guideline, when the lengths don’t match exactly, you’ll want the left column to be the longer column. That’s a rule you can break if you can offset the imbalance.
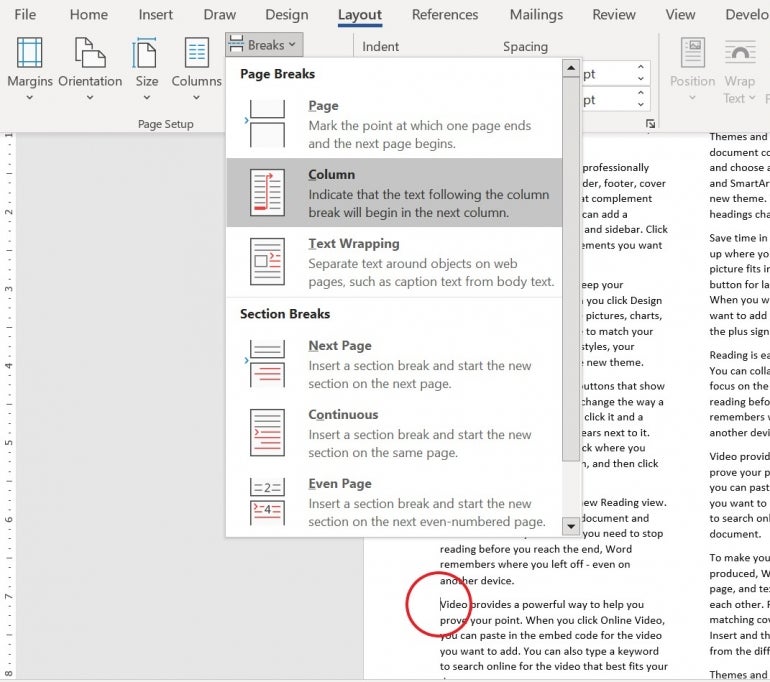
Now, let’s add a column break to the first column on page two:
- Position the cursor at the beginning of the fifth full paragraph. It starts with “Themes and styles also help keep your … .”
- Click the Layout tab if necessary.
- In the Page Setup group, click the Breaks dropdown.
- Choose Column Break (Figure D).
Figure D
The results might not be as close as you might like, as shown in Figure E, but Word didn’t break a paragraph between the bottom of the left column and the top of the right, which you should avoid when possible.
Figure E
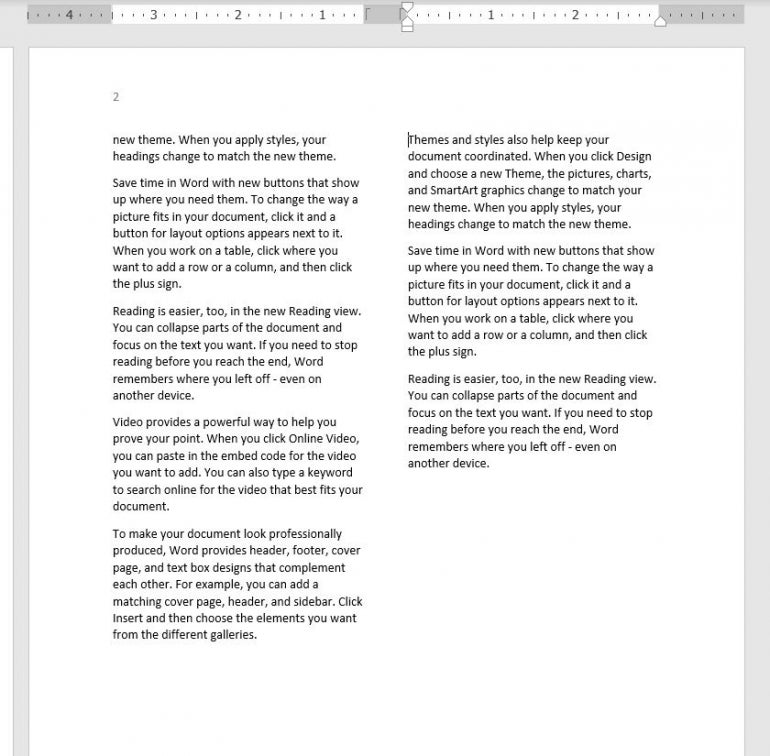
If you want the bottom margins more even, and in this case, you’ll have to split a paragraph. If so, click the Undo button to reset both columns. Then, do the following:
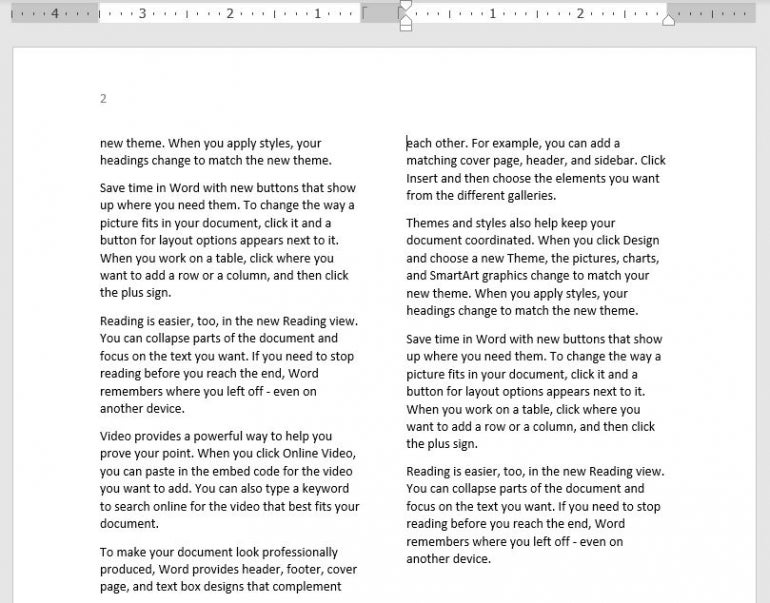
- Position the cursor in the fourth full paragraph at the beginning of the fourth line. It begins with “each other. For example, you can add a … .”
- Add a column break as you did earlier.
Figure F shows the results. This is about as close as you can get. If you go up another line, the left column will be longer than the right.
Figure F
You can also create newspaper columns with some of the content, but before we do so, let’s look at how to remove newspaper columns.
How to remove newspaper columns in Word
You might not realize it, but by default, your content is a single column. Remember when you set the content to two columns and the dropdown list included a One option? That’s the default. To remove columns, choose it as follows:
- Click the Layout tab.
- In the Page Setup group, click the Columns dropdown.
- Choose One.
Word will remove the two columns and stretch the content between the left and right margins—it’s one column.
Now, let’s turn a few paragraphs into multiple columns.
How to enable newspaper columns for part of a document in Word
Occasionally, you’ll see a document with a section that’s more than one column in the middle of a document. To achieve this look, simply select the content you want to display as columns before choosing the number of columns. For example:
- Select paragraphs five through 11 on page one.
- Click the Layout tab.
- In the Page Setup group, click the Columns dropdown, and select Two.
Figure G shows the results. Right away you might notice that the results look off balance. That’s because you have a wrapped margin next to a flush margin.
Figure G
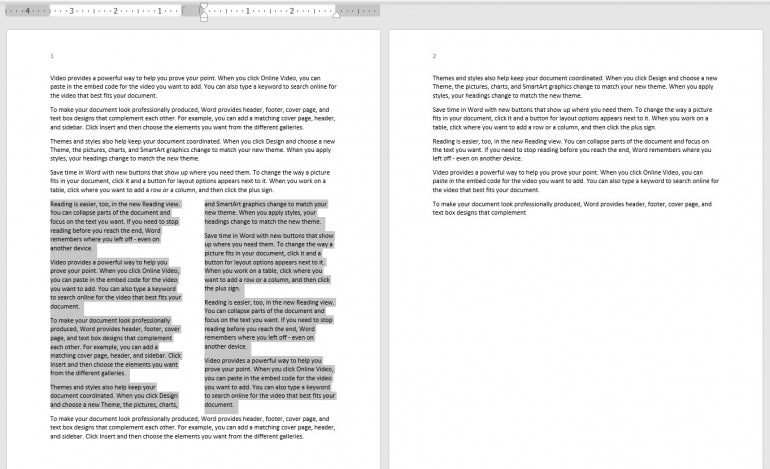
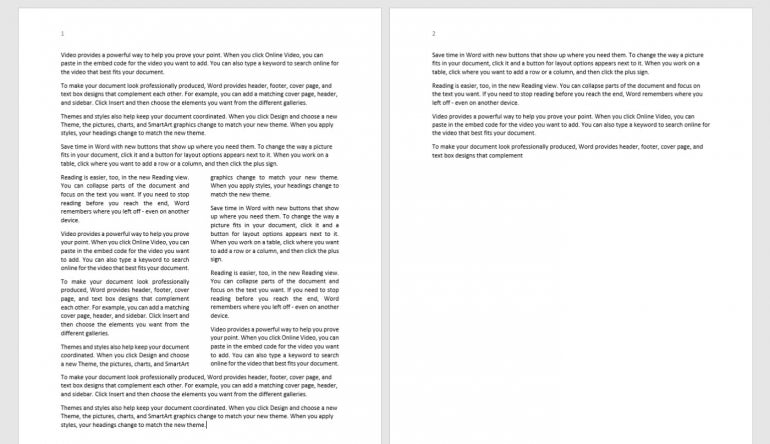
It just looks odd, but there is a quick fix. With the columns still selected, click the Home tab, and then, click Justify in the Paragraph group. Doing so stretches the content of both columns between the left and right margins of each column, as shown in Figure H.
Figure H
Stay tuned
Enabling columns in a Word document can add a bit of focus to a section or improve the readability of the entire document. Once you have the columns in place, there are more options for fine-tuning the look. In a future article, we’ll review these options.


