Whether you are running a new Windows 11 PC, or an older PC updated to Windows 11 from Windows 10, according to Murphy’s Law, you are going to need to recover from a catastrophic personal computer failure one day. Unfortunately, for most users, that means starting over from scratch because they have no recovery media. But it doesn’t have to be that way.
SEE: How to minimize security risks: Follow these best practices for success (TechRepublic Premium)
Creating a USB recovery drive using built-in tools provided by Microsoft, Windows 11 users can create fully functional recovery drives quickly with just a few mouse clicks and a little educated preparation. The general process for creating a USB recovery drive has been the same since Windows 7, but there are some slight variations for Windows 11.
Featured Partners: Back Up & Recovery Software
How to create a USB recovery drive for Windows 11
Perhaps the most significant difference from previous Windows recovery drive procedures is the required size of the USB drive. For Windows 11, the size of the USB drive used for a recovery that includes system files should be at least 32GB.
It is also important to note that the USB drive in question, once created, cannot be used for any other purpose. You will not be able to store other files on it or use it any other way—once committed to this purpose, it must stay committed to this purpose regardless how much “empty” space is left on the drive.
However, in the interest of completeness, we will mention that it is possible to use a much smaller USB drive of 1GB for this purpose, if you do not wish to recover system files as well. However, a recovery drive created this way would only restore Windows 11 to its default configuration—hardly the “recovery” we are looking for.
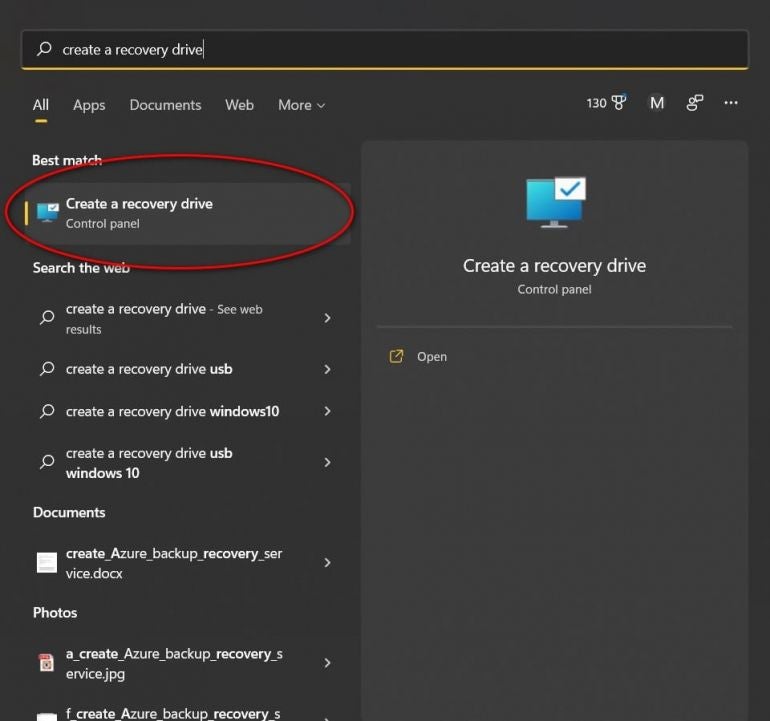
To create a full system recovery USB drive for Windows 11, type “create a recovery drive” into the desktop search tool (Figure A) and click the appropriate search result.
Figure A

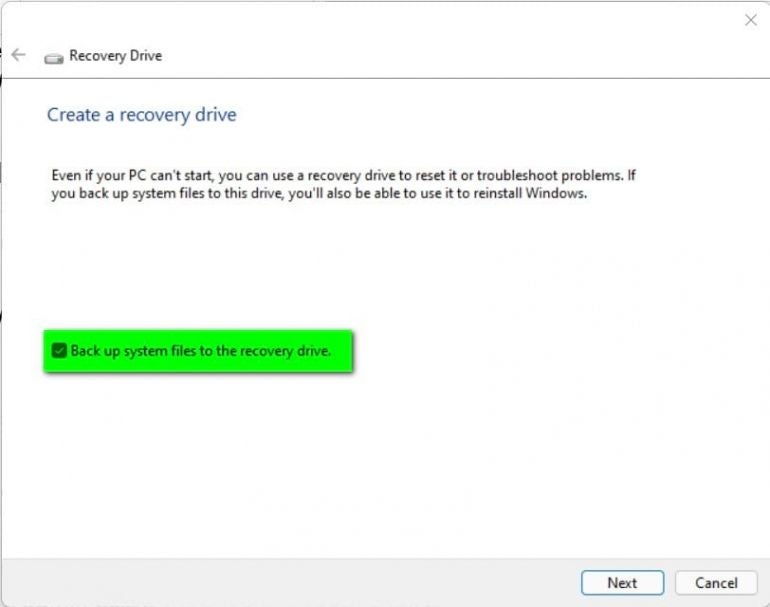
Windows 11 will present you with a simple application screen with one choice, as shown in Figure B. Make sure the “Backup system files to the recovery drive” is checked and click the Next button.
Figure B

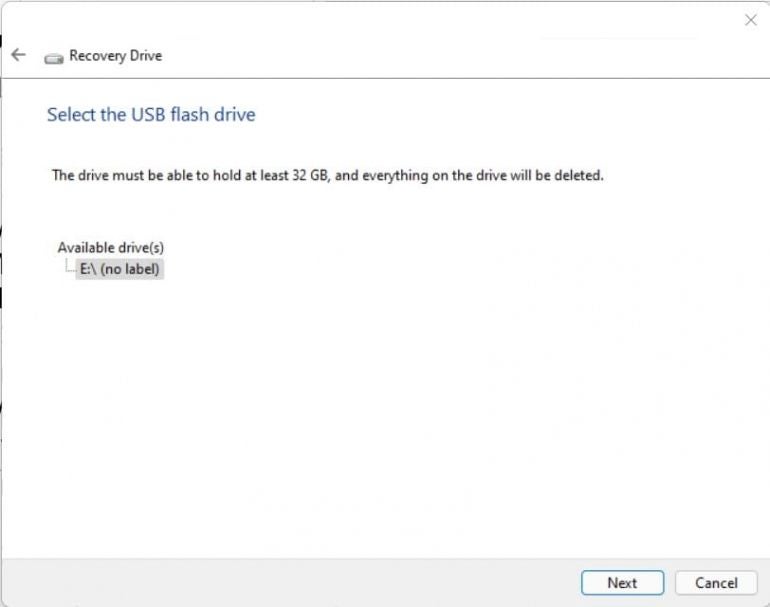
Windows 11 will go through a preparation phase that may take a few minutes. When completed, as shown in Figure C, the system will ask you to insert a 32GB USB drive or show you which drives are available, if a 32GB USB drive is already connected.
Figure C

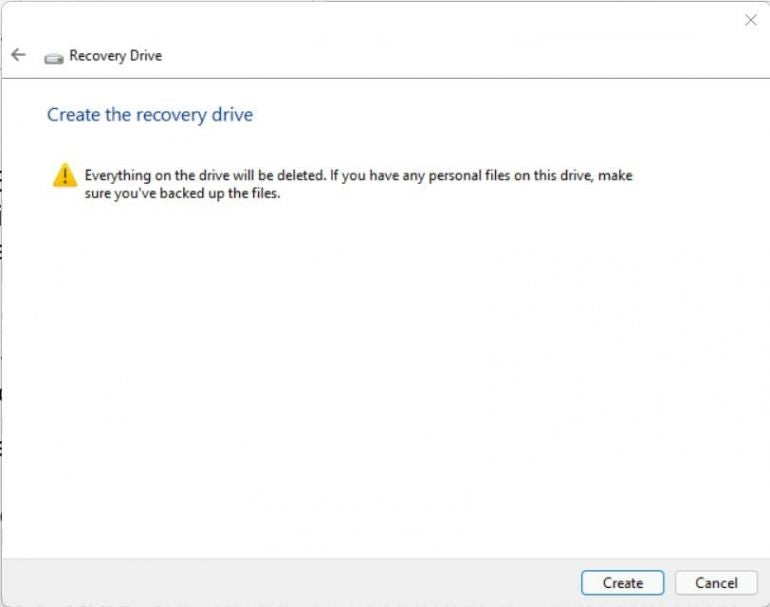
Select the USB drive you want to use as your recovery drive and click the Next button. The system will warn you that all the data will be lost on the USB drive and ask for confirmation, as shown in Figure D.
Figure D

When you are ready to create the Windows 11 USB recovery drive, click the Create button. The process may take anywhere from a few minutes to an hour or so.
However, once the process is complete, you will have a viable and complete Windows 11 USB recovery drive. The drive should be stored in a safe place, preferably somewhere offsite where the drive will not be subject to the same potential calamities as the PC itself.

