Project management is a rather important means to a business end. This is especially so as your projects multiple and grow in complexity. As they scale, projects can become quite challenging to manage, which is why you need the right tools to succeed.
For me, the ideal project management tool is the Kanban board, but there are a vast number of project managers who prefer a tool that lays out their projects in a bar-charts where the progress of each component of a project can be easily viewed as a timeline. This is especially important when a project has very specific and hard deadlines. This is known as a Gantt chart.
SEE: Hiring kit: Project manager (TechRepublic Premium)
If the Gantt chart sounds like your jam, which tool should you use? Some Gantt chart tools are a part of a bigger service that include a large number of other project management tools, but what if you prefer software that does one single thing very well?
If that sounds like you, you might be interested in GanttProject, an open source project management tool that offers most of the features you need to tickle your Gantt chart fancy. With this tool, you can add tasks and milestones, set dependencies, allocate resources and rates, sync your charts to the cloud for collaboration, import files from different sources and export to PDF, images, spreadsheets and Microsoft Project files.
GanttProject is free, but there is a $5.00 donation version to help the developers continue to add new features. Both versions have the same feature set and are available to install on Linux, macOS and Windows.
Let me show you how to install GanttProject, so you can get this handy tool up and running to help with your project management needs.
What you’ll need to install GanttProject
As you’ve probably come to expect, I’ll be demonstrating this on Linux. If you’re using either macOS or Windows, you know that the installation is just a matter of downloading the installer and running it. Linux isn’t much more challenging than that, but I’ll show you how it’s done anyway.
To install on Linux, you’ll also need a user with sudo privileges. Another thing to keep in mind is that GanttProject is only available to install on Ubuntu-based distributions, as they only offer a .deb file.
That’s it. Let’s install.
How to install GanttProject
Download the installer from the GanttProject download page. One of two things will happen depending on which version of Linux you use. The file will either simply download or an app like Gdebi will open to install the app via a GUI. Let’s assume the file downloads but you need to install it manually.
With the .deb file saved to your ~/Downloads file, open a terminal window and issue the command:
sudo dpkg -i ~/ganttproject*deb
After the software is installed, you should see an entry for GanttProject in your desktop menu. Run the software and you should immediately feel right at home with all the Gantt chart goodness you need.
How to use GanttProject for collaboration
Project management software that is only used by a single person isn’t exactly the ideal methodology for this type of tool. How do you use GanttProject in the cloud? You have to create an account.
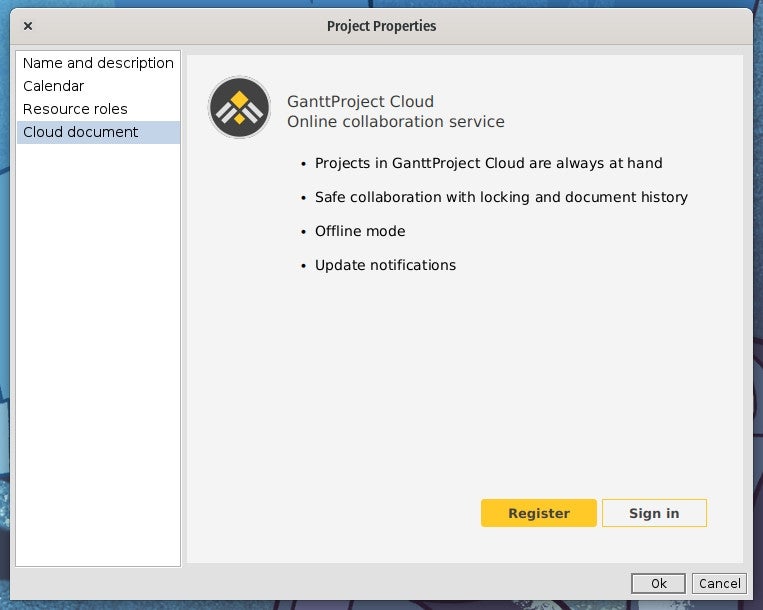
To do that, open the software and click Project | Properties. In the resulting window, click Cloud Document. From there (Figure A), click Register.
Figure A

This will open your default web browser to the GanttProject account sign-up page, where you can register for a new account. Again, the service is free, so you don’t have to crack open that wallet to use the tool. However, the cloud service is yet another reason why you might consider that $5.00 donation.
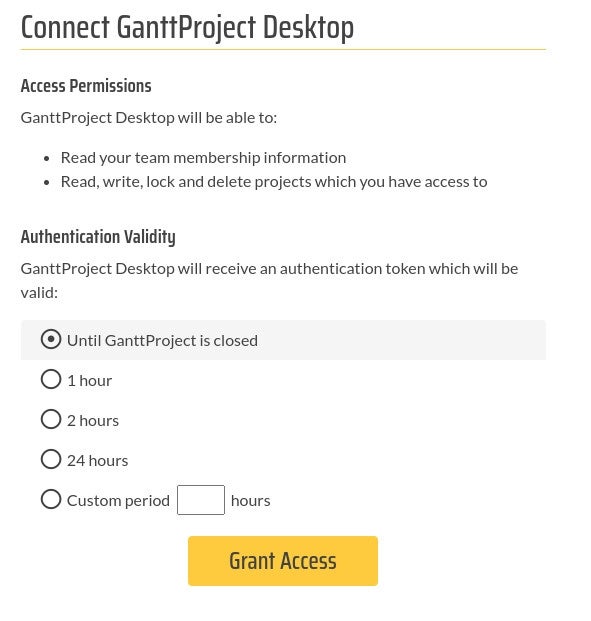
Once you’ve created the account in the web browser, go back to the GanttProject Properties window and click Sign In. This will take you to yet another web page where you must grant access to the project file (Figure B).
Figure B

Once you’ve done that, you’ll need to create a team on the GanttProject web page and then create a new project.
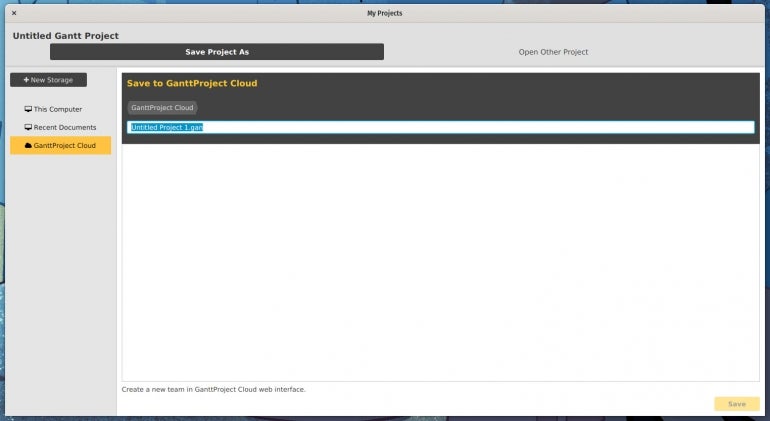
Click Grant Access and go back to the desktop client, where you should see that you’ve connected the project to the cloud. With that done, you can save the file to the cloud using Project | Save. In the save window, make sure to select GanttProject Cloud in the left navigation (Figure C) before clicking Save.
Figure C

Give the file a name, then click Save and you’re good to go. That file will appear in your GanttProject Cloud account.
I will confess that saving to the GanttProject Cloud service is a bit awkward, and it does take a bit of getting used to. There were a few times when I’d attempt to save to the cloud and the desktop client insisted I sign into my GanttProject Cloud from the default browser. Even though I had already signed in, it refused to accept that reality. Because of this, I would recommend you save your projects locally first. After all, you can’t be too careful with your work.
Other than that one hiccup, GanttProject is a stellar client for the caring and feeding of all your Gantt chart needs. Give the app a try and see if it doesn’t help you manage your projects with a bit more ease.
Subscribe to TechRepublic’s How To Make Tech Work on YouTube for all the latest tech advice for business pros from Jack Wallen.
