Illustration: Lisa Hornung, Getty Images/iStockPhoto
Must-read Windows coverage
- CrowdStrike Outage Disrupts Microsoft Systems Worldwide
- 10 Best Project Management Software for Windows in 2024
- Windows 10 Extended Security Updates Promised for Small Businesses and Home Users
- Securing Windows Policy
It’s easy to make shapes spin in Microsoft PowerPoint; simply apply the Spin animation. However, achieving the right spin within the right area isn’t always that simple. Sometimes you need to force the axis of rotation to recognize a different area—you can’t really do that, but there is a workaround that does this trick. In this article, I’ll show you how to do so by forcing a triangle to span the entire circumference of a circle, similar to the hands of a clock, instead of spinning in only one half of the circle.
SEE: Office 365: A guide for tech and business leaders (free PDF) (TechRepublic)
This article assumes you have basic PowerPoint skills, such as inserting shapes and applying properties. For your convenience, you can download the demonstration .pptx file. You can apply this workaround in the browser edition.
What is axis of rotation?
Merriam Webster defines axis of rotation as follows: The straight line through all fixed points of a rotating rigid body around which all other points of the body move in circles.
A great example of this concept is a compass dial. Its axis of rotation is the center of the dial. The dial circles around the circumference as expected because the axis of rotation is the center of the dial, which is also the center of the circle. This concept might be better explained with a visual.
How to create a spinning arrow
A center axis of rotation is inherent in some shapes, such as lines. When you can use one of these shapes, do so, because what you need is already there. For example, let’s add a double-arrow shape and apply a spin animation to create a simple spinning arrow:
- Click the Insert tab, click Shapes in the Illustrations group, and choose the left to right double-arrow shape in the Block Arrows section. Position and size the inserted arrow (Figure A).
- Click the Animations tab.
- From the Emphasis section, choose Spin. PowerPoint will give you a quick preview.
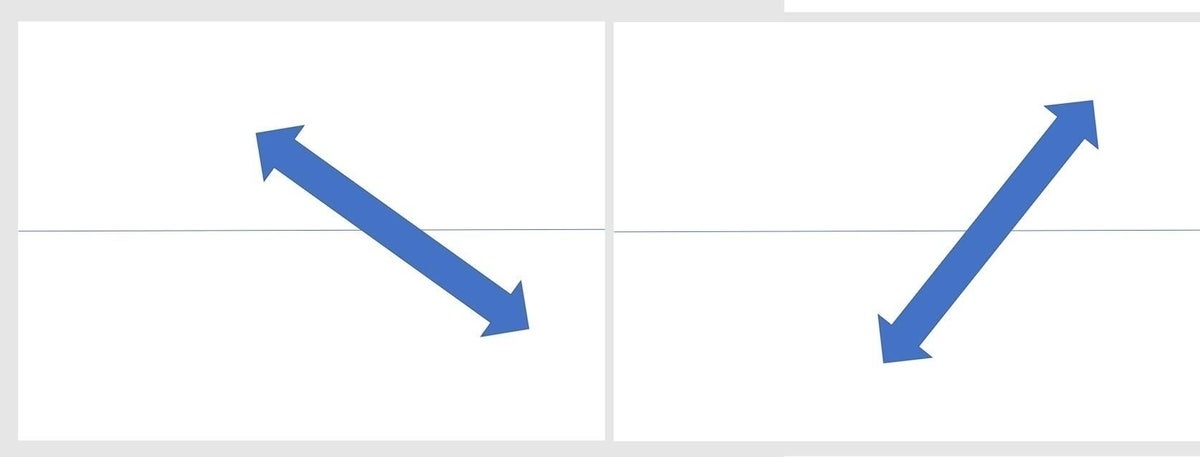
Figure A

A figure can’t show you the full spin, but the arrow spins from the center—its axis of rotation is in the center of the arrow. (Figure B).
Figure B
Play around with a few different shapes and you’ll see that many shapes spin as expected, whereas others don’t. For instance, try a square and a triangle, and you’ll find that the triangle spins, but the axis of rotation might not be where you expect!
Creating a false axis of rotation
It would be great if every shape spun as expected, but because of the axis of rotation, some will surprise you. We can illustrate this by trying to create a clock dial. The double-arrow will spin correctly, but it’s a double-arrow, not a traditional one-arrow dial.
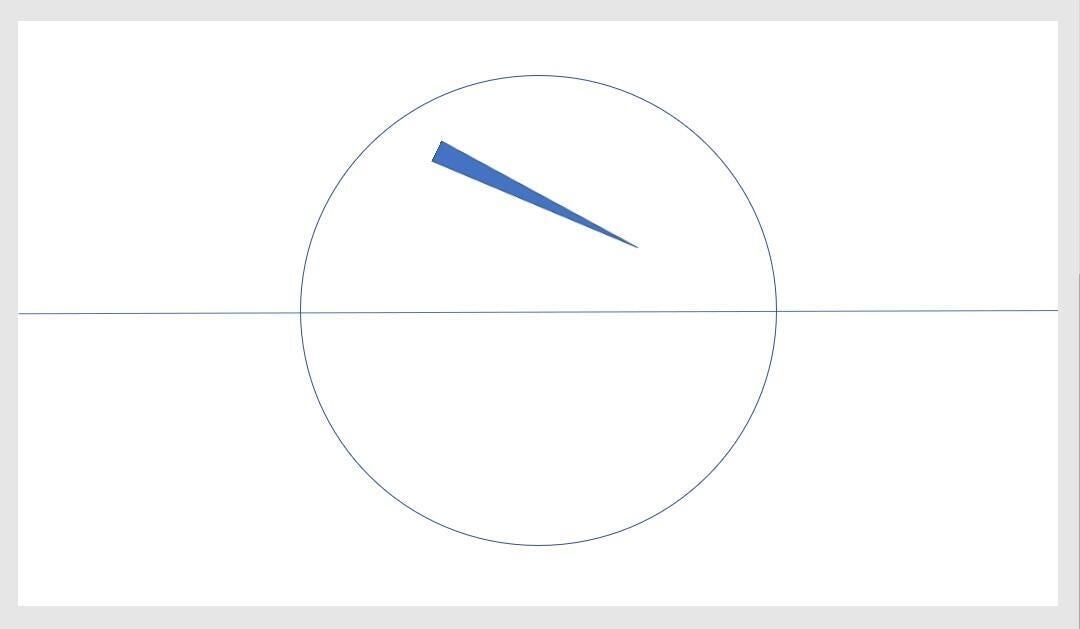
To get the results you want, you might use a long, narrow triangle, as shown in Figure C. But the lone triangle won’t spin as expected. Instead of spinning around the circle, which is what you want, it spins in the top half only (see Figure D). That’s because it exists only in the top half. It’s spinning correctly, but it’s not what you want.
Figure C
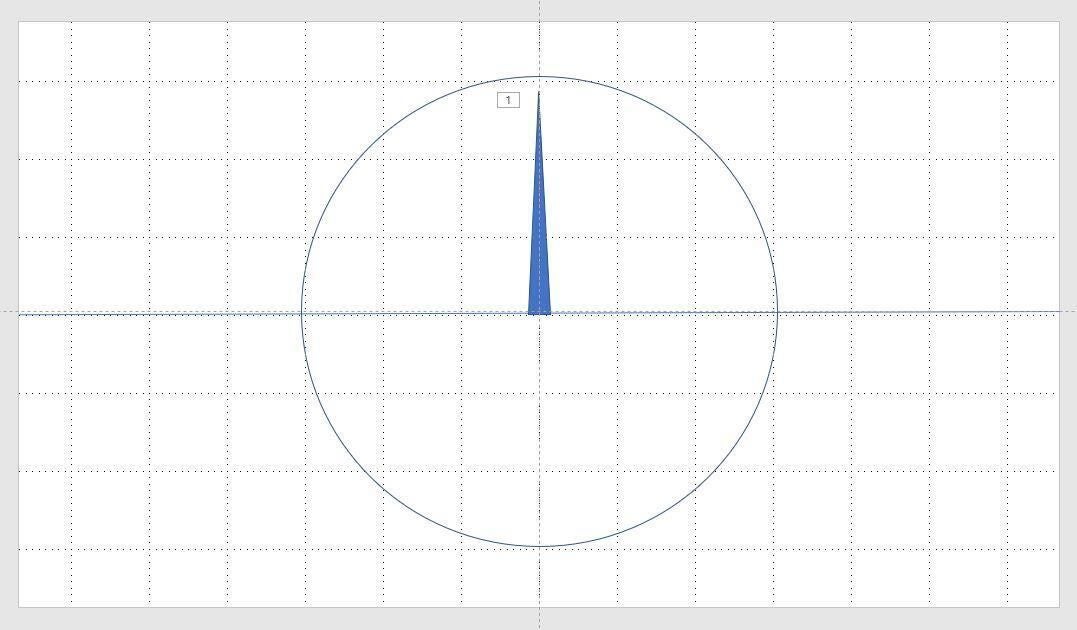
Figure D
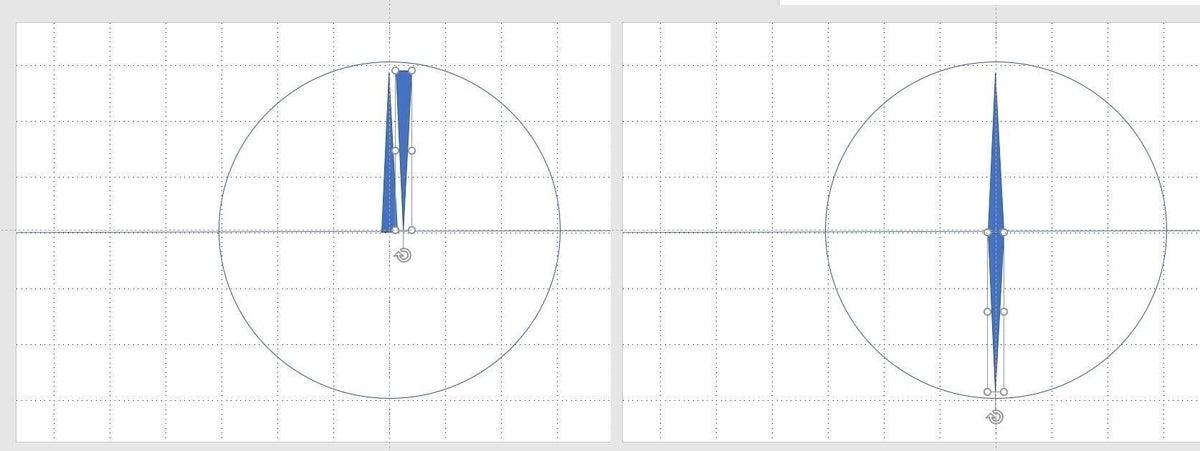
The obvious solution is to change the axis of rotation to the bottom of the triangle. There’s no way to do that, but there is a workaround. In a nutshell, copy the triangle and rotate it, lining it up with the bottom to create a double-arrow dial, then set the new triangle’s fill property to nothing. Finally, you group the two shapes and in doing so, you change the axis of rotation from the center of the lone triangle to the point where the two arrows meet.
Let’s work through an example using the triangle in Figure C (in the downloadable demonstration file):
- After positioning and sizing the narrow triangle, select it, press Ctrl+B and drag a copy to the side.
- With the copy still selected, choose Rotate from the Arrange dropdown (on the Home tab).
- From the submenu, choose Flip Vertical (Figure E).
- Drag the copy to the lower half and line it up with the arrow in the top half (Figure E).
- With the lower triangle still selected, choose No Fill from the Shape Fill dropdown (Shape Styles group on the contextual Shape Format tab).
- Choose No Outline from the Shape Outline dropdown.
- Hold down the shift key and select both triangles and then press Ctrl+G to group the two. (If you’re working in the browser editing, hold down the Shift key.) The two selection boxes will turn into one. If this doesn’t happen, try again.
- With the grouped triangles selected, apply the Spin animation as you did before.
Figure E
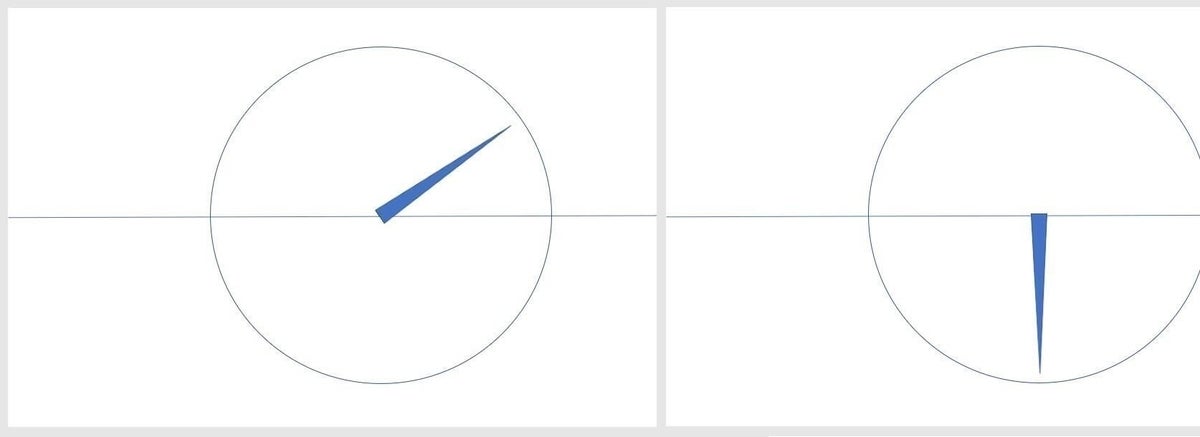
By changing the axis of rotation from the center of the upper triangle to the center of the fake dial, you force the spin animation to work around the clock! As you can see in Figure F, the upper triangle now spins through both the upper and lower halves of the circle. You can use this workaround any time you need to adjust the axis of rotation for a shape.
Figure F