


Image: iStock/BongkarnThanyakij
Must-read Windows coverage
- CrowdStrike Outage Disrupts Microsoft Systems Worldwide
- 10 Best Project Management Software for Windows in 2024
- Windows 10 Extended Security Updates Promised for Small Businesses and Home Users
- Securing Windows Policy
If you need to insert dynamic date expressions into a Microsoft Word document, I’ve got good news and bad news. Word has a date field that always displays the current date. The bad news is that using it in an expression to return anything other than the current date is difficult. It’s worse than difficult—I’d rather swim in an oil slick. That doesn’t mean you can’t do it, but the easier route is to create a mail merge with a Microsoft Excel file that calculates your dates. It’s easy to implement and update.
SEE: 60 Excel tips every user should master
This technique has three steps: Build the Excel sheet, build the mail merge document, and then merge the two. In this article, I’ll show you Word’s date field, just so you’ll know about it. Then, we’ll create an Excel file and a Word merge document. When we merge the two files, Word’s merge fields will update using the dates calculated by Excel.
I’m using Microsoft 365 on a Windows 10 64-bit system, but you can use earlier versions. You can create the documents yourself or download the sample files: Word and Excel. The browser version doesn’t support mail merge.
How to display the current date using Word’s date field
Perhaps the best place to start is with the easiest method for inserting a dynamic date, which is Word’s built-in date field. Regardless of when you enter the field, Word will evaluate it to the current date. To enter the date field, do the following:
- Click the Insert tab, and then choose Field from the Quick Parts dropdown in the Text group.
- In the resulting dialog, choose Date in the Categories list and then choose a format from the Date formats list (Figure A).
- Click OK.
Figure A
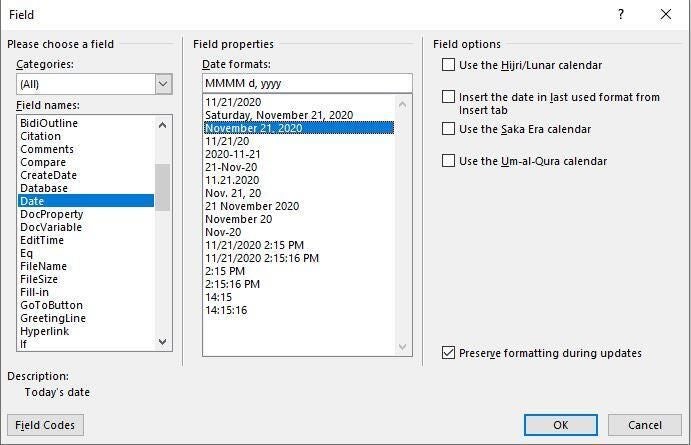
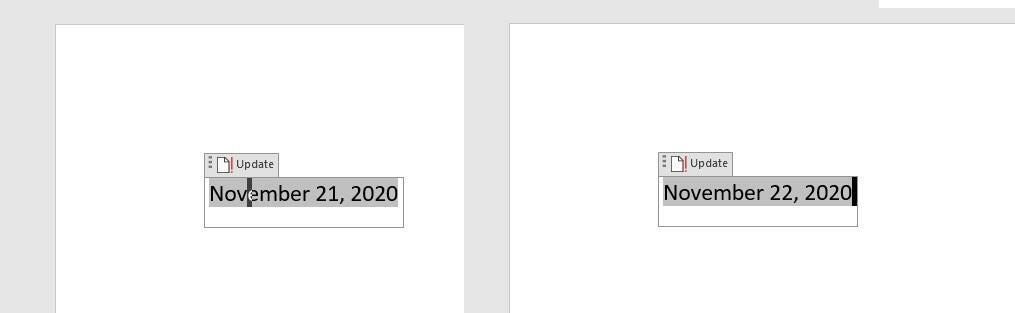
Figure B shows the resulting date in the format chosen in Step 2. You can tell it’s a field because of the background when selected. To the right, you see the results of the same field in the same document on a different day. To bypass the interface, press Alt+Shift+D to enter the current date field.
Figure B
The date field provides an easy way to always display the current date. Sometimes you’ll want to display a future or past date by building an expression around this but doing so is tedious and frustrating—think herding cats. You really need to want a challenge to work around the date field. A mail merge is easier.
Step 1: Calculate the dates in Excel
Now, let’s suppose you want a series of dates that are x number of years, months, weeks, or days into the future or the past. You can avoid a lot of head banging by calculating those dates in Excel, as shown in Figure C:
- Cell A3 contains =NOW(), an Excel function that returns the current date. It’s not necessary that you use this function; you could use a static date instead of this function.
- Row 1 is header text, which describes the dates. We’ll use the header text as merge fields later, in Word.
- Row 2 contains the dates as text. If you merge the expressions that return the dates, Word displays date serial values.
- Row 3 contains the date expressions, and they all accommodate leap years.
- Row 5 contains the values that represent the date components—years, months, weeks, and days—that you want to add to or subtract from the date in A3.
Figure C

The expressions in row 3 follow:
- B3: =EDATE($A$3, B2*12)
- C3: =EDATE($A$3 , C2*12)
- D3: =EDATE($A$3 , D2)
- E3: =EDATE($A$3 , E2)
- F3: =$A$3 +F2*7
- G3: =$A$3 +G2*7
- H3: =$A$3 +H2
- I3: =$A$3 +I2
The first four expressions use the EDATE() function, which returns the indicated number of months before or after the specified date This function uses the form
EDATE(start_date, months)
where start_date is the date you’re adding or subtracting from and months is the number of months you want to add or subtract from start_date. Each of these expressions refers to the date in A3 as start_date.
To work with years, the expression multiples the number of months (the values in row 5) by 12. Working with weeks requires a simple expression that multiples the values in row 5 by 7 (7 days in a week). The day expressions simply add the values in row 5. The -1 values subtract date components from the date in A3. You can change them to any integer you like.
SEE: How to manipulate multiple graphic files at the same time in a Word document (TechRepublic)
The structure is a bit odd but it’s necessary because Word’s merge feature will transfer the values in row 2 automatically. There’s no way to alter this behavior, so the header text must be in row 1 and the textual date values must be in row 2. The beauty of this sheet is that you can change the input values—A3 and row 5—to update the dates merged, without modifying the actual expressions in rows 2 and 3.
The demonstration demo contains a second sheet of more complex expressions that use the DATE() function. They return the same results, but they’re easier to modify if you want to add or subtract a combination of date components, such as one year and one month, or one month and a day. I added it to be comprehensive, but this article doesn’t use or explain those functions.
With the Excel sheet complete, it’s time to build the Word mail merge document. Note the Excel file’s name and location because you’ll soon need it.
Step 2: Create the mail merge document in Word
Building a mail merge document is step 2, and in this case, that task is simple. If you have no experience with mail merge, you might want to also read How to use Word mail-merge later, but it isn’t necessary to complete this article.
Open your document—in our case, use the date field document or start a new blank document—and identify the source file for the merge as follows:
- Click the Mailings tab. In the Start Mail Merge group, click Start Mail Merge, and choose Letters from the dropdown.
- Click the Select Recipients option and select Use an Existing List from the dropdown.
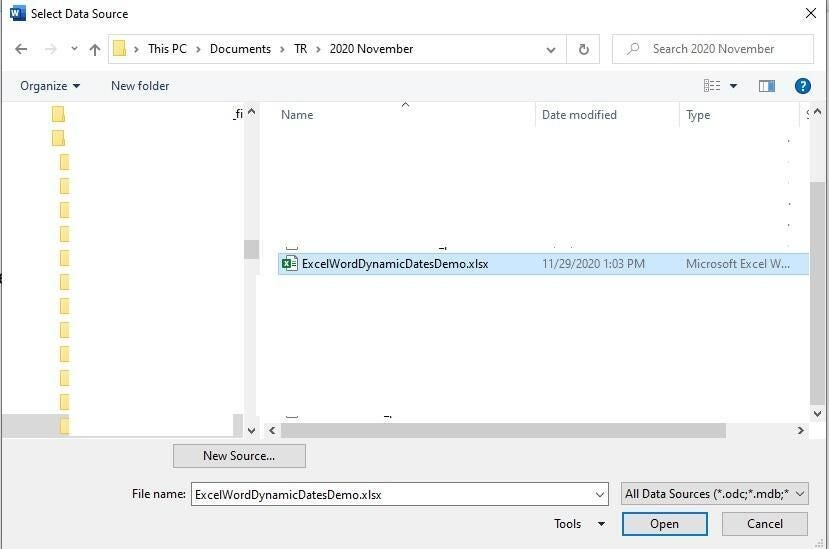
- In the resulting dialog, locate and then select your source file (Figure D), the Excel file we created in the previous section, and click OK.
- Select the appropriate sheet, Sheet 1 (if prompted) and click OK.
Figure D
Once you identify the source, Word knows where the dates are coming from and you’re ready to insert the merge fields. Doing so lets you determine which fields in the data source end up in your merge document. Begin by positioning the cursor where you want to insert the first date, and then do the following:
- Click Insert Merge Field in the Write & Insert Fields group and choose Year Out from the resulting list (Figure E). This dropdown lists all the header cells (fields) from the Excel sheet. Remember when I said the header cells must be in row 1? This is why.
- Position your cursor where you want to insert the second date and repeat step 1, choosing the next merge field.
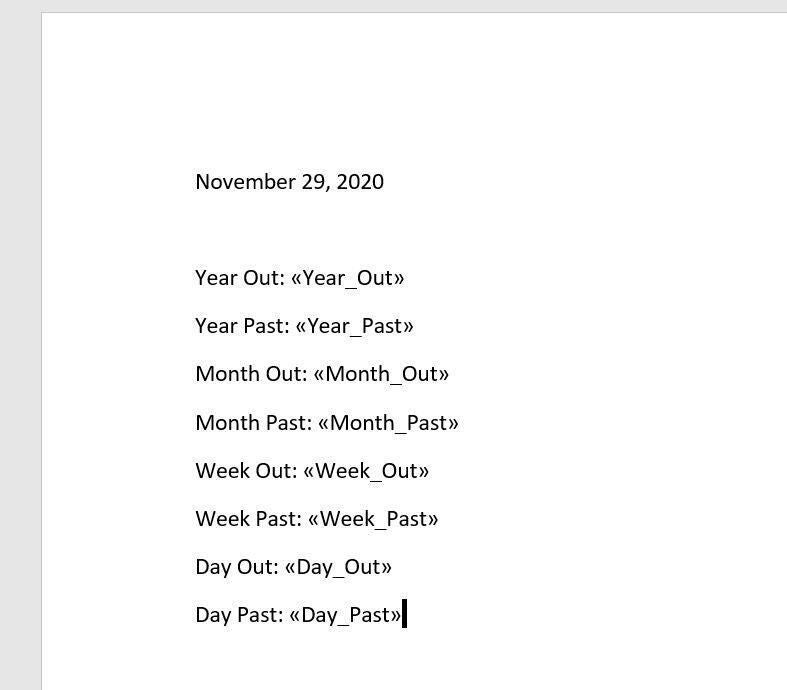
- Continue until you’ve added all your merge fields (Figure F). Notice that all the merge fields use the header text from the Excel sheet.
Figure E
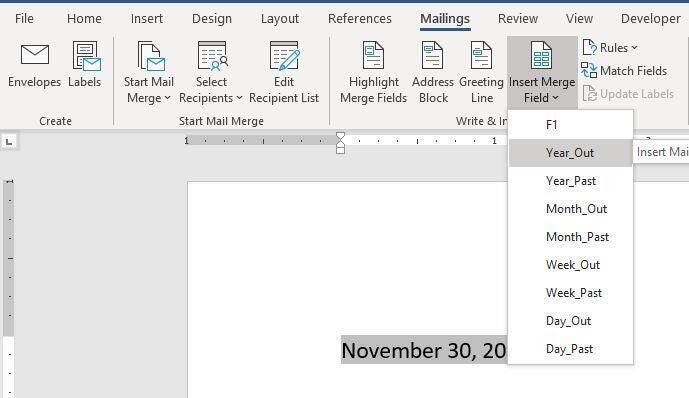
Figure F
You’re almost done—next step is the merge!
SEE: How to color pages in a Word document (TechRepublic)
Step 3: Merge
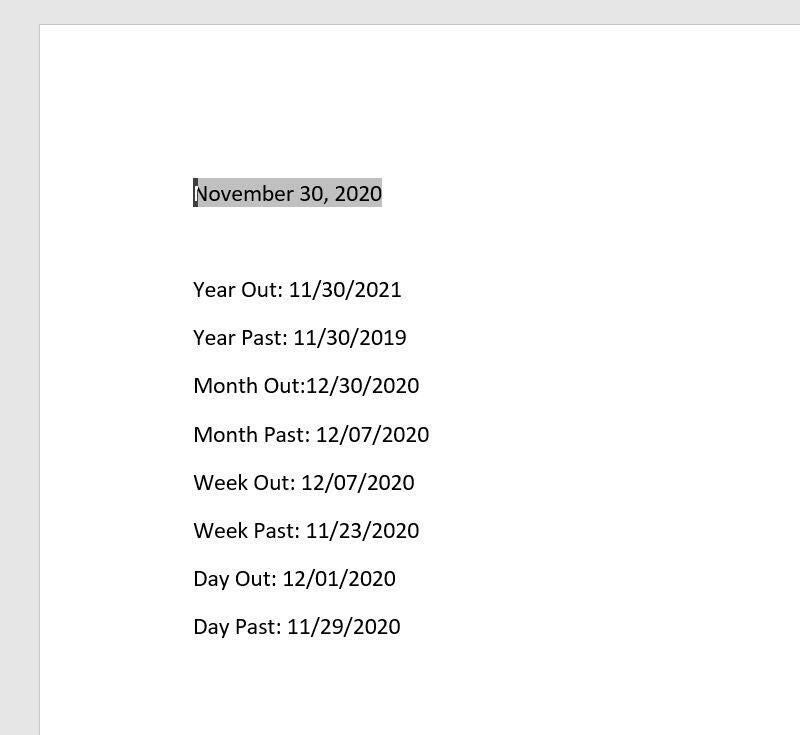
With the merge fields identified in the Word merge document, you’re ready to merge the two files. To do so, click Finish & Merge in the Finish group. From the dropdown, choose Edit Individual Documents, and then click All and Okay. Word will create a new document and replace the merge fields with the textual date values in Row 2 of the Excel sheet, as shown in Figure G. You have two files at this point: The original merge document and the new merged document.
Figure G
You can print and save the merged file. When you close the merge file (the one with the merge fields) you don’t need to save it unless you make changes you want to retain for the next merge task.