


If you’re using CentOS for any part of your data center, chances are you’re looking for an easier administration solution. Although CentOS offers a very nice GUI desktop (GNOME 3), there are certain systems and services you want to be able to manage with a level of efficiency that requires a web-based admin console. That’s where the CentOS Web Panel comes in.
The CentOS Web Panel is a single point of entry that allows you to configure/administer CentOS server features such as:
- Apache (Varnish Cache Server, Mod Security, Nginx Reverse Proxy, etc.)
- User Management (add/edit/modify users, user monitoring, shell access management, CPW limits, CloudLinux limits, user FTP & file management)
- Email (Postfix, Dovecot, Mailboxes, Alias-forwarder, Roundcube webmail, Postfix mail queue, AutoResponders, Antispam/Antivirus)
- Security (CFS Firewall, CageFS, SSL certificates, file system lock mode)
- System (Auto-fix, chkconfig manager, services manager, hardware/software info, disk details, network configuration, backup manager)
- Database (MySQL database management, local or remote user access, Live Monitor for MySQL process, PhpMyAdmin, create/remove databases, PostgreSQL, phpPgAdmin)
More about data centers
- Stargate Norway: OpenAI’s First AI Data Center in Europe
- AI Data Centers’ Soaring Energy Use: Who Pays for Higher Utilities Costs?
- China’s Submerged AI Data Center Could ‘Influence Global Sustainable Computing’
- Google to Power Data Centers With Nuclear Energy by 2030 in First-Of-A-Kind’ Agreement
For anyone running CentOS, Web Panel should be considered a must-have. Install this as soon as you have CentOS up and running, and your experience with the open source server solution will be much improved.
Let’s install it, shall we?
SEE: 10 stupid things people do in their data centers
Requirements
What you will need:
- A fully updated CentOS server install
- LAMP stack installed
- 32bit Server – 512 MB RAM
- 64bit Server – 1024 MB RAM
- Drive space – 10 GB
According to the Web Panel site, CentOS 7 is not yet supported; however, I managed to get the tool up and running on the unsupported release without a hitch.
Installing CentOS Web Panel
Fair warning: Although the installation is easy, the install takes a long time; I clocked a recent install at around 25 minutes, which is longer than it took to install the server OS. So once you run the installer script, step away and let it do its job. Here’s the process.
- Open a terminal window.
- su to the root user.
- Make sure your server is fully updated with the command yum upgrade.
- Download the installer script with the command wget http://centos-webpanel.com/cwp-latest.
- Issue the command sh cpw-latest.
- When prompted, enter your MySQL root password.
The script will download and install numerous dependencies (which is why it takes so long). Allow the install to complete, and it will present to you the addresses used to log in to your new Web Panel instance. If you miss that, the address is simple: http://IP_TO_SERVER:2030.
Log in with your root user credentials, and you’ll find yourself on the Web Panel Dashboard (Figure A).
Figure A
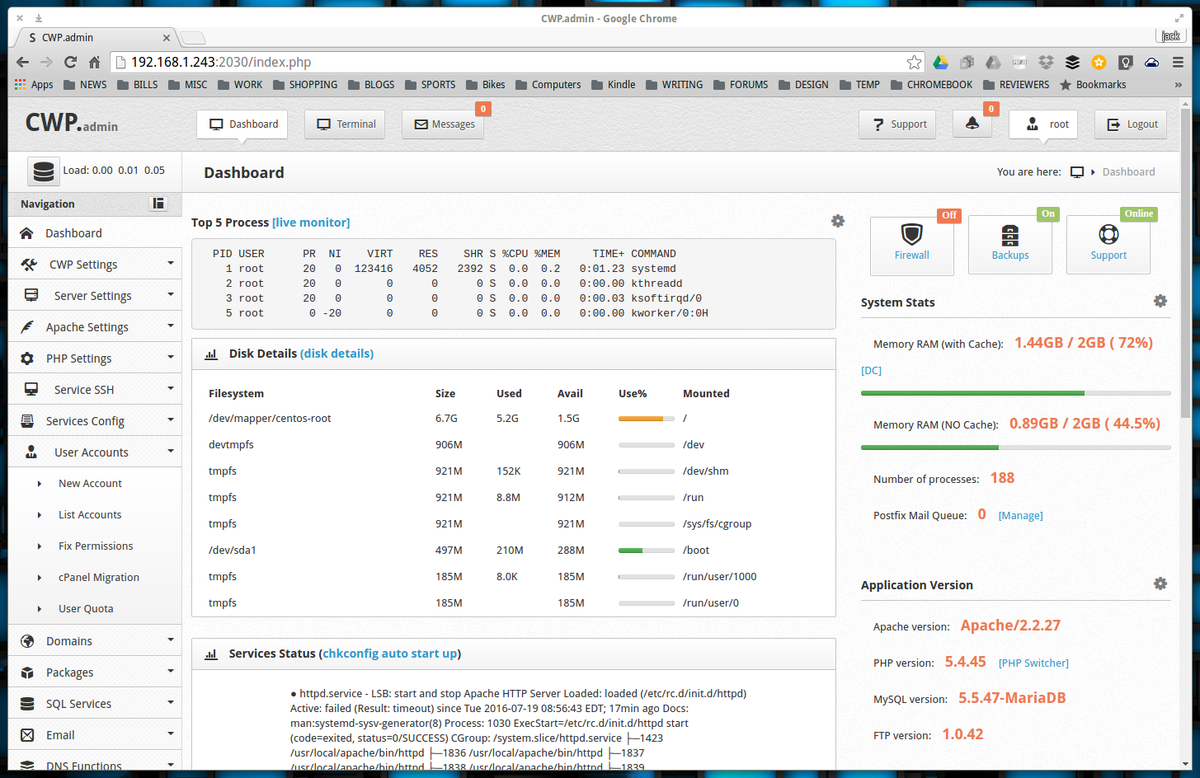
You’re ready to start working with your CentOS server via an incredibly well-designed web-based interface.
A powerhouse tool, free of charge
The CentOS Web Panel is a powerhouse administration tool that will set you back $0.00 USD. Once you start using Web Panel, you’ll never want to administer CentOS without it. Navigate through the menu hierarchy and become familiar with what Web Panel has to offer…you’ll be pleasantly surprised.