It’s easy to import data from Excel into an Outlook item, such as a message or appointment, because the functionality is built-in, and a wizard walks you through the entire process. If you want to accomplish the same thing from inside Excel—for instance, display and populate an appointment while working in Excel—you’ll need a bit of VBA magic. In this article, I’ll provide the code for pre-populating an Outlook appointment form using Excel data, from inside Excel.
SEE: 83 Excel tips every user should master (TechRepublic)
I’m using Microsoft 365 on a Windows 10 64-bit system. (I recommend that you wait to upgrade to Windows 11 until all the kinks are worked out.) Downloading the .xlsm, .xls, and .cls files will save you a lot of work. I ran into no problems running the procedure in the .xls format, but the code was written specifically for 365, so I can’t guarantee that you won’t run into something I didn’t account for. The Outlook web applications don’t support VBA.
This article assumes a bit of Excel knowledge, but even if you’re a beginner, you should be able to complete the instructions to success. This article is long, but it’s mostly explanation, so you won’t be working as hard as you might think, especially if you download the demonstration files.
The VBA event procedure
We’ll be using the BeforeDoubleClick event procedure to trigger the code in Listing A to display Outlook’s default appointment form. In addition, the code will populate a few fields. At that point, you can continue to add information or save and close the form. This procedure populates only a few of the form’s fields, but you can easily accommodate other fields, and I’ll show you how to do so as we discuss the code.
Listing A
Private Sub Worksheet_BeforeDoubleClick(ByVal Target As Range, Cancel As Boolean)
'Display Outlook appointment form and fill in default fields.
Option Explicit
Dim ol As Outlook.Application
Dim olApptItem As Outlook.AppointmentItem
Dim wb As Workbook
Dim ws As Worksheet
Dim r As Long
Dim c As Long
Set ol = New Outlook.Application
Set olApptItem = ol.CreateItem(olAppointmentItem)
Set wb = ThisWorkbook
'Update to work with a specific sheet.
Set ws = wb.Sheets("Sheet1")
r = Target.Row
c = Target.Column
On Error GoTo errHandler:
'If double-click isn't in column C of Table1, Exit Sub.
If c <> 3 Then Exit Sub 'Column check.
If r <= 2 Then Exit Sub 'Row check.
If ws.ListObjects("Table1").DataBodyRange.Rows.Count > r + 2 Then Exit Sub 'Lower rows check.
With olApptItem
'Start and End include both date and time.
.Subject = ws.Cells(r, c - 1).Value
.start = ws.Cells(r, c).Value & " " & ws.Cells(r, c + 1).Value
.End = ws.Cells(r, c).Value & " " & ws.Cells(r, c + 2).Value
.Display
End With
Set ol = Nothing
Set olApptItem = Nothing
Set wb = Nothing
Set ws = Nothing
Exit Sub
errHandler:
MsgBox "Error " & Err.Number & " " & Err.Description
End Sub
If you’re not very familiar with VBA, Listing A probably looks a bit scary, but most of it is declaring and defining variables. The code that actually populates and displays the form starts at the With block, and is short, simple and can be easily modified to fit your needs.
Before we get entrenched in the code, let’s enter it and set a reference to the Outlook object library.
Entering the code
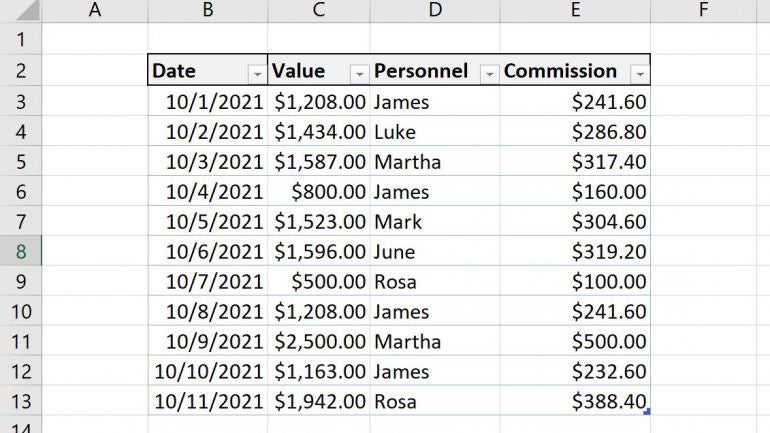
We’re working from inside an Excel workbook, so the first thing we need is an Excel file with the appropriate values for filling an Outlook appointment. Figure A has a few records; it’s simple on purpose.
Figure A
If you are using a ribbon version, be sure to save the workbook as a macro-enabled file. If you’re working in the menu version, you can skip this step.
To enter the procedure, press Alt + F11 to open the Visual Basic Editor (VBE). In the Project Explorer to the left, select the sheet that contains the appointment data, in our case that’s Sheet1. Enter the code manually or import the downloadable .cls file. In addition, the procedure is in the downloadable .xlsm, .xls and .cls files. If you enter the code manually, don’t paste from this web page. Instead, copy the code into a text editor and then paste that code into the sheet module. Doing so will remove any phantom web characters that might otherwise cause errors.
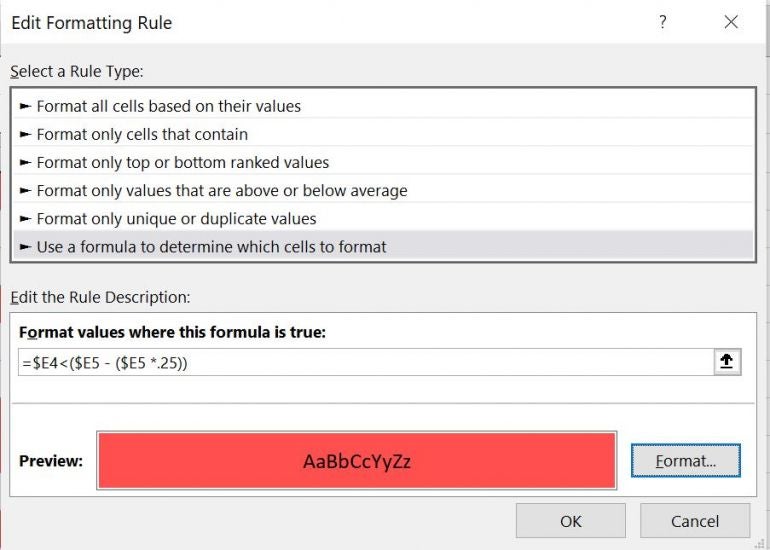
Before you can run the code, you must reference the Outlook object library because some of the declarations reference Outlook objects. To do so, click the Tools menu and choose References (Figure B). In the resulting dialog, thumb down to the Microsoft Outlook Object Library (mine is 16, but you might be running another version; if there are two, check the newest library).
Figure B
To run the code, return to the sheet and double-click any of the four date values in column C—C3:C6. Doing so will open the Outlook appointment form and fill in the subject, start and end controls using the corresponding values for the date you double-clicked. For instance, Figure C shows the form after double-clicking C3. You can enter more data, close and save the appointment as is, or cancel. For now, do the latter.
Figure C
Try all four date cells, cancelling each instead of saving anything for now. Did you notice a problem with C4? It returns an error message. Click OK to dismiss the error and then take a glance at the data and see if you can figure out why before I explain.
If you guessed it’s a date problem, you right. The start time is 10 a.m. The value needs the minute component—10:00AM. Fix that and try again. Ooops … it still doesn’t work, as you can see in Figure D. As is, the event runs from 10 a.m. until 12 a.m., on the same date, which can’t happen. The Type Mismatch in the error message is the best clue. Change 12:00AM to 12:00PM and try again. Both time values are wrong, so you must correct both before this record will work. I’m not trying to complicate things, but I want you to see the simple error-handling at work.
Figure D
Now that you’ve seen the procedure at work, you’re probably wondering how it works. That’s what we’ll tackle next.
The VBA procedure explained
Reviewing the procedure, you can see that the first several lines declare and define objects and variables. This part is straightforward. The first statement you might need to modify when applying the procedure to your own work is
Set ws = wb.Sheets("Sheet1")
I’ve specified Sheet1 so this procedure won’t work on any other sheet. You could reference another sheet of course or even reference ActiveWorksheet
Set ws = wb.ActiveWorksheet
I recommend that you make this change only if you want to run this procedure on other sheets, which is unlikely. If you use this statement, you’re opening up a can of worms because the double-click will work in the active sheet, not only Sheet 1.
The On Error statement handles any run-time errors; you saw it at work in Figure D. This task is simple enough that you shouldn’t need much more error-handling but be sure to test it thoroughly before making that decision.
The next statements check the double-clicked cell
'If double-click isn't in column C of Table1, Exit Sub.
If c <> 3 Then Exit Sub 'Column check.
If r <= 2 Then Exit Sub 'Row check.
If ws.ListObjects(“Table1”).DataBodyRange.Rows.Count > r + 2 Then Exit Sub ‘Lower rows check.
If the double-clicked cell isn’t in column C, the procedure stops. If the double-clicked cell is in row 1 or the header row, the procedure stops. The last check handles all rows below the last row in the Table object. When applying this procedure to your own data, you must modify these three statements to accommodate your Table object. For instance, if your dates are in column D, use the component If c <> 4. If your header row is in row 1, use the component If r = 1.
The last statement is a little more complicated. First, update the Table’s name. Then, keeping in mind which row the header is in, update the r + 2 component. The Rows.Count property returns 4 because there are four rows of data (excluding the header row from the count). The 2 in the r + 2 component accounts for row 1 and the Table’s header row. In our example, that evaluates to 6, our last row of data.
This is the one place where you might want to enhance your procedure a bit by adding a message box that explains why the procedure stops. I would find the message a bit annoying, but if you’re distributing this to others, they might find it helpful to know why the procedure isn’t working, even though I think it’s rather obvious.
The With block does the real work
With olApptItem
'Start and End include both date and time.
.Subject = ws.Cells(r, c - 1).Value
.start = ws.Cells(r, c).Value & " " & ws.Cells(r, c + 1).Value
.End = ws.Cells(r, c).Value & " " & ws.Cells(r, c + 2).Value
.Display
End With
The With block references an Outlook appointment form (olAppItem). When you enter the period character, Excel opens a list of properties and events, as shown in Figure E. You’ll add additional form information this way. I included only a few to keep things simple.
Figure E
The populating statements use relative addressing to find the right value. For instance, the subject text is in the same row (r) as the double-clicked cell. In the defining code, I set the two Long variables r and c to Target’s row and column
r = Target.Row
c = Target.Column
Target is the passed parameter that identifies the cell address. If you double-click the value in row 3, r equals 3. If you double-click a value in column C, c is also 3. By subtracting 1 from c, the code references the cell to the left of the double-clicked cell. In this case, that’s the Task column (column B). Because we’ve set r and c ahead of time, you need to change only the actual values to identify the relative position of the populating data.
The Start and End settings are a bit more complex because they accommodate the date and time. That’s why these two statements concatenate the values from two cells. Specifically, Start is the start date and start time. Similarly, End is the end date and end time. Notice that the start and end date use the same reference because the event doesn’t extend beyond one day. When referencing the time, you will need to update the values (1 and 2) accordingly to identify the cells containing those values.
The Display event displays the form, which is pre-populated with the appropriate values from the Table.
The last few statements destroy the objects and exit the sub. The following error-handler displays an error message (Figure C) only when called. You might want to add more specific error messages, but this simple code might be adequate.
At first, the procedure seems a bit daunting, but as I’ve shown, it’s simpler than you might realize with just a glance. Most of it is declaring and defining objects and variables. The demonstration files should run fine for you, with the exception of any unaccounted error(s) in the .xls format. When applying the procedure to your own work, you’ll need to update a few statements, but I’ve identified those spots for you.
