Being able to glance at your Microsoft Outlook calendar without clicking a thing has its advantages, and it’s certainly convenient. The good news is that it couldn’t be easier to arrange it. If you work with multiple monitors, so much the better. You can position it and leave it. With a quick turn of the head, you can see instantly where you need to be next! In this article, I’ll show you a few easy tricks with Outlook’s calendar.
SEE: 83 Excel tips every user should master (TechRepublic)
I’m using Microsoft 365 on a Windows 10 64-bit system. I recommend that you wait to upgrade to Windows 11 until all the kinks are worked out. This article isn’t appropriate for Outlook online, and there’s no demonstration file.
How to pin an Outlook calendar
The first thing we’ll do is pin the default Outlook calendar to the Desktop. The process is so simple, requiring only a few clicks. Let’s do that now:
- Click the Windows Start menu icon (the window in the bottom-left corner of the screen).
- Choose Calendar, and Windows immediately displays your calendar in Day mode. As you can see in Figure A, I have a busy afternoon.
Figure A
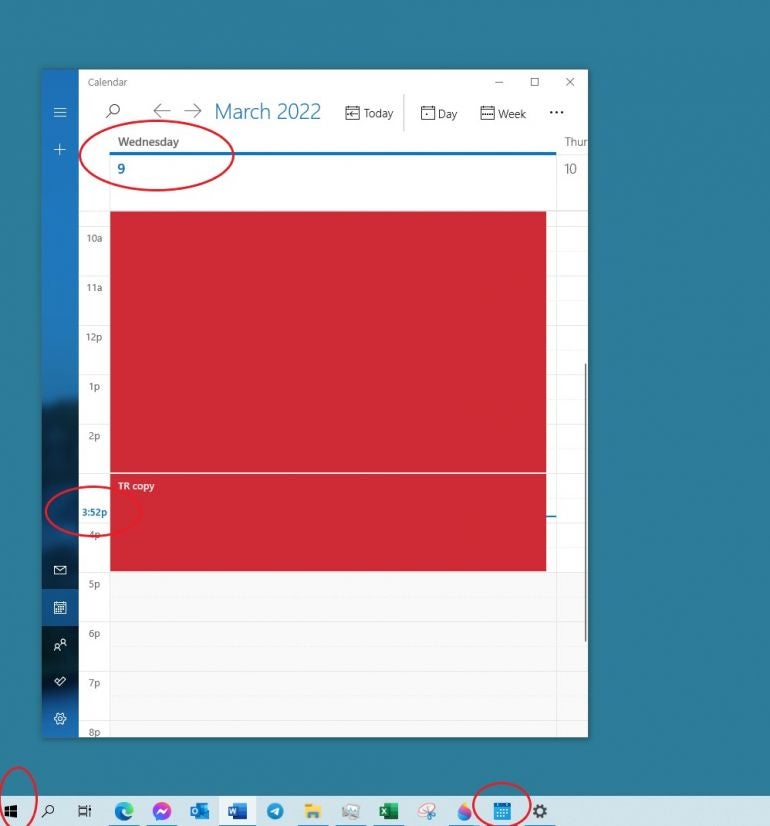
The calendar opens to the current day and time. But the entire day is there; just scroll up to see the morning appointments or down to see the afternoon. Notice the calendar icon on the taskbar. Right-click that icon and choose Pin to Taskbar. To close the calendar, click the Close icon (X) in the top-right corner of the calendar. To quickly access it again, simply click the Calendar icon on the taskbar!
In addition, the calendar isn’t just for viewing. You can work with the calendar as if you were working in Outlook’s Calendar window. You can change, delete or add appointments, and Outlook saves it. To change the view mode, click the three dots in the top-right corner of the calendar and choose another mode. Outlook will remember the mode, even if you close the calendar.
How to pin other Outlook windows
The calendar isn’t the only Outlook window you can pin to the Desktop. In the bottom-left corner, you’ll see the Outlook icons: Mail, Calendar, People and To Do. Simply click one to open that window. Then, pin it to the taskbar, the same way you did the calendar, or not. Your working needs will dictate the different windows you pin.
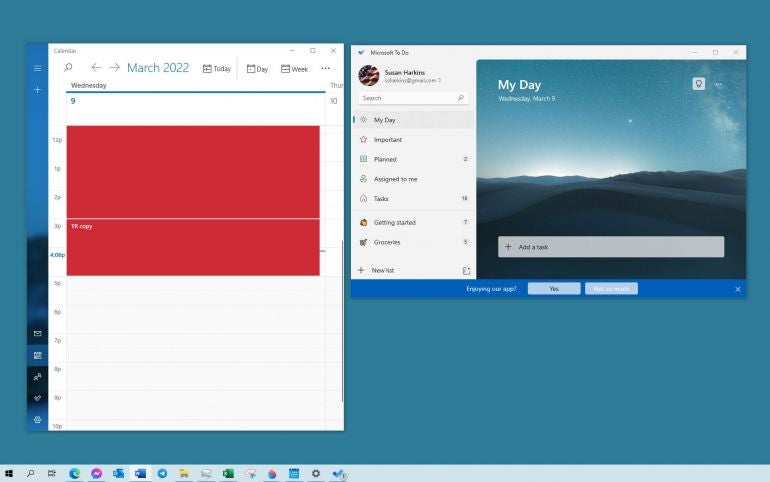
Figure B shows the To Do list next to the calendar. To see your task list, click To Do (in the left pane). Similarly to the calendar, you can make changes and they stick!
Figure B
Settings
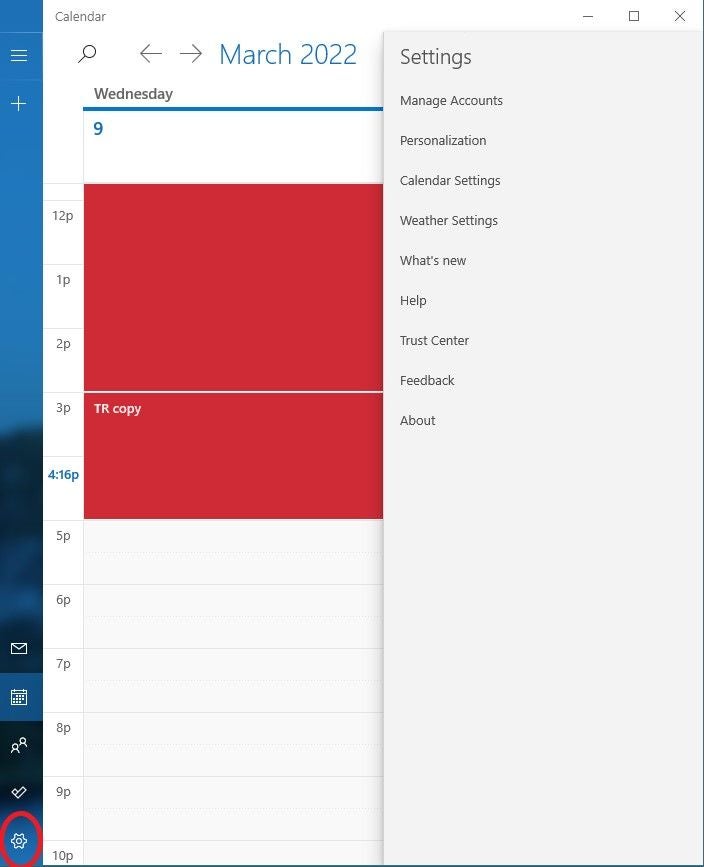
At the bottom of the Outlook window app list, you’ll see the Settings icon—it resembles a small gear. Figure C shows its main menu. For the most part, you can change basic settings for all of the Outlook windows you open at the Desktop level. This is something for you to explore later. There’s just too much to cover. To close the settings, click anywhere in the Outlook window but outside the settings pane.
Figure C
More calendars
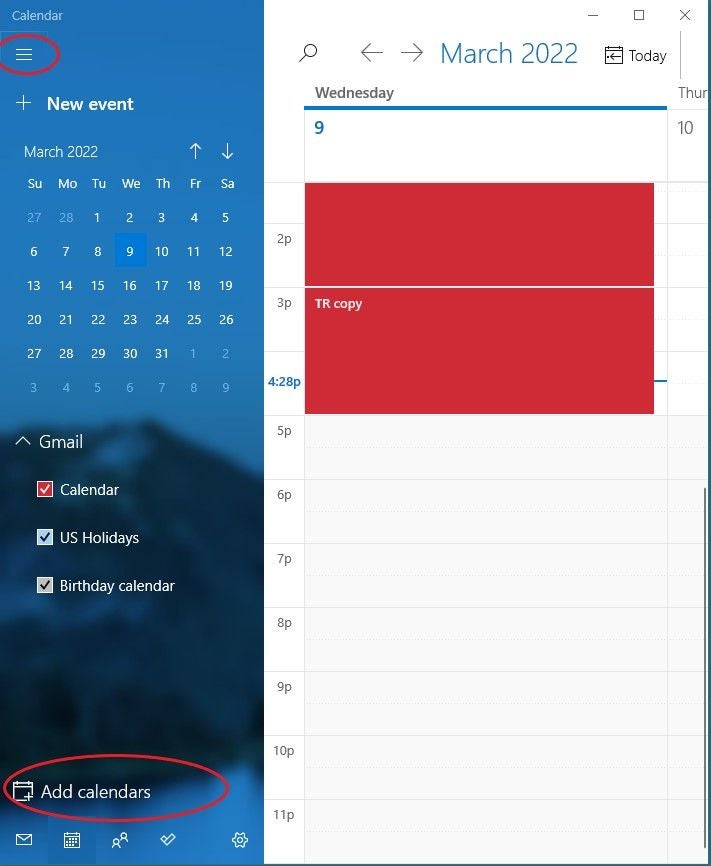
At the top-left corner of the Calendar window, you’ll see the cheeseburger icon. Click it to open the Navigation pane shown in Figure D. (This is a toggle icon; click it to the close the Navigation pane.) You’ll see the entire month; click any date to see that day’s events. In the middle, you’ll see your calendars. Check to add or uncheck to remove a calendar from the display.
Figure D
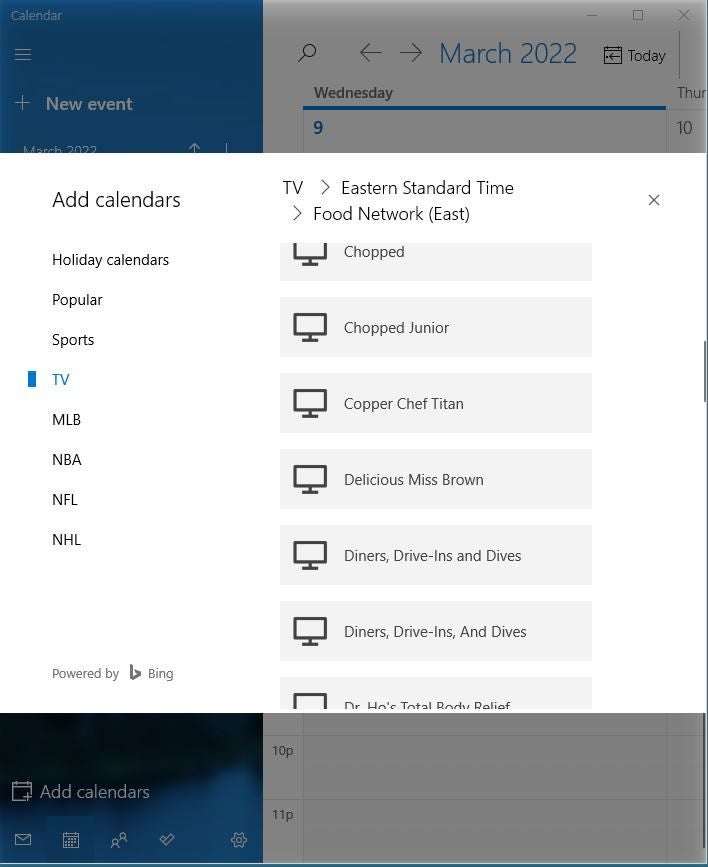
To add a calendar, click the Add Calendars option at the bottom. You might be a bit surprised to see what’s available. The first pane displays a list of available calendars—these aren’t your calendars, but public calendars, as shown in Figure E. Click TV and then choose a time zone. Choose a channel or network to see what’s on! Click a few shows to add them to your calendar. To remove a calendar, right-click it and chose Remove Calendar.
Figure E
Pinning the calendar to the Desktop is probably the most help to most people. However, as I mentioned, you can add all of the Outlook windows for easy access, and the more monitor room you have, the more efficient you can be.
If you’re running an older version, right-click the Desktop and choose Gadgets to get started.


