


PowerPoint 2016’s new transition, Morph, offers a simple way to represent motion across slides. Specifically, Morph can do the following:
- Create motion
- Zoom in and out
- Change one shape into another
More about Software
- Software Installation Policy
- Five Methods to Insert a Checkmark Into Microsoft Office Products
- How to Hide and Handle Zero Values in an Excel Chart
- How to Use Section Breaks to Control Formatting in Word
You can combine common options to move, resize, rotate, and change color of an object, all at once–morphing the objects in one slide into the objects on another. It’s ease of use does come at a cost: You can’t manipulate what PowerPoint does in between the first and second slides. You don’t have complete control, but most of the time that won’t matter.
This feature is limited to 365/Office 2016 users. It’s a rollout item that began to show up last winter. By now, everyone with 365/Office 2016 should have this feature. I’m using 365/Office 2016 on a Windows 10 64-bit system. This article assumes you know how to insert, drag, and arrange objects on a slide. For your convenience, you can download the demonstration .pptx file.
Common setup
Regardless of how you use Morph, all the possibilities will have a few things in common:
- A beginning slide–how the object looks in the beginning.
- An ending slide–what the object morphs into.
In addition, all Morph transitions are built the same way:
- Create a slide with an object in its starting position and with its original formatting. (You can work with more than one object.)
- Duplicate the slide. If the ending slide has different elements, copy and paste the object(s) into the ending slide. The second (or end) slide needs to follow the first.
- On the second slide–the duplicate–make changes to the original object(s). In this step, you want the objects to appear in their final state.
- Once you have both slides in place, apply the Morph transition to the second slide.
Now, let’s look at a few morphing examples. First, we’ll pull a few letters together to form a word. Then, we’ll move a big rectangle, zoom in on a picture, and finally, morph one shape into another.
Create motion
To create an object that moves from a starting position on one slide to an ending position on a second slide, you’ll create both slides and then do one or more of the following:
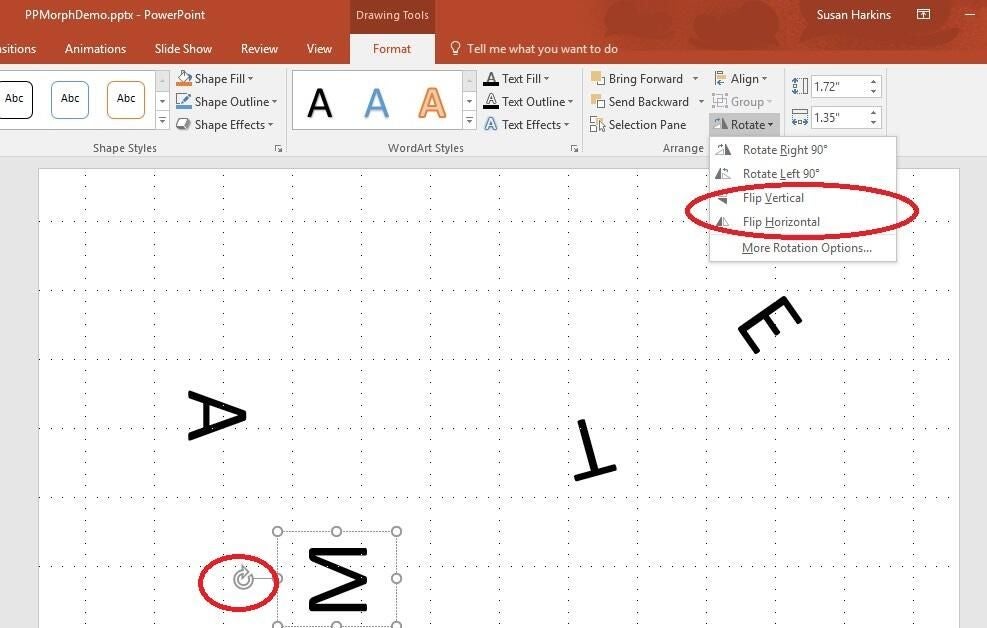
- To rotate an object, select the object on the duplicate slide and use the rotate handle to reposition the slide to its end position.
- To zoom in or out on the object, resize the object on the end side, accordingly.
- To flip an object, select it on the end slide and use the desired flip settings (in the Arrange group).
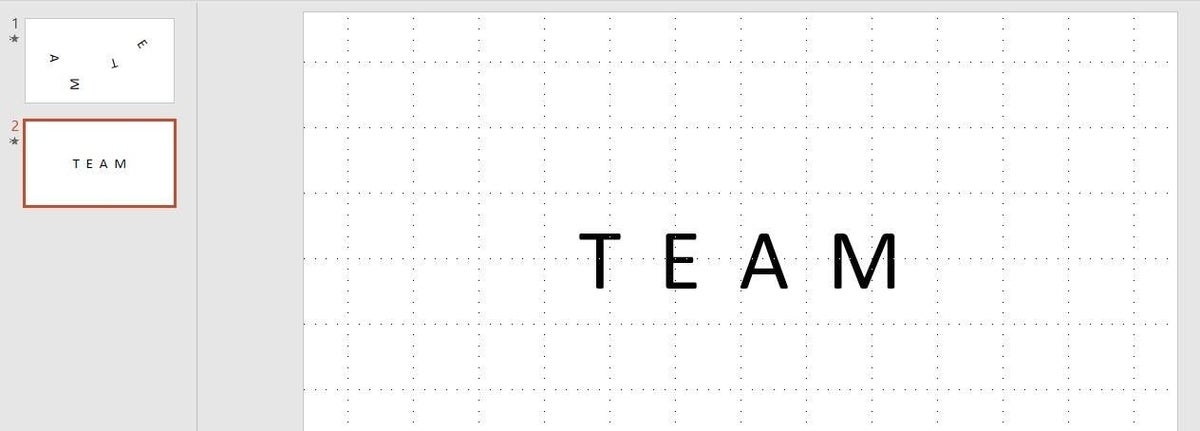
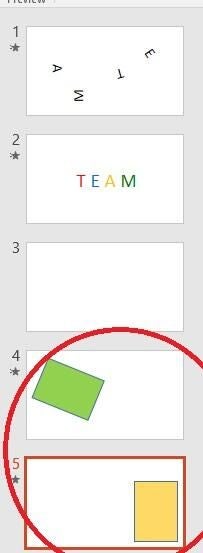
We can illustrate all three with a simple example. Specifically, we’ll mix up the letters of the word TEAM and then pull them together using Morph. We’ll begin by creating the two slides:
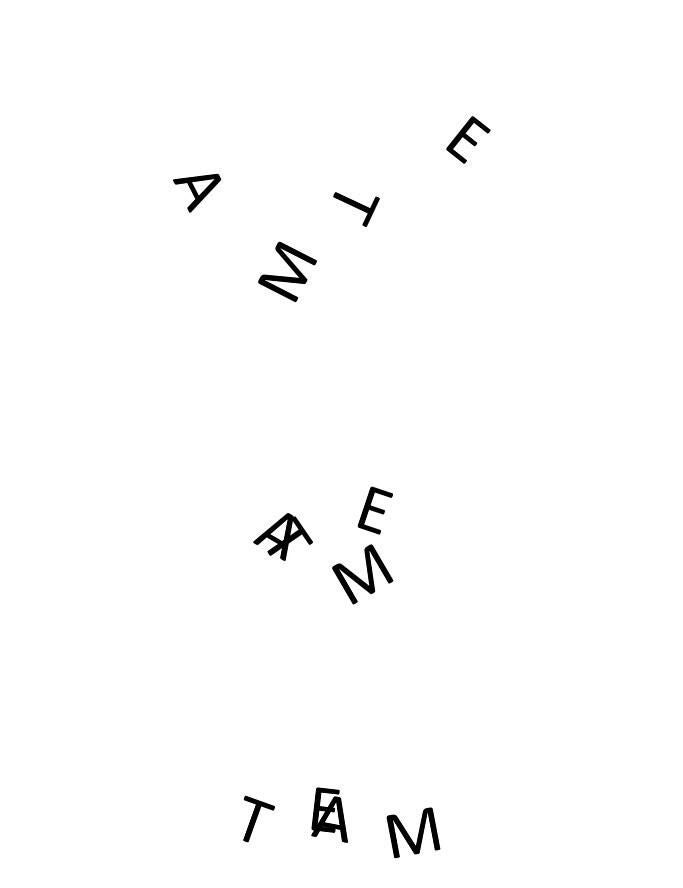
- First, use four text box characters, each with a letter in the word TEAM and position them in odd alignments and in no specific order.
- Duplicate this slide (Figure A) by right-clicking the slide and choosing Duplicate Slide from the resulting submenu.
- On the second slide, arrange the letters as you want them using the rotate handle and the flip settings. In the demonstration file, I dragged the letters to the end position and then used the rotation handle to set the T and E upright (Figure B). Then, I used the flip settings to set the A and M correctly. Finally, I selected all four text box controls and used the Arrange settings to align and space them all. Figure C shows the final placement.
Figure A

Start with two duplicate slides.
Figure B
Use the rotation handle and the flip handles.
Figure C
Reposition the text box controls to their end positions.
With both slides in place, the next step is to add the transition as follows:
- Click the second slide (the slide with the objects in their final position).
- Click the Transition tab.
- In the Transition To This Slide gallery, click Morph and watch the preview (Figure D). This transition accommodates objects, words, and characters but defaults to objects.
Figure D
Here’s the Morph transition at work.
This simple transition yields a lot for your work; it took only a few minutes to pull it together. However, with the ease comes a loss of control. You can’t control how PowerPoint moves the objects between the two slides. If you need a special path of motion, you must use the motion path animation settings, which is often a difficult process.
You’re not limited to movement; you can also change an object’s color, size, and other formatting. Figure E shows the result of changing the font type and color of the letters. This isn’t difficult. Once you have the letters (objects) in place, simply reformat them and the transition will take care of the rest.
Figure E

You can morph formatting.
See: Microsoft Stream: The future of secure business video
Move shapes
You can use this technique with shapes, as well. Figure F shows two slides with two rectangles of different colors and sizes. Following the same process, add a green rectangle to the first slide. Then duplicate that slide, move the rectangle to its end position, and change its fill color and size (a subtle change). Figure G shows its morph process. You can work with more objects and even have them fly in from beyond the edge of the slide and fly out the other side.
Figure F
These two slides create the morph effect shown in Figure G.
Figure G
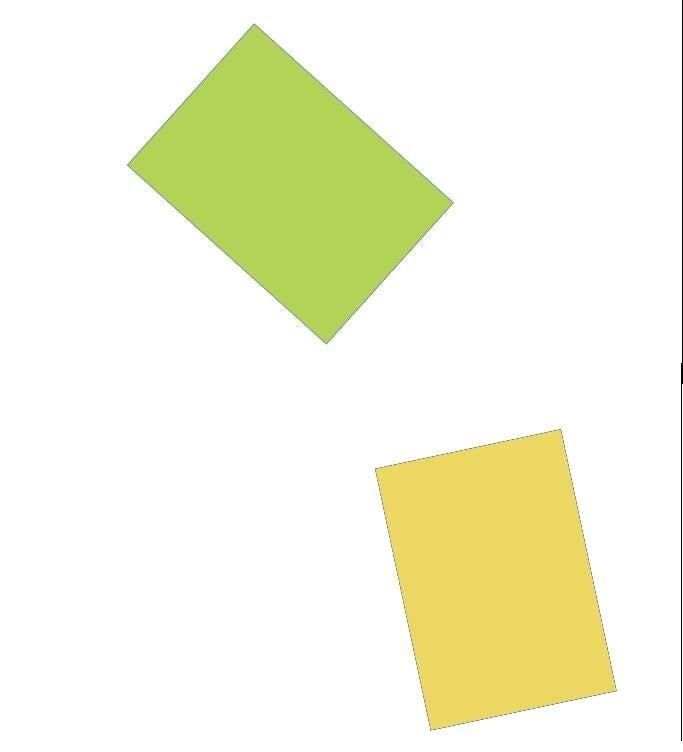
The first rectangles morphs into the second in front of your eyes.
Zoom in
You can also use Morph to zoom in (or out). Figure H shows an inserted picture that we’ll zoom in on using this feature. Duplicate the slide and then resize the picture, making it much larger. You can pull out the corners or right-click the picture and use the Size and Position options. If necessary, you can move the picture to reposition the zoom area, but don’t move the picture too much. After you have the picture on the second slide resized and positioned, click the Transition tab and then click Morph in the gallery.
Figure H
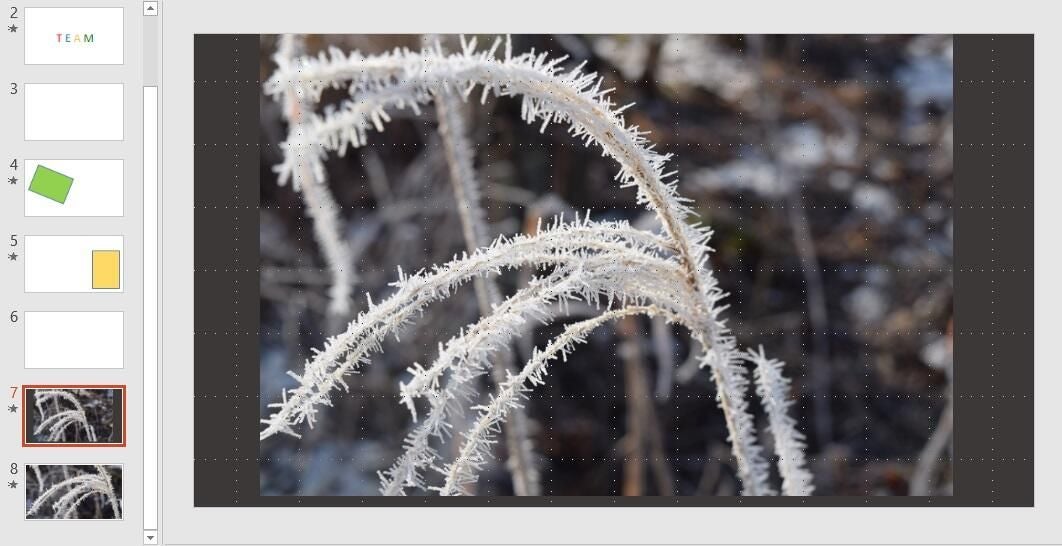
Zoom in on the frost particles.
Figure I

Morph zooms in on an area.
Although you can’t see it in the figures, PowerPoint changes from the first picture to the zoomed insert. You can see the picture enlarge onscreen.
Morph a shape
Earlier, I showed you how to quickly move and reformat a shape. If you start with the right shape, you can actually morph that shape into a new one. By right, I mean the built-in AutoShapes that support the reshape tools (not all of them do). As you can see in Figure J, the rounded rectangle shape has a yellow handle that most shapes don’t have. This yellow handle is a reshape tool, which you can drag to change the original shape.
Figure J
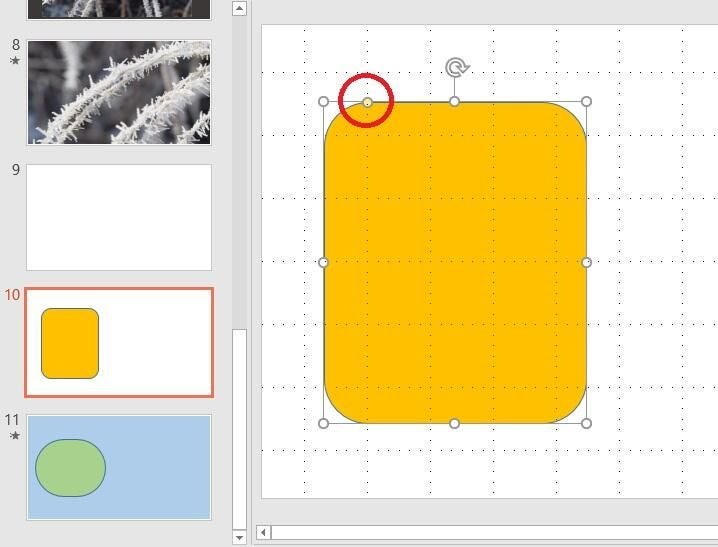
Look for the reshape tool.
For this example, add a rounded rectangle to the slide and duplicate the slide. On the second slide, use the reshape tool to create a new shape. Change its position and color and apply a background color. When you’re finished, click the Transition tab and choose Morph in the gallery. Figure K shows the morph effect between the two slides. Depending on the shape you choose, the change can be much more dramatic. You can even combine shapes to create new shapes and morph them together or separately.
Figure K
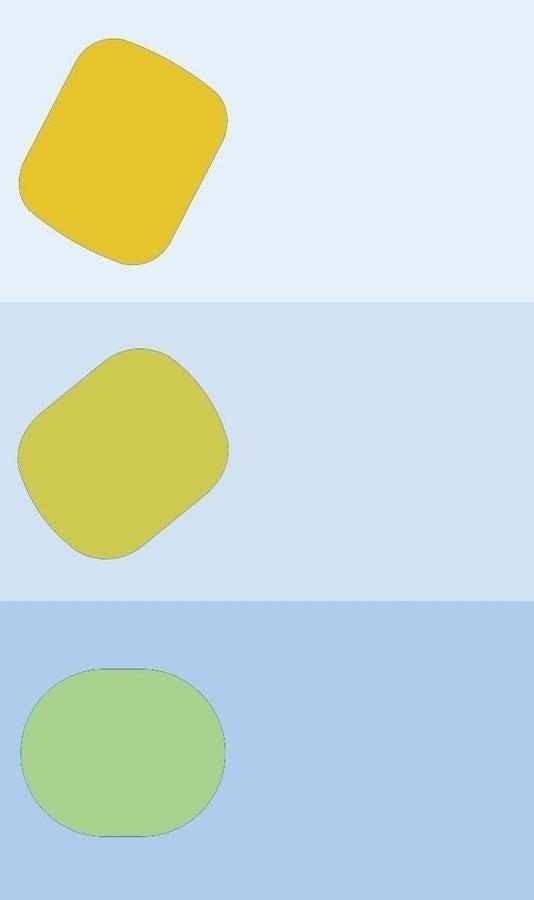
Morph changes the shape of the original shape.
Missing morph
What you can’t see in any of the figures is the movement from one slide to another. The change is gradual, subtle–not abrupt. You see the shapes, position, and colors slowly morph from the first object to the second. For the full effect, download the demonstration .pptx file. The feature is amazingly simple to implement and the only real limit is your own imagination.
Send me your question about Office
I answer readers’ questions when I can, but there’s no guarantee. Don’t send files unless requested; initial requests for help that arrive with attached files will be deleted unread. You can send screenshots of your data to help clarify your question. When contacting me, be as specific as possible. For example, “Please troubleshoot my workbook and fix what’s wrong” probably won’t get a response, but “Can you tell me why this formula isn’t returning the expected results?” might. Please mention the app and version that you’re using. I’m not reimbursed by TechRepublic for my time or expertise when helping readers, nor do I ask for a fee from readers I help. You can contact me at susansalesharkins@gmail.com.