
Image: monticello/Shutterstock
Some Microsoft PowerPoint slides have a lot going on. There’s might be a lot of small details or some important content, and editing that content isn’t practical. When this happens, you can create a zoom shape and use the grow animation to zoom in on the detail or content you’re talking about. Doing so allows you to retain the big picture, both visually and conceptually, while focusing on the heart of the discussion. In this article, we’ll create a zoom effect by animating a special shape, which I’ll call the zoom shape.
SEE: 69 Excel tips every user should master (TechRepublic)
This technique is simple but has a few steps:
- We’ll create a duplicate slide with the same image.
- Using a shape, we’ll outline the zoom area to create a zoom shape—the area we want to draw attention to by making it larger. This is a term I made up; you won’t find it as a shape option or setting.
- We’ll merge the image and the zoom shape to remove everything but the zoom shape.
- Finally, we’ll move the zoom shape to the original slide and add the grow animation.
I’m using Microsoft 365 on a Windows 10 64-bit system, but you can use earlier versions. You can work with your own image or download the demonstration .pptx and .ppt files. This article assumes you have basic PowerPoint skills, such as inserting shapes and applying settings.
SEE: Windows 10: Lists of vocal commands for speech recognition and dictation (free PDF) (TechRepublic)
How to create the zoom shape
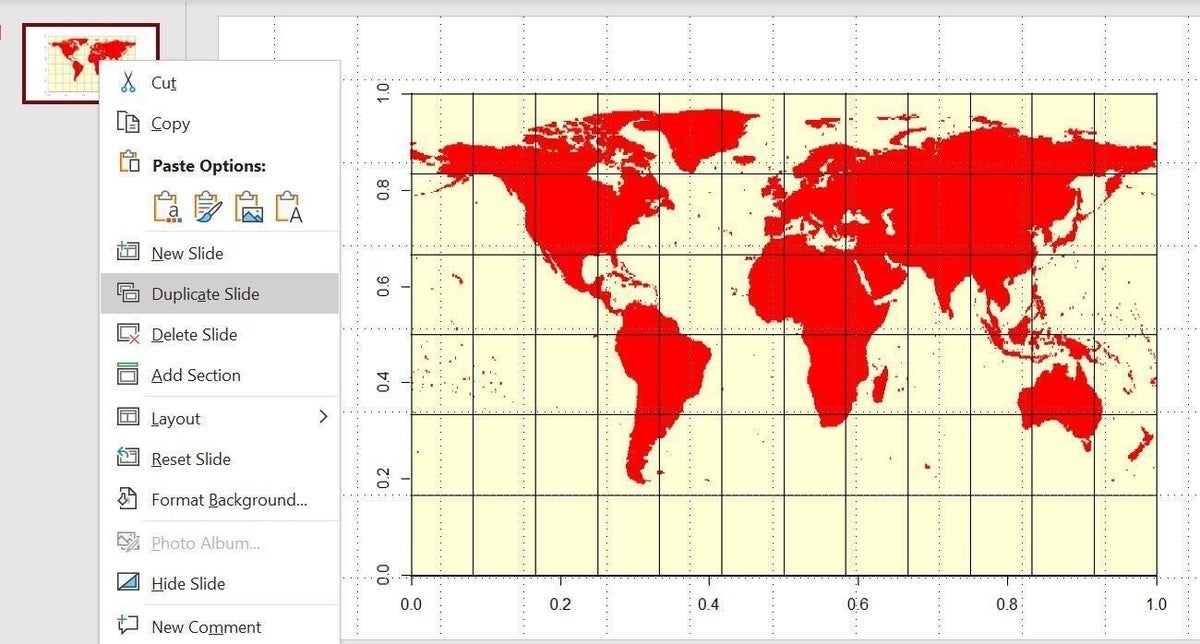
We’re going to need two copies of the map image shown in Figure A. One will be the actual slide; the second will supply the zoom shape. To create a duplicate slide, right-click the original map slide in the Navigation pane and choose Duplicate Slide from the resulting submenu (Figure A). PowerPoint will add the second slide, which you’ll see in the Navigation pane just below the original.
Figure A
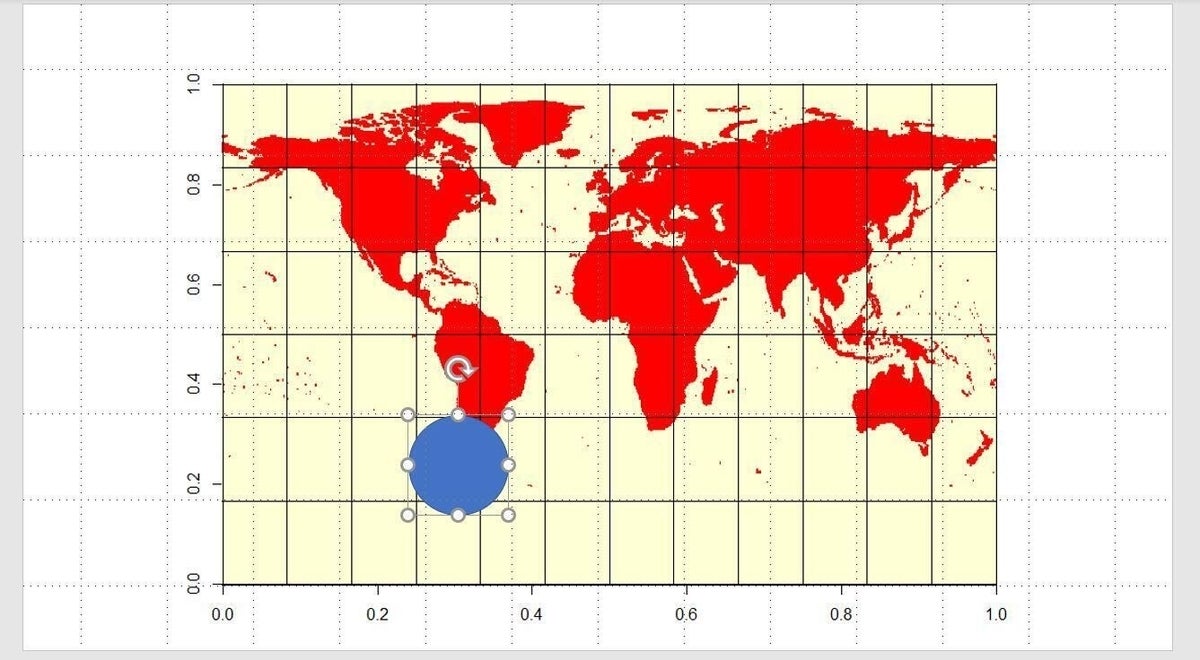
Now we’re ready to create the zoom shape by covering that area with an oval shape and then merging the map image and the shape. Move to the second slide (if necessary) and then click the Insert tab. Grab the oval shape (in the Basic Shapes section) and while dragging it over the southern tip of South America hold down the Shift key to get a perfect circle, as shown in Figure B.
Figure B
With the shape still selected, use the Shape Outline option on the contextual Shape Format tab to set the outline color to red and the weight to 3 points (or anything you like).
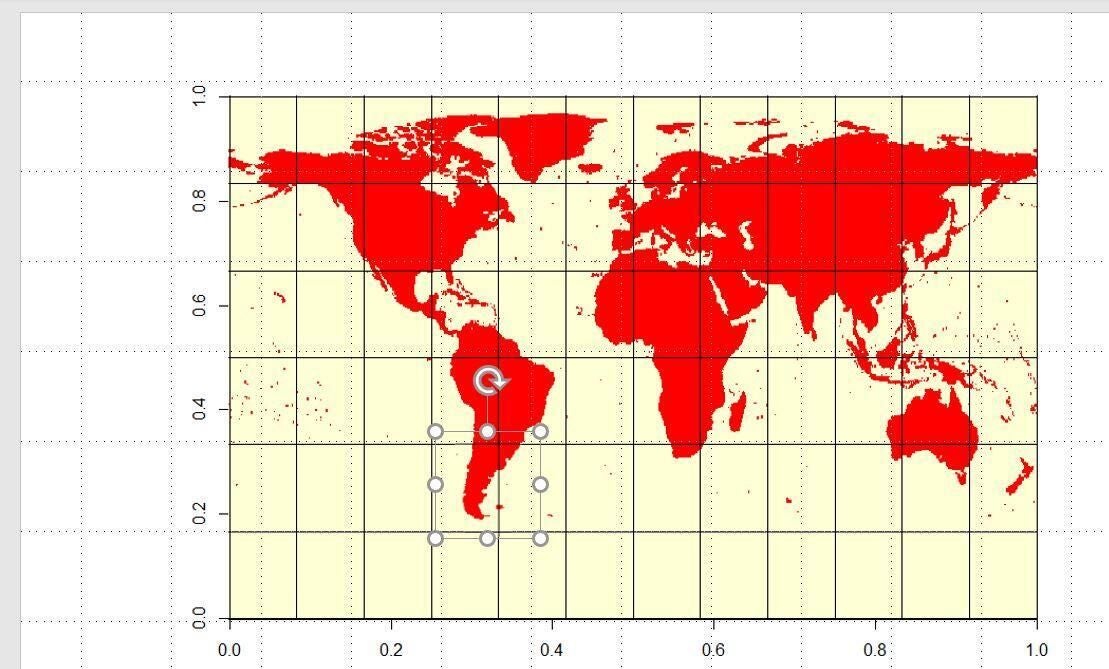
The next step is to merge the map and the zoom shape. To do so, select both objects by selecting one, holding down the Shift key and clicking the other. With both the map and the shape selected, click the Merge Shapes dropdown (in the Insert Shapes group), and choose Intersect. Figure C shows the results; PowerPoint hides everything but the image in the zoom shape. If the Merge Shapes option is dimmed, make sure to select both the map and the shape; this feature doesn’t work with only one selected object.
Figure C

At this point, I want to mention that this effect won’t always be easy to apply if the zoom area has lots of surrounding or overlapping content. In Figure C, you can see that the zoom shape includes the longitude and latitude lines on the map. I did this on purpose; a picture is worth a thousand words. If those lines distract from the zoom shape, you can look for a new map that doesn’t include those lines. Or you can continue—that’s what we’re going to do. With the zoom shape created, it’s time to move it to the original slide and add the animation.
How to animate the zoom shape
We’re ready to add the zoom shape (in the duplicate slide) to the original slide and add the animation that “zooms in.” To do so, simply paste the zoom shape to the original slide and drag it until it’s a perfect match, as shown in Figure D. In this case, those lines we talked about are helpful! If you can’t line it up perfectly, use the Nudge feature to move the zoom shape a tad. To do so, hold down the Ctrl key and click the appropriate arrow key.
Figure D
With the zoom shape in place, we’re ready to move on to the last step. Before applying the animation, let’s determine how we want to trigger it. Most likely, you’ll want to use a click event; that way you can trigger the animation when you’re ready. When applying this to your own work, you can choose any event you like.
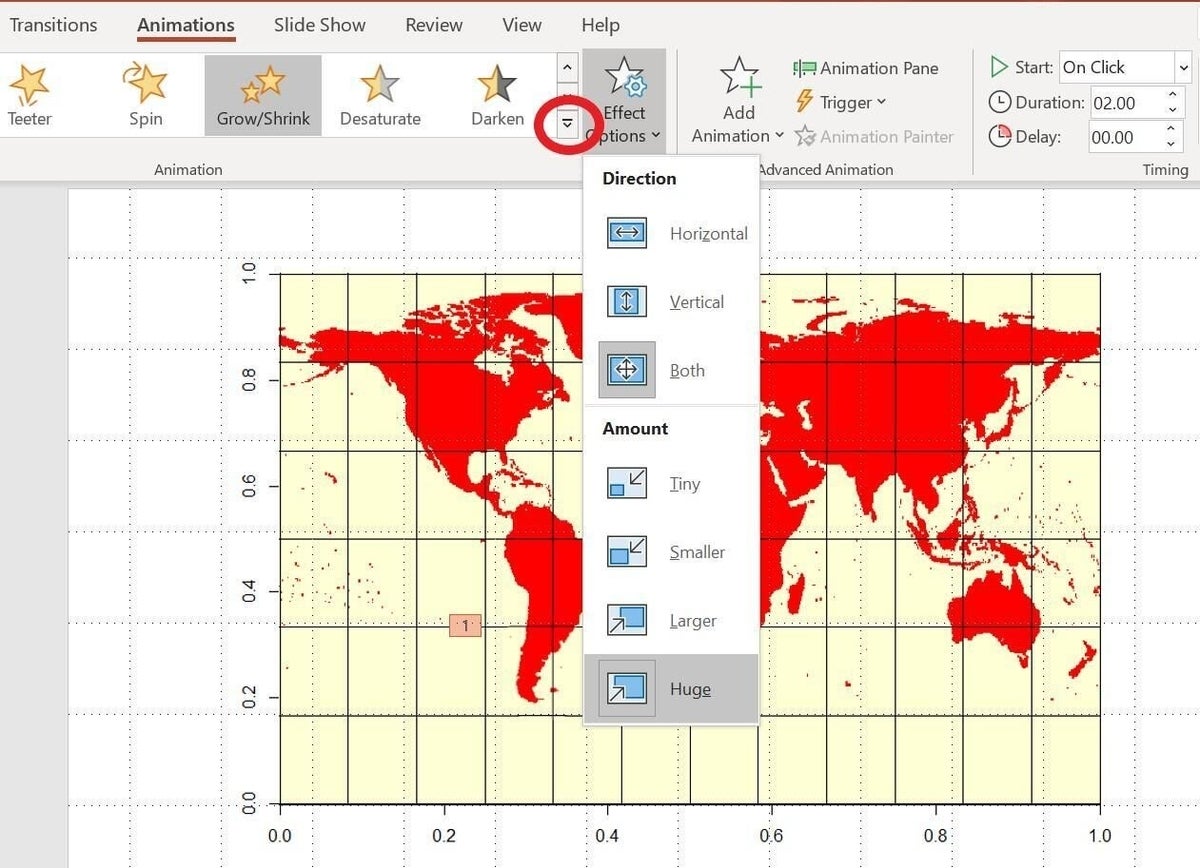
With the zoom shape selected, click the Animations tab and then click the gallery’s More button (circled in Figure E) to expose all the animations. In the Emphasis section, click Grow/Shrink. Next, from the Effect Options dropdown, choose Huge.
Figure E
You’re done! To see the effect, run the show by pressing F5. When you’re ready to see the zoom effect, as shown in Figure F, click the slide.
Figure F
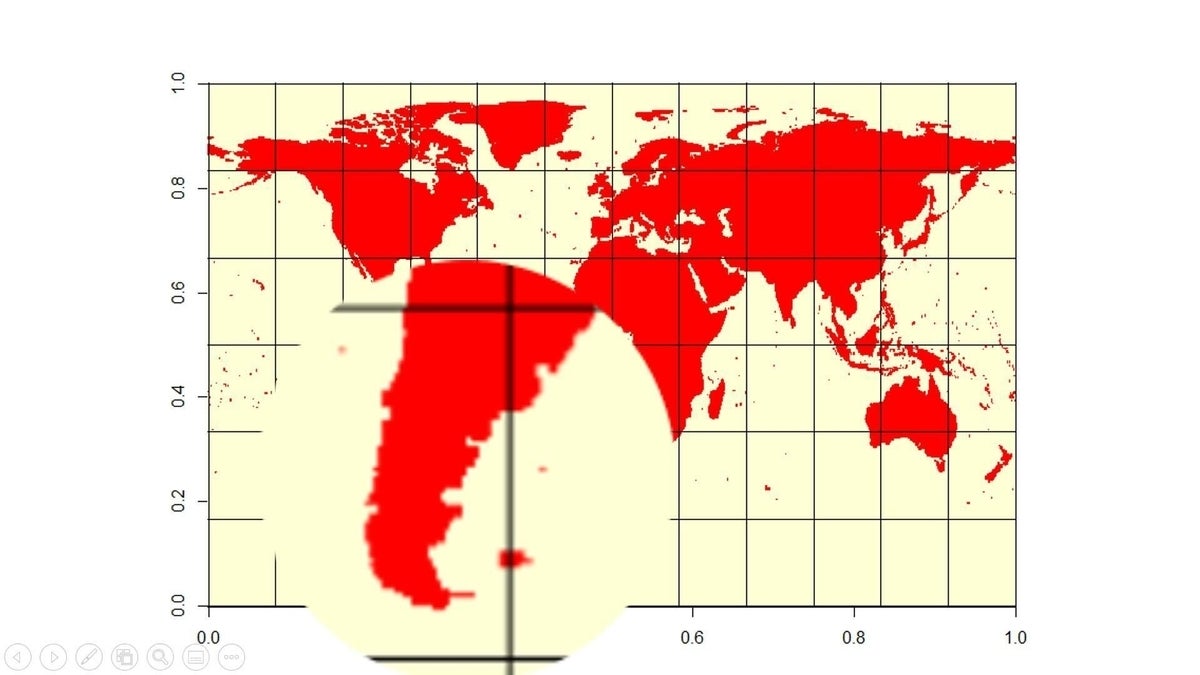
This zoom technique requires a few steps and as shown, a bit of thought when selecting the best image, but it’s easy to implement considering the results.

