
Carla uses different headers for different documents, and she considered creating a different template for each header. She could go that route, but if everything else–styles, formatting, and so on–are the same, Carla doesn’t need multiple templates. Instead, Carla should consider adding each of her custom headers to the Headers gallery using Word’s Quick Parts feature.
I’m using Word 2016 (desktop) on a Windows 10 64-bit system, but this technique will work in earlier versions. Although the browser edition will let you edit a header (somewhat), the Headers gallery isn’t available. There’s no demonstration file because you won’t need one. This article assumes you know how to create a Word header.
Note: This article is the first of a three-part series. You’ll find the next to articles here:
- How to create custom galleries and categories to control organization in Word docs
- How to add custom galleries to Word’s QAT and ribbon for quick access
What are building blocks?
Word’s Quick Parts feature comprises reusable content in the form of AutoText, document properties, fields, and building blocks. These pre-designed elements contain structure, formatting, text, and graphics, ready to go with a simple click. You’re already familiar with them–many of them are available via Word’s galleries.
What makes them so useful is that you can save custom content as a building block. When you do so, Word allows you to save the custom building block to its many galleries. Simply create and format the text and graphics. Then add them to the appropriate gallery via the Quick Parts feature (on the Insert tab). In this article, we’ll add a custom header to the Headers gallery by saving the custom content as a building block. If the relationship still isn’t clear, don’t worry.
SEE: Cost comparison calculator: G Suite vs. Office 365 (Tech Pro Research)
Save the headers
First, we need a custom header to add to the Headers gallery. Figure A shows two similar, but slight different headers. The example headers are simple on purpose, so as not to distract from the technique. You don’t need to recreate our header; you can use any header elements you like.
Figure A

You’ll need at least two different headers to see the full benefit of this technique.
Once you have a customized header that you want to reuse, do the following to save it as a building block item:
- With the header open in edit mode press Ctrl+a to select everything in the header.
- Click the Insert tab, and then choose Save Selection to Quick Part Gallery (Figure B) from the Quick Parts drop-down (it’s in the Text group). Or, press Alt+F3.
- In the resulting dialog, give the building block a meaningful name–these appear in alphabetical order in the gallery.
- Choose Headers from the Gallery drop-down (Figure C). You can save the custom header to any gallery, but the Headers gallery makes the best sense in this example.
- You don’t need to change any other settings, so click OK.
Figure B

Save the custom header as a building block using Quick Parts.
Figure C
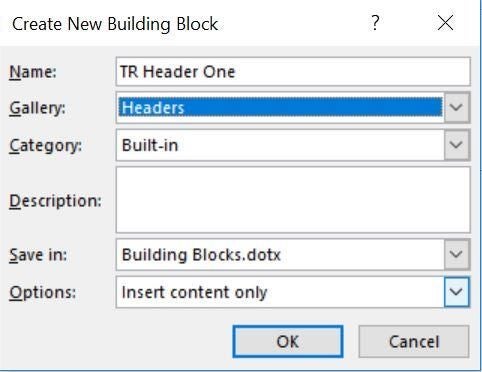
Save the custom header to the Headers gallery.
Quick access to different headers
After saving all your custom headers to the Headers gallery, you’re ready to add them to your documents. Open a new document (or an existing document), and do the following:
- Open the header in edit mode.
- Click the Header drop-down in the Header & Footer group to see the Headers gallery. You’ll see built-in headers as thumbnails.
- Thumb down until you see TR Header One and TR Header Two (Figure D).
- Select one of the custom headers. That’s it!
Figure D
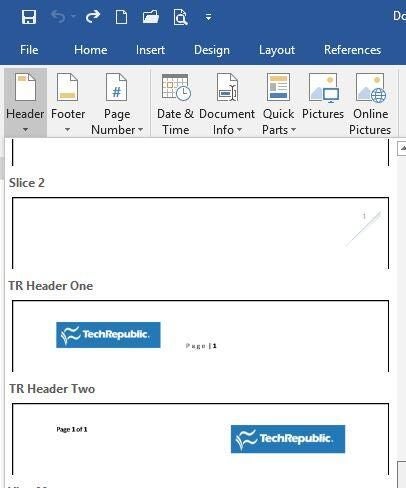
Your custom headers are now part of the built-in Headers gallery.
You used Word’s Quick Parts feature to save custom headers to the Headers gallery. They’re not saved with the Normal template, they’re saved in Building Blocks.dotx (another template). Consequently, your custom headers are available to all open documents–both new and existing.
Once you save a header (or any element) to a gallery, you might need to maintain it a bit. Let’s look at how you delete and modify one of these custom elements.
Maintaining building blocks
Removing a custom element from a gallery is easy. Display the gallery, right-click the appropriate thumbnail, and choose Organize and Delete from the resulting submenu, as shown in Figure E. In the Building Blocks Organizer (Figure F) click Delete. Click Yes to confirm, and then Close. You can also access the Building Blocks Organizer via the Quick Parts drop-down.
Figure E
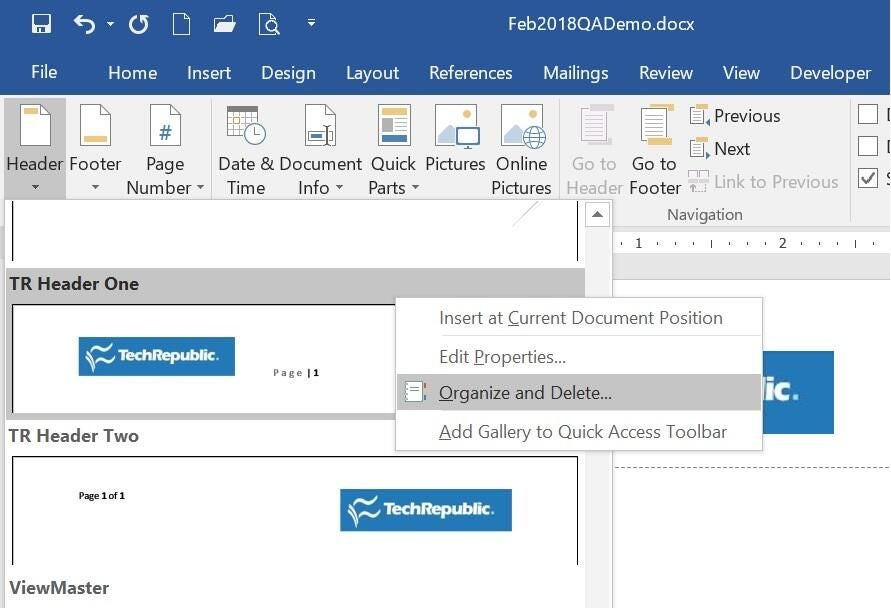
Access the Building Blocks Organizer.
Figure F
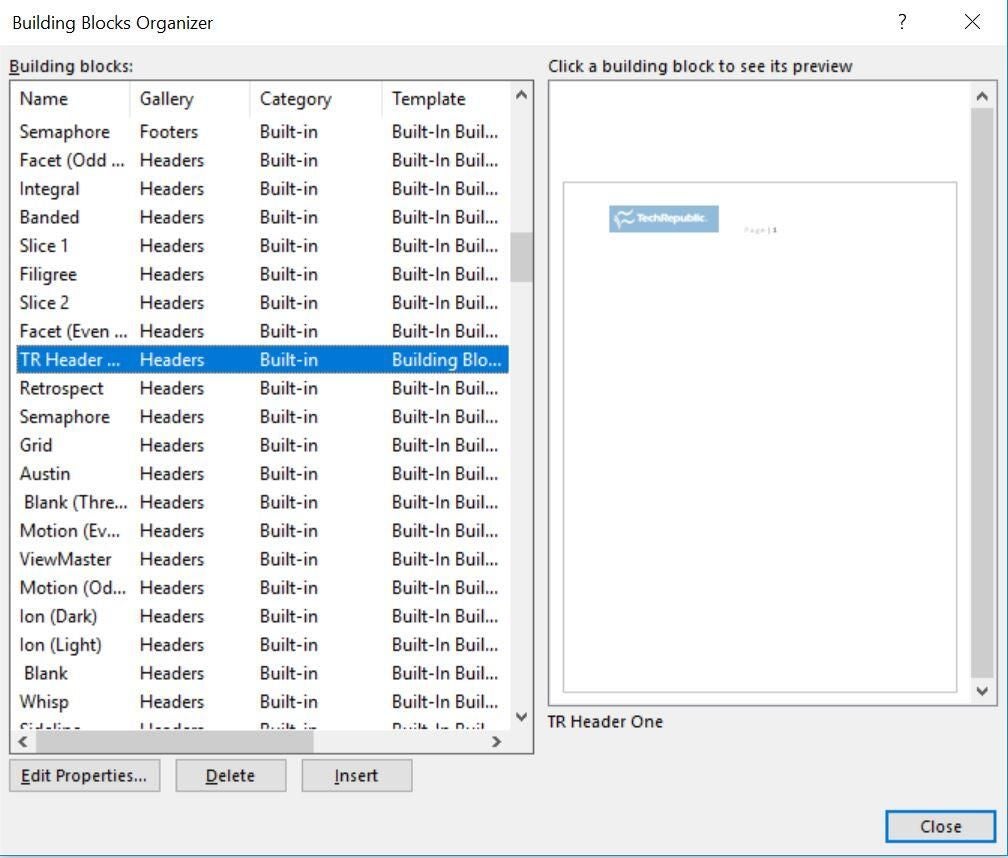
Click Delete to remove the selected building block.
You can also use both routes to modify the element as a building block. However, you’re not changing the element’s design; you’re changing its building block properties. If you need to modify the design, you’ll have to start over and replace the existing building block.
SEE: 10 all-purpose keyboard shortcuts to boost your Word efficiency (free PDF) (TechRepublic)
A little insight
When creating the custom building block, you used the default Insert content only Options setting (see Figure C). If your header contains line spacing, indents, alignments, and so on, you might not get the results you expect when inserting the custom header via the gallery. In this case, you might need to choose Insert content in its own paragraph from the Options drop-down. Be sure to include the paragraph mark at the end of the section (Figure G). Pressing Ctrl+a with the header in edit mode will select the paragraph mark. (To display paragraph marks, click Show/Hide in the Paragraph group on the Home tab.)
Figure G
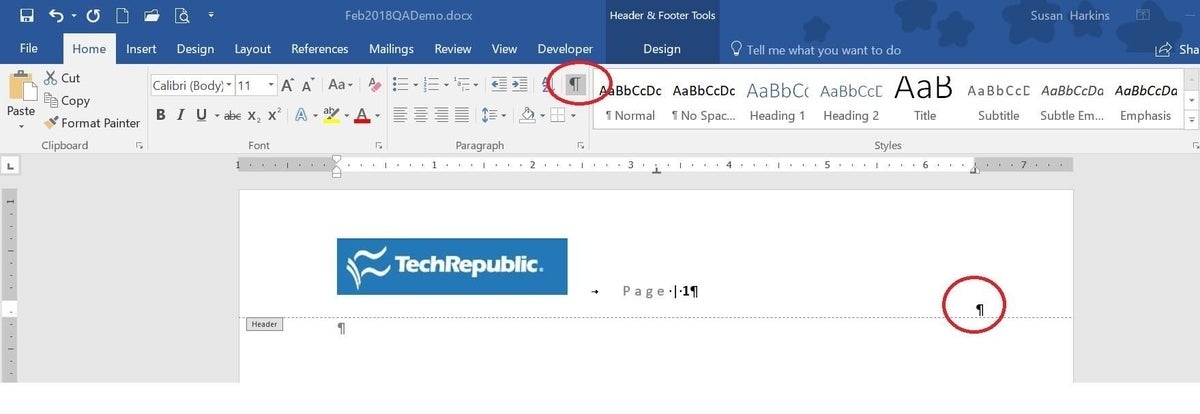
Be sure to include the paragraph mark.
Every header you add this way will be available to all documents–even existing documents. You could change that setting and save the custom headers to only the Normal template or a custom template.
You can add custom elements to most galleries using this technique so don’t stop with a few headers!
Send me your question about Office
I answer readers’ questions when I can, but there’s no guarantee. Don’t send files unless requested; initial requests for help that arrive with attached files will be deleted unread. You can send screenshots of your data to help clarify your question. When contacting me, be as specific as possible. For example, “Please troubleshoot my workbook and fix what’s wrong” probably won’t get a response, but “Can you tell me why this formula isn’t returning the expected results?” might. Please mention the app and version that you’re using. I’m not reimbursed by TechRepublic for my time or expertise when helping readers, nor do I ask for a fee from readers I help. You can contact me at susansalesharkins@gmail.com.
See also…
- How to change an Excel slicer’s visual impact with a few simple steps (TechRepublic)
- Four ways to specify dates using Excel data validation (TechRepublic)
- Office Q&A: Counting conditional unique values in Excel (TechRepublic)
- How to create two advanced dynamic lists in Excel (TechRepublic)
- Five readers add value to 2017 Office articles (TechRepublic)


