


Email signing certificates can prove that emails really did come from you; these certificates can also be used to encrypt the emails you send. Follow the steps in this tutorial to learn how to create a certificate, import it into any version of iOS, assign it to an email account, and then send a message using your certificate.
SEE: Mobile device computing policy (Tech Pro Research)
How to create an email certificate
Must-read security coverage
- UK Police Convicts Pair in £5.5 Billion Bitcoin Launder Case
- Blackpoint Cyber vs. Arctic Wolf: Which MDR Solution is Right for You?
- How GitHub Is Securing the Software Supply Chain
- 8 Best Enterprise Password Managers
Many corporate email accounts use certificates to verify users sending the emails and provide encryption for messages sent inside of the company; however, if you don’t already have an email certificate, you can easily generate one using Comodo’s free secure email certificate.
After filling out the form and confirming your email address, you’ll be given a certificate file that you can download to your computer. Download the file and keep it in a safe place for use in the next step. The certificate that is generated is valid for one year, after which this process will need to be completed again to generate a new certificate that’s valid for the following year.
SEE: Special report: Cybersecurity in an IoT and mobile world (free PDF) (TechRepublic)
How to import an email certificate
To import an email certificate to an iOS device, follow these steps.
- Email yourself the certificate file (a .p12 file).
- Open the email on your iOS device.
- Tap the .p12 certificate file in the attachments list of the email.
- iOS will prompt you to install the certificate. Tap Install, and then enter your iOS password.
Note: You can optionally use AirDrop from a macOS device to iOS to AirDrop the .p12 file, which will prompt you to install the certificate.
Either action will cause the certificate to be installed in Settings.app | General | Profiles & Device Management | Configuration Profiles.
How to assign a certificate to an email account
To assign a certificate to an email account and start sending signed emails, perform these steps.
- Open Settings.app.
- Navigate to Accounts & Passwords.
- Select the email account you wish to configure.
- Select Account | Advanced.
- Locate the S/MIME section and enable the toggle for S/MIME.
- Select the Sign section, and enable the toggle for Sign, selecting the certificate you imported from the certificates list (Figure A).
Figure A
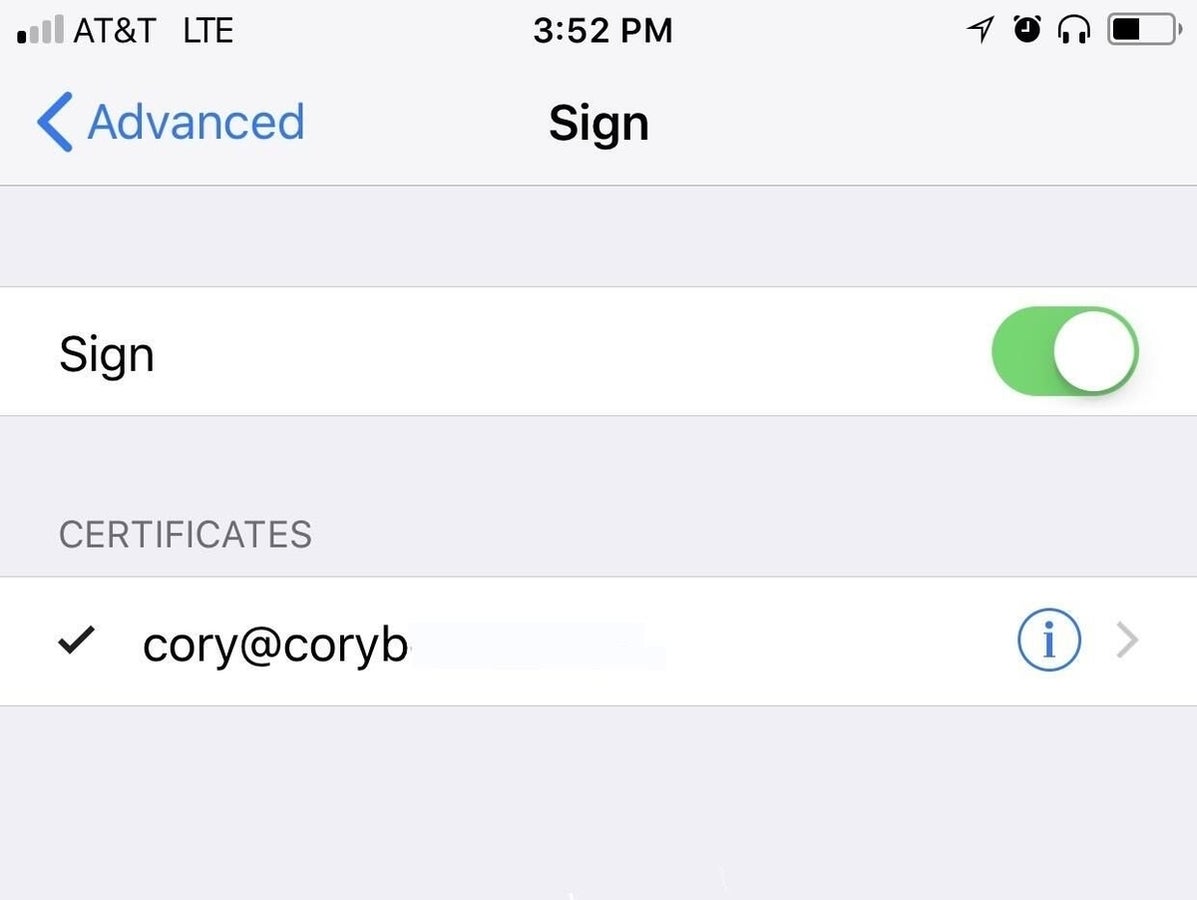
If the certificate doesn’t appear in this listing, it’s possible the certificate expired, wasn’t properly imported, or wasn’t for the email address you’re attempting to assign it to.
SEE: Secure your iPhone and iPad: Change these iOS 11 privacy and security settings now (ZDNet)
How to send a signed email message
To send a signed message, just follow the same flow that you’ve always used for sending a signed message. By default, if an S/MIME has been selected, iOS Mail will automatically sign the message. If you have a certificate that supports encryption, you’ll be able to tap the Lock that will appear when entering a “To” address in the compose view–this will cause the message to be encrypted to the sender.
Note: This certificate is only valid inside of the Apple Mail app and doesn’t work with other third-party apps; you’ll need to follow the third-party app setup to determine if you can import a certificate.
