Image: grmarc/Shutterstock
Several versions of Microsoft Outlook ago, you could use color to identify appointments by quickly applying a category. Outlook no longer supports this feature, although, with a little roughhousing, you can still get to them. Because they’re not supported and because you do have to jump through hoops to retrieve them, I don’t recommend their use any longer. I expect them to disappear with every upgrade, and if they don’t completely disappear, they might stop working as expected, and you might not even realize it.
SEE: Windows 10: Lists of vocal commands for speech recognition and dictation (free PDF) (TechRepublic)
Must-read Windows coverage
- CrowdStrike Outage Disrupts Microsoft Systems Worldwide
- 10 Best Project Management Software for Windows in 2024
- Windows 10 Extended Security Updates Promised for Small Businesses and Home Users
- Securing Windows Policy
You can, however, still use conditional formatting to color code appointments. The good news is, once the formatting rule is in place, you won’t have to do anything. Outlook will apply the color automatically. In this article, I’ll show you how to use this feature in Microsoft 365’s desktop version of Outlook. You can use conditional formats with other Outlook items, such as email messages. The process is the same, but you need to be in the appropriate window.
I’m using Microsoft 365 desktop on a Windows 10 64-bit system, but you can use earlier versions. There’s no demonstration file; you won’t need one. This feature isn’t supported in Outlook Online.
Make a plan for your Outlook Calendar color codes
Before you start creating rules to color-code your appointments, spend a few minutes deciding which colors you want to apply and to what types of appointments. I can’t give an exact rule of thumb because everyone works differently. For instance, you might color code appointments by subject matter or project titles. Or you might color code by whether it’s mandatory or optional. There are all kinds of reasons you might want a particular appointment to stand out.
SEE: 83 Excel tips every user should master (TechRepublic)
The type of appointment that you choose to color-code should have a consistent property or content for the rule to find. For that reason, you do need to think it all out just a bit before diving right in. We’ll color-code appointments by a trigger phrase in the subject text, “Restructure Committee.” If someone sends a message to the group but uses a different subject, the condition won’t be met. That’s why this needs a bit of up-front planning.
Before we can do anything though, we need an appointment.
How to add an appointment in Outlook Calendar
Before we add the conditional formatting rule, let’s create an appointment for the restructure committee, as follows:
- Double-click Sept. 7, 2021, a Tuesday in your calendar (I’m using the Month view; I just find it easier when creating appointments because you get a bigger picture of everything that’s going on.) Doing so creates an Event item. Alternatively, you can click New Appointment and create it from scratch, but for now, use the double-click.
- In the resulting dialog, enter the name Restructure Committee. When applying to your own work, the name should be descriptive and meaningful so it’s easy to find and maintain.
- Uncheck the All Day option so the start and end times are available.
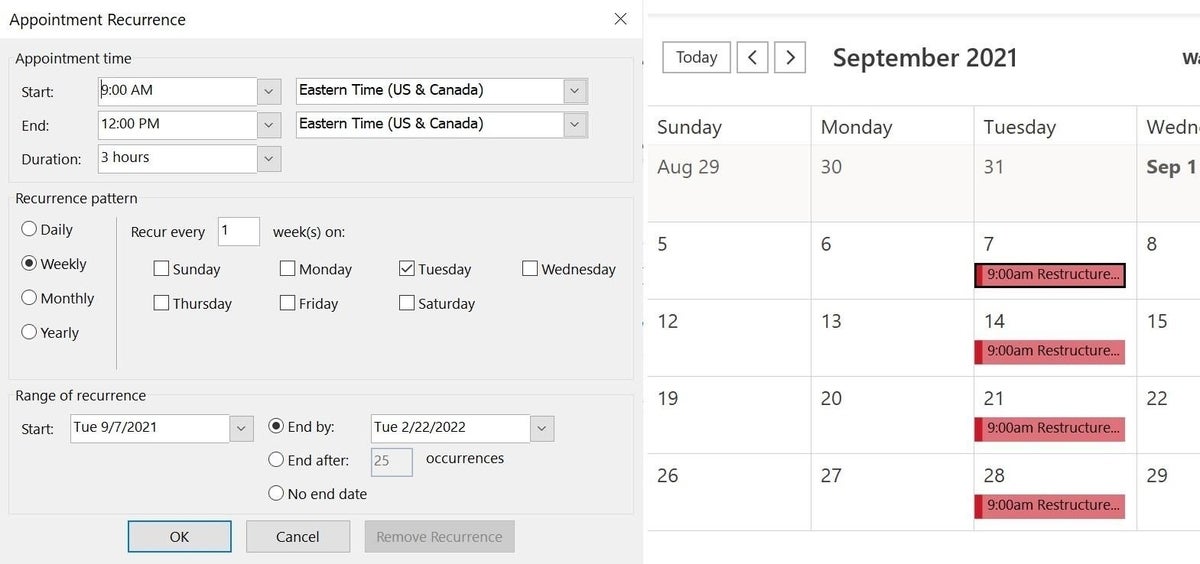
- Set the time for 9:00 AM through 12:00 PM, as shown in Figure A.
- Click Save & Close to return to the Calendar window.
Figure A

Technically, you don’t have to have an appointment that meets the condition before creating the conditional formatting rule, but the feature does work with existing appointments.
How to apply the conditional format in Outlook Calendar
With or without an appointment, applying a conditional format is easy, and Outlook applies the code automatically. You need a condition, which in this case is the subject text, “Restructure Committee.” In addition, you need to select a color; we’ll use red.
Let’s get started:
- Open the Calendar window and click the View tab. Then, choose View Settings in the Current View group. In the resulting dialog, click Conditional Formatting.
- Click Add to create a new rule, and enter a name for it, such as Color Restructure Appt.
- Choose the color red (Figure B).
- Click Condition in the bottom-left of the dialog. This is where things can get a bit complex.
- Click the Appointments and Meetings tab (if necessary, it’s the default).
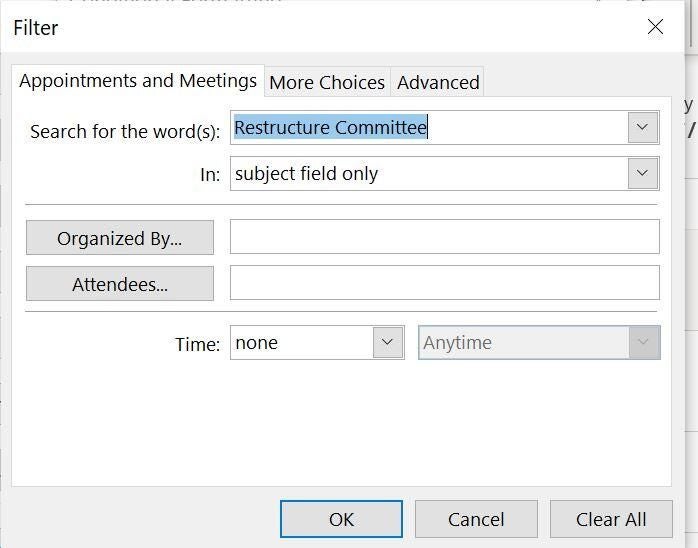
- Enter Restructure Committee in the Search for the Words control (Figure C). Don’t uncheck the In Subject Field Only (default) setting because you want to look for this phrase in the message’s subject. This dialog deserves some exploration later because of its many options. You’ll want to learn about all of them.
- Click OK three times to return to the Calendar window.
Figure B
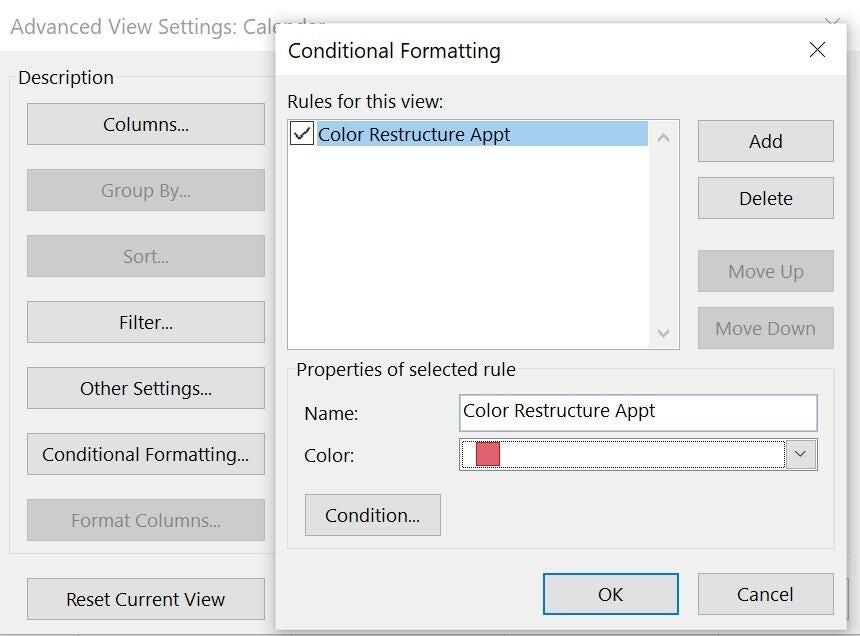
Figure C
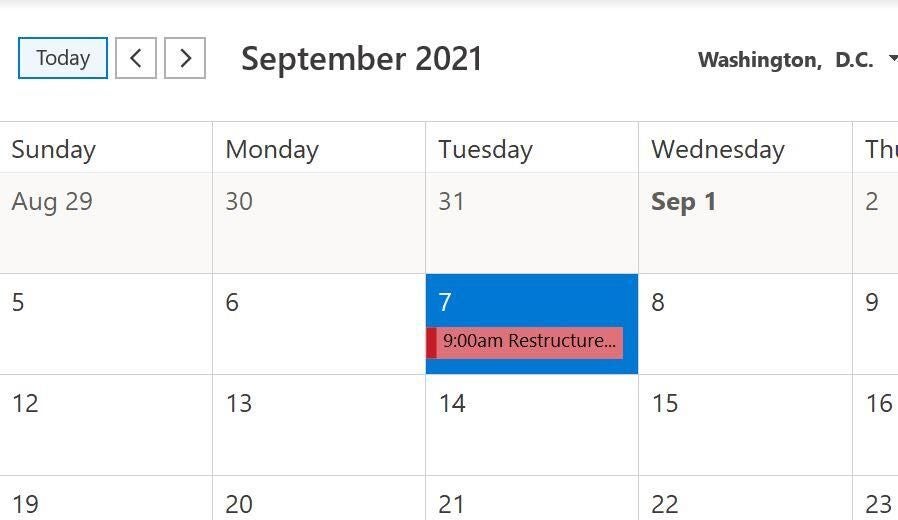
Browse to the appointment for Sept. 7. You’ll find the existing appointment color-coded in red as shown in Figure D.
Figure D
The condition set in step 6 could be different. For instance, you might choose to look for only the word restructure. Or you might click the Advanced tab and add more words other than restructure, but omitting committee—when specifying multiple words, committee might get a lot of hits that don’t apply to the restructure committee. This example is simple and doesn’t offer any possible snags, but things can get more complex when needed.
How to make a meeting recurring in Outlook Calendar
The formatting rule will work on existing and all new appointment items that fit the condition. Use the instructions above to create a new appointment if you want to see that at work. If you opt to make the meeting recurring, the rule will even color-code those, after the fact. Open the appointment and click Recurrence in the Options group (on the Event tab). Outlook will select the Weekly and Tuesday options for you, as shown in Figure E. When you return to the calendar, you will see an appointment for every Tuesday, in red.
Figure E