


Image: iStock/SeventyFour
Must-read Windows coverage
- CrowdStrike Outage Disrupts Microsoft Systems Worldwide
- 10 Best Project Management Software for Windows in 2024
- Windows 10 Extended Security Updates Promised for Small Businesses and Home Users
- Securing Windows Policy
PowerPoint’s animations provide a wealth of effects that are easy to implement and cool in action. As usual, it’s prudent to remind you that in PowerPoint, simple is usually best. That’s what makes the Fly In animation that you’ll learn in this article so effective. It’s easy to create, it’s neat to watch, and there’s a world of opportunities for putting it to use.
SEE: 83 Excel tips every user should master (TechRepublic)
I’m using Microsoft 365 on a Windows 10 64-bit system, but you can use earlier versions. For your convenience, you can download the demonstration .pptx and .ppt files. The finished slide is the first slide; the other three show the animation as it’s put together.
The pieces of the animation in PowerPoint
Like most animations, this one requires a few pieces that you’ll insert or create before you start animating. To begin, you’ll add a rectangle to a blank slide and do the best you can to mimic any theme or design that appears on other slides. Next, you’ll add circles (or some other shape) to the slide and use the Subtract option to leave holes that expose the underlying slide. Place your icons or pictures in the circles and use the Arrange tool to move them behind the rectangle. Finally, add the Fly In animation to the icons.
The final count is eight pieces:
- Slide
- Rectangle
- Circles (we’ll use three)
- Icons (three, to match the circles)
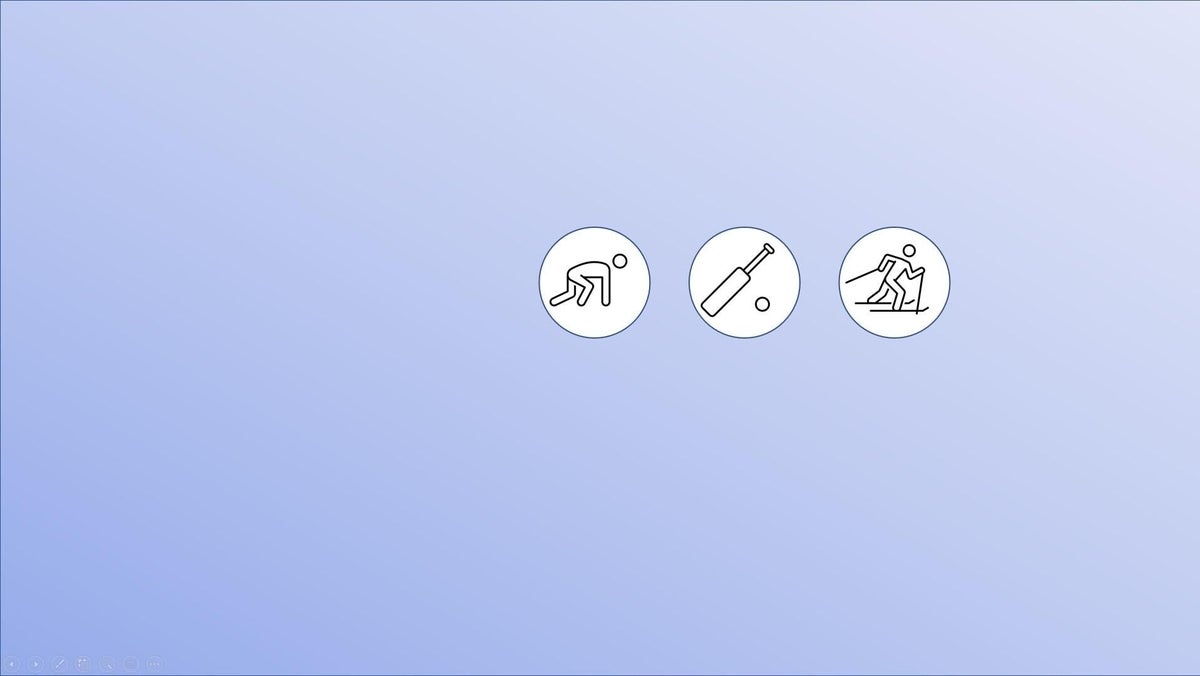
Figure A shows the resulting slide. Of course, you can’t see the movement, but you can if you download the demonstration .pptx or .ppt file. The icons and background use minimal effort, so we can focus on the technique.
Figure A
If you want to use this type of slide and you want the slide to repeat the theme or design, I recommend that you use a simple design that can be easily replicated in a rectangle. In addition, if you are using a theme or design, you’ll need to insert a blank slide to create this animation.
SEE: Office 365: A guide for tech and business leaders (free PDF) (TechRepublic)
How to insert the rectangle in PowerPoint
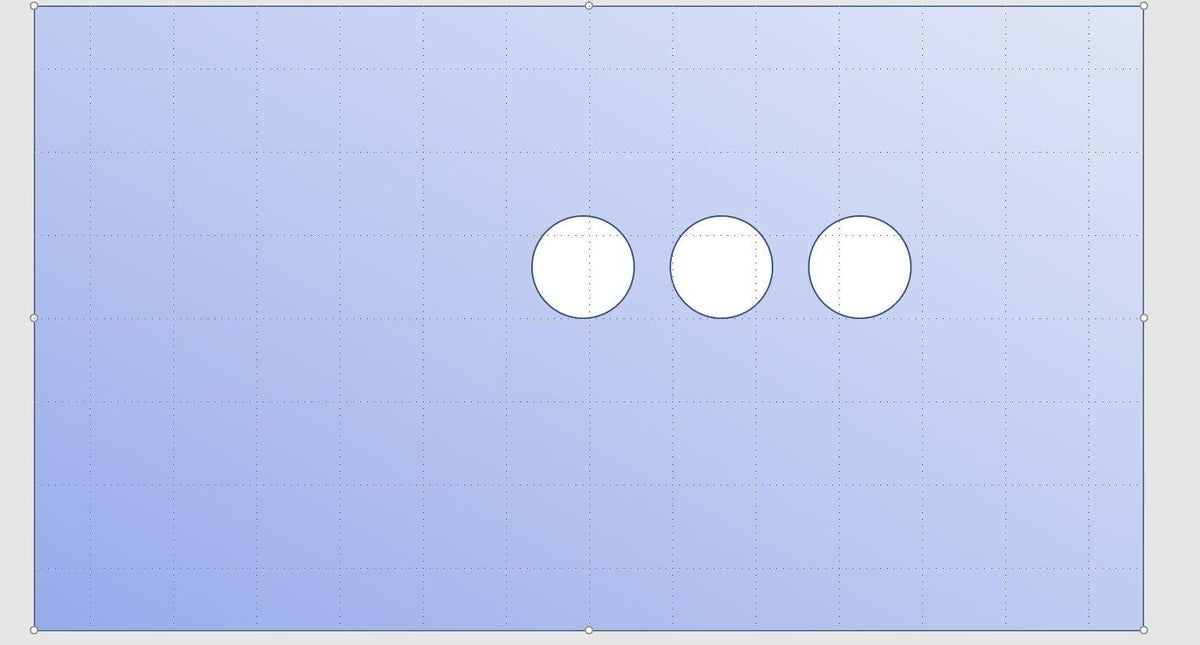
To create the circles that expose the icons, you need an extra layer—that’s where the rectangle comes in. Simply insert a rectangle that covers the entire slide. Apply the appropriate design to match the rest of the slides if possible. To keep things simple, we’ll apply a subtle gradient background as follows:
- To insert a rectangle, click the Insert tab.
- In the Illustrations group, click the Shapes dropdown and choose Rectangle. Click and drag to size.
- Click the contextual Shape Format tab.
- From the Shape Fill dropdown (in the Shape Styles group), choose Gradient and then choose any gradient you like (Figure B). This slide doesn’t have to match all the other slides in your presentation; if not, a subtle change would be best unless you have a reason to distract your audience a bit. For the most part, you’ll want the design to flow from one slide to the next. A slide that’s drastically different from the others can be a bit unsettling—but maybe that’s what you want.
Figure B

With the rectangle in place, it’s time to move on to the next step: the circles.
How to insert the circles in PowerPoint
The example slide (Figure A) has three circles. You can use only one or several, but too many will spoil the mood. Use the Shapes dropdown again to insert an oval while holding down the Shift key to create a perfect circle. With the circle still selected, press Ctrl and drag (twice) to copy the first circle. Position the circles, and if necessary, use the Align options (in the Arrange group on the Shape Format tab) to align them and distribute the space between them.
The icons will appear in these circles. To make that happen, we need to subtract the circles from the rectangle, exposing the underlying slide, as follows:
- Select all the pieces—the rectangle and all three slides. To do so, hold down the Ctrl key while you click each piece.
- If necessary, click the contextual Shape Format tab.
- In the Insert Shapes group, click the Merge Shapes dropdown, and choose Subtract. Doing so will cut out three circles in the rectangle, as shown in Figure C.
Figure C
How to position the icons in PowerPoint
We’ll animate icons to appear in the cut-out circles, and as yet, we don’t have any icons or clipart. We’ll insert some simple ones from stock for the example, but you can insert any graphic you like. Don’t work too hard to insert them right in the circles because you can position and resize them at any time. To insert and position an icon, do the following:
- Click the Insert tab and choose Icons in the Illustrations group.
- In the resulting window, choose three icons and click Insert. (The Icons option should already be selected.) To select multiple icons at once, hold down the Ctrl key while you click icons.
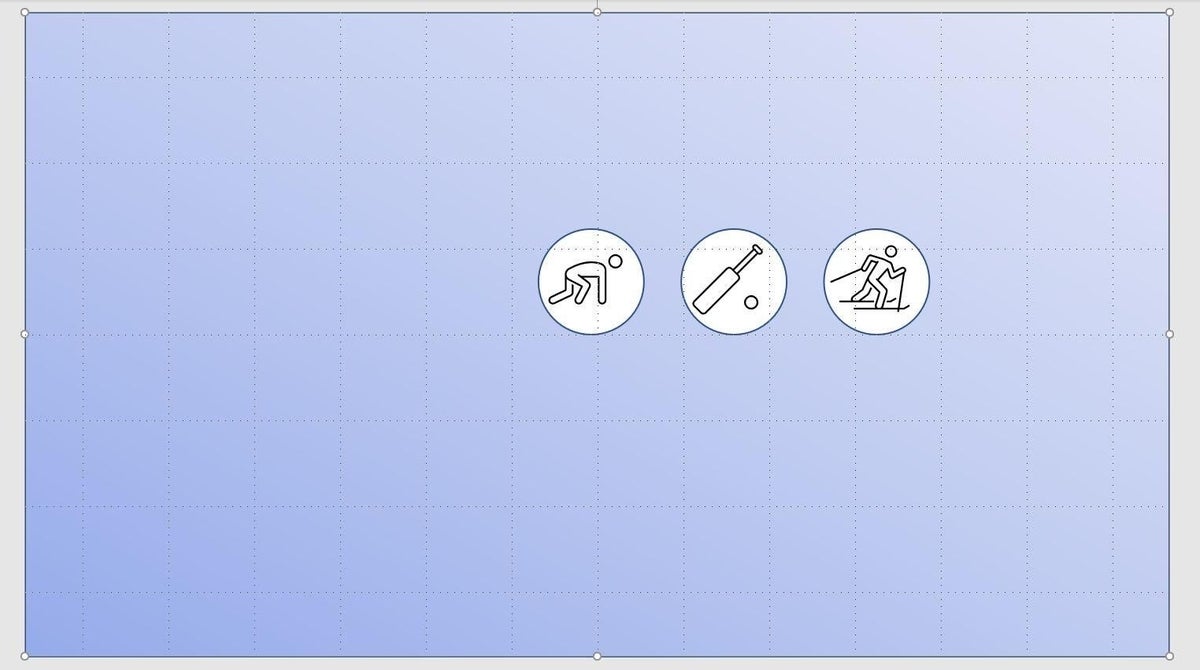
- After inserting the icons, drag them to the circles, as shown in Figure D. Resize if necessary.
Figure D
Simple icons are best for this particular animation. In addition, be sure to choose the same format. For instance, all of the icons in this example are simple line sketches in black and white. You wouldn’t want to throw in a solid icon or one with a different colored line unless you had a specific reason for doing so. Simplicity and consistency are best.
Instead of icons, you could also choose Pictures in the Images group. If you plan to distribute something, be sure to get permission from the artist or use only Stock Images pictures. Many Common License are free and don’t require credit, but make sure you check that before distributing; some artist will require credit.
Once you insert the icons, you’re ready to add the animation.
How to add the Fly In animation in PowerPoint
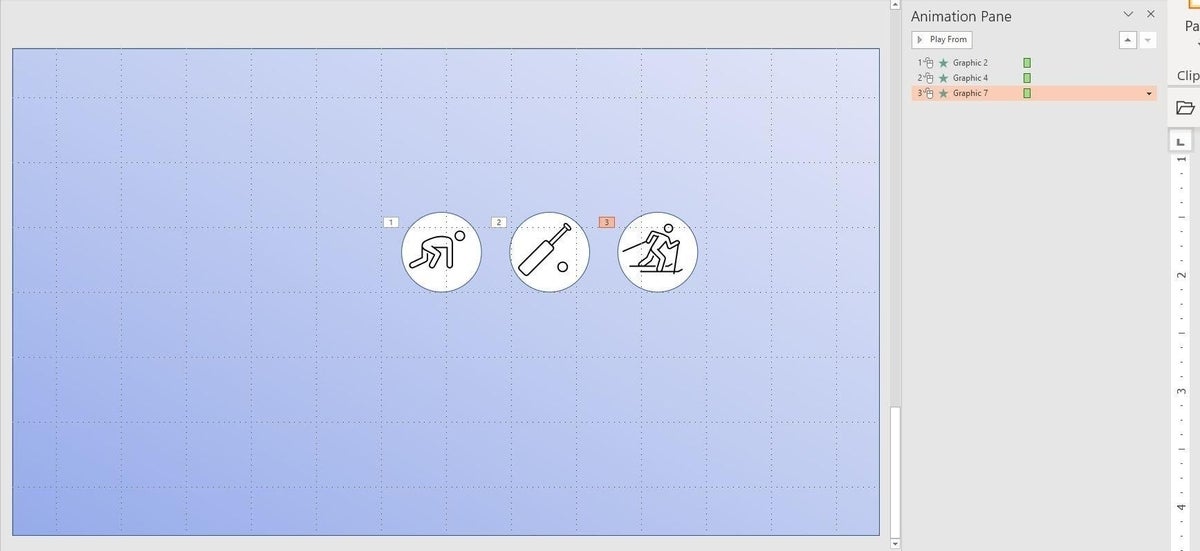
We’re just about done. Everything’s in place, and we’re ready to add the animation to the icons. To do so, select the icon you want to expose first. Then, click the Animations tab and click Fly In from the Animation gallery. If Fly In isn’t visible, click the gallery’s More button. Fly In is an Entrance animation. Apply the same animation to the other two icons in the order you want them to appear. Figure E shows the animation IDs to the top-left of each icon. You can use the Animation Pane to apply more properties, but for this example, we won’t need to change anything else.
Figure E
At this point, you’re ready to run the animation! Press F5 and click three times to display all three icons.
Does something seem a bit off? As is, you can see the icons flying in from the bottom of the slide, and that’s not what we want. To achieve the look of suddenly appearing in the circle, we need to send each icon to the back, so it’s not visible on top of the slide. Click all three icons and choose Send To Back from the Send Backward option in the Arrange group on the contextual Graphics Format tab.
Now, try it again and notice the difference—it’s much better! The icons seem to fly in from the bottom of the circle instead of the bottom of the slide.
If you’re using the demonstration presentation, the final slide is the first slide. It’s a simple technique, and by using the Click On timing, you can control when the icons appear.