


Image: Andrey_Popov/Shutterstock
Must-read Windows coverage
- CrowdStrike Outage Disrupts Microsoft Systems Worldwide
- 10 Best Project Management Software for Windows in 2024
- Windows 10 Extended Security Updates Promised for Small Businesses and Home Users
- Securing Windows Policy
A simple numbered list is easy to generate in Microsoft Word. Select the text and click Numbering in the Paragraph group. It’s all you’ll need most of the time. But it comes with a hanging indent. In fact, there’s no built-in list style that uses Normal as the text style and doesn’t have a hanging indent. You could modify the font of an existing list style that doesn’t have the hanging indent, but you don’t want to take that route. In this article, I’ll show you how to create a custom list style that doesn’t have a hanging indent. While doing so seems more complex than simply altering one of the existing list styles, this is one of those times when doing something the right way instead of the easy way pays off.
SEE: 69 Excel tips every user should master (TechRepublic)
I’m using Microsoft 365 on a Windows 10 64 bit-system, but you can work with earlier versions. There’s no demonstration file. Use the =RAND() function to generate several paragraphs of text.
How to make a numbered list in Word
When you click the Numbering option in the Paragraph group, you get a numbered list similar to the one shown in Figure A. By default, there’s an indent at the left margin and then a number. The wrapped text aligns with the text in the first line. It’s called a hanging indent. It’s automated, and it’s adequate for most situations.
Figure A
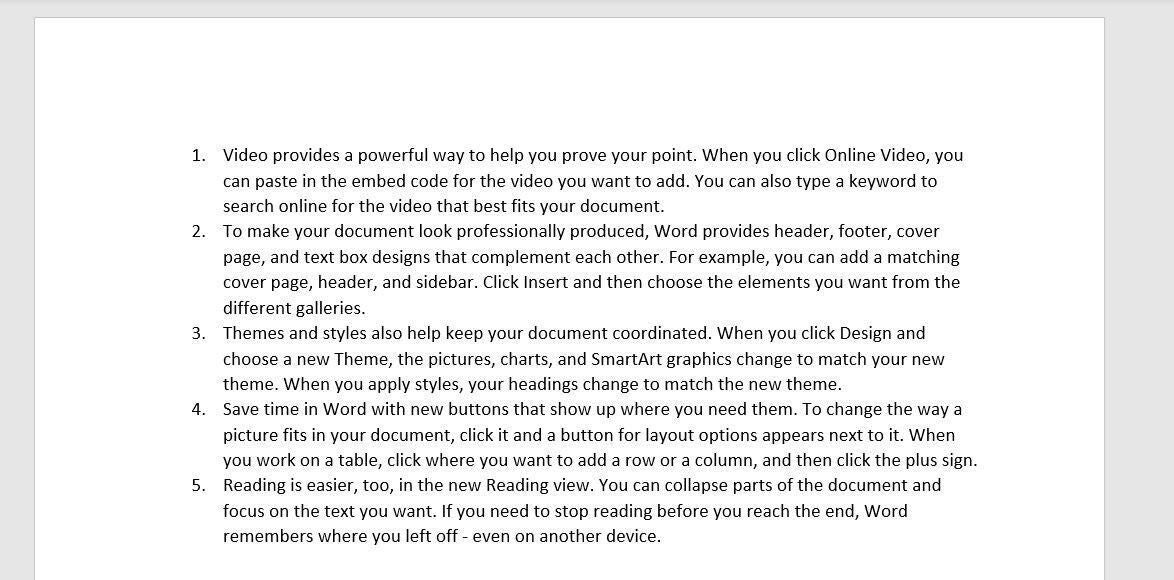
In this case, the text doesn’t look like a true hanging indent because the text is aligned. The number to the left creates the hanging indent; if you think of the number as the left margin, the hanging indent is clearer.
Occasionally, you’ll work with a set of conventions that requires text to wrap to the left margin, aligning with the number. There are a couple of built in list styles that don’t use the hanging indent, but you don’t want to use them. Let’s find out why.
How to use list styles in Word
You can modify a list style, but you won’t want to. A list style does a lot—much more than you might think. A list style is a group of paragraph styles in a specific order. That’s why Word has such a powerful multilevel numbering system. A list style also stores the information about number formatting at each level. You don’t need to know how all the pieces work together, but it helps to realize that you’re working with a lot of styles, not one. That’s why changing a built-in style rarely works. It’s generally better to create a new style.
SEE: Windows 10: Lists of vocal commands for speech recognition and dictation (free PDF) (TechRepublic)
Let’s take a look at what can happen when you try to avoid creating a new list style:
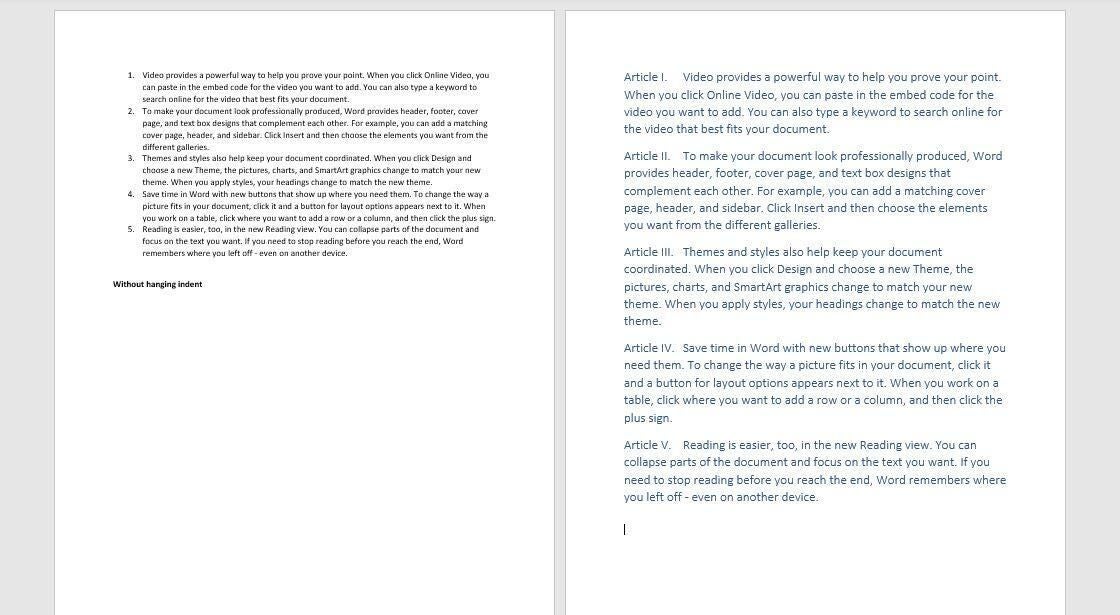
- Select the text you want to number. (I generated a second set of paragraphs.)
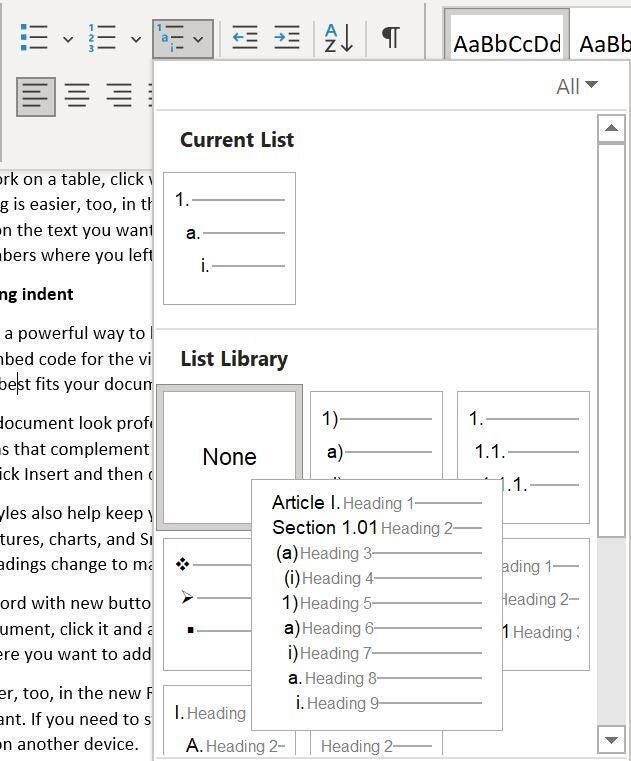
- Click Multilevel List and choose Article 1 from the dropdown list (see Figure B).
Figure B
This list style is based on built-in heading styles: Heading 1, Heading 2 and so on. That means the first numbering level, Heading 1, will have large blue font, but no hanging indent. Figure C shows the result of using the Article list style and then updating it by choosing a smaller black font. To do so, I clicked inside the numbered list, right-clicked Article Heading 1 in the Styles gallery, chose Modify and then made the appropriate changes. Consequently, anytime I use the Article level option in this document, it will resemble the one in Figure C.
Figure C
Remember though, by changing Heading 1 in the list style, you also change Heading 1. If you use Heading 1, expecting the familiar large blue font, you’ll be disappointed because it will look like the text in the numbered list.
That’s why I can’t recommend this quick-and-dirty method unless it’s a one-time document and you’re not using Heading 1 for anything else. It’s important to remember that the list styles are groups based on existing styles.
How to remove the hanging indent in a numbered list in Word
The right way to customize a numbered list is to create a custom list style, not to modify an existing one. As shown, doing that has consequences that you might not be able to troubleshoot down the line because you won’t remember what you did! “Why is Heading 1 no longer blue?” Will you remember that you changed Heading 1 in a list style? It’s unlikely.
Now, let’s create a new list style and define a non-hanging indent:
- Select the text you want to number as a list or click any clear space in the document (you can apply the style later).
- From the Multilevel List dropdown, choose Define New Style List.
- In the resulting dialog, enter a meaningful name for the list style and set its properties: font, font size, font color and so on. (See Figure D).
- Click the Format button in the bottom-left corner and choose Numbering from the resulting list.
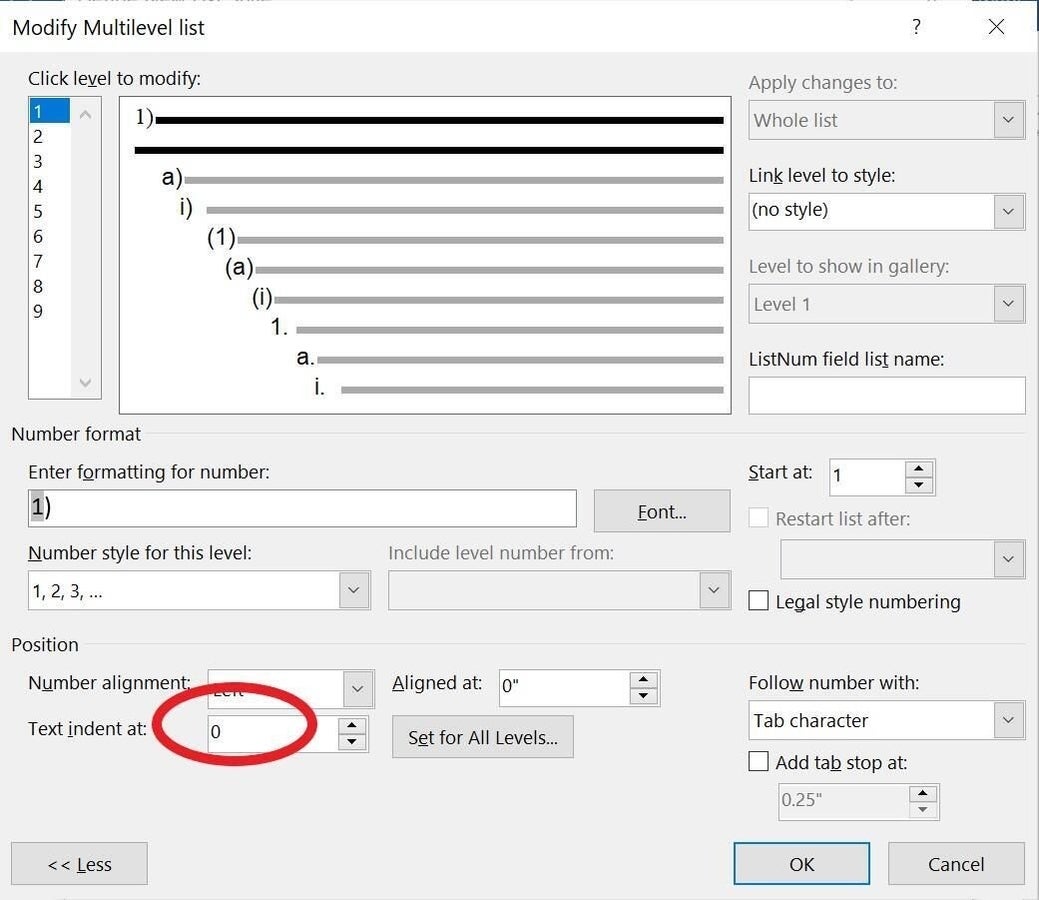
- In the resulting dialog, you need to make only one change: In the Position section toward the bottom, change the Text Indent At setting to 0, as shown in Figure E.
- Click OK twice.
Figure D
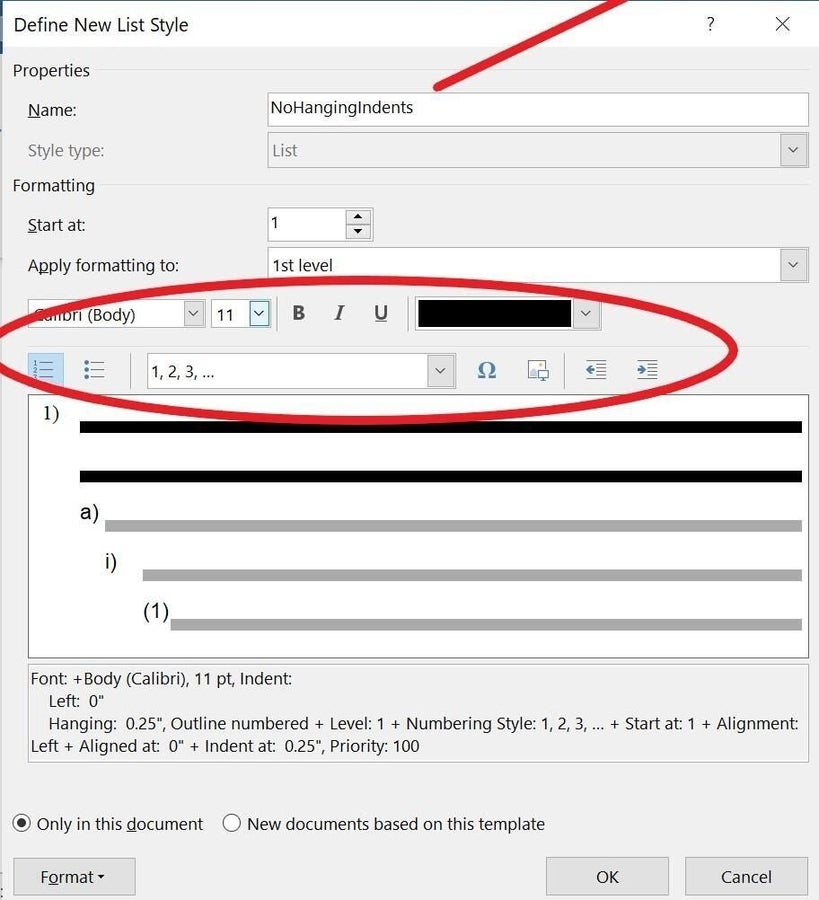
Figure E
If Word doesn’t automatically format your list, click the second thumbnail in the Multilevel List Styles section, as shown in Figure F. If you have more than two options in this section, click the last thumbnail. Figure G shows the list without the hanging indent. Any time you want this list style, be sure to select it instead of one of the built-in options; it’ll be in the List Styles section.
Figure F
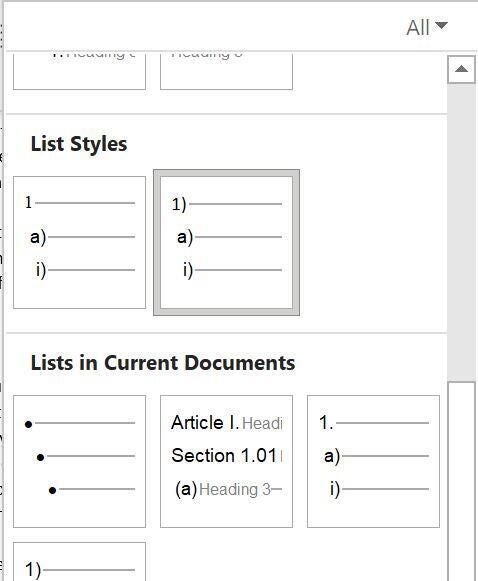
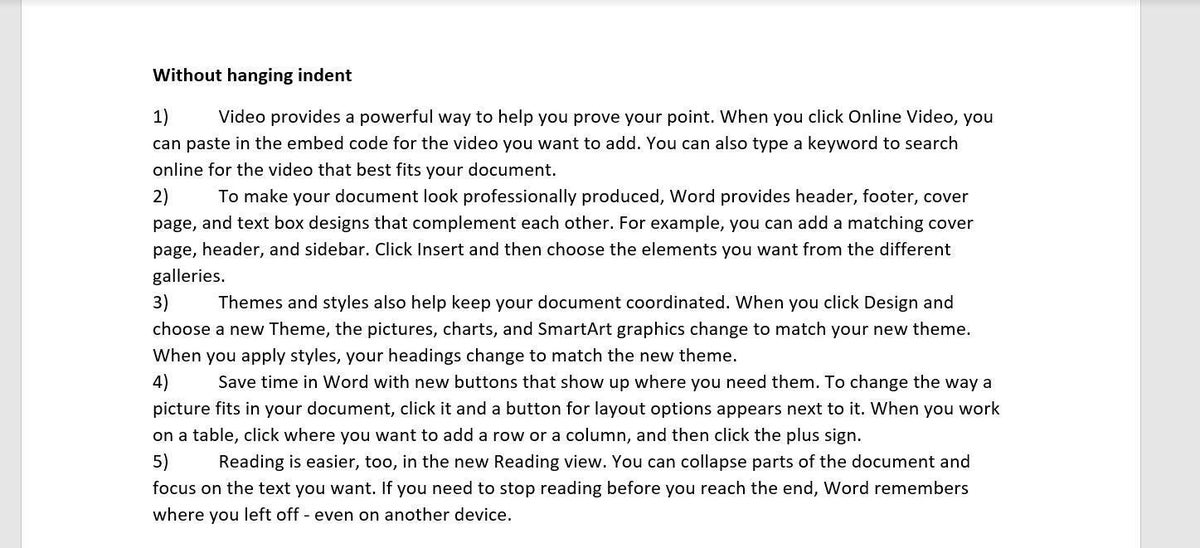
Figure G
If you don’t like that large space between the number and the text, you can change it by modifying the new style you just created. To do so, right-click the style in the List Styles section of the Multilevel dropdown and choose Modify. Click the Format button and choose Numbering. The custom style uses a Tab stop to indent, and the first default stop is at .5 inch (Figure E). Set a new one at .25 or so to reduce that spacing.
We only modified one level because the example is a simple numbered list. If you’re working with multiple-level lists, use the dialog in Figure E to update all the levels the same way.