If you’re an admin who has to log into remote servers, chances are you use Secure Shell (SSH). If you understand the importance of security, you know the best way to handle SSH authentication, is by way of SSH keys. To add to this seven-layer security dip, you probably also make use of a password manager, like KeePassXC.
What if you could combine all of that goodness together to make one efficient security authentication tool? You can. I’m going to show you how.
KeePassXC can now store SSH keys (and their associated passphrases) and add them to the ssh-agent tool, which makes using SSH key authentication a snap. KeePassXC will also automatically unload the SSH keys, upon the usual period of inactivity, when you close the app, log out of your computer, or close the lid of your laptop.
SEE: Information security policy template download (Tech Pro Research)
Let’s make this work.
What you need
In order to enable this, you need the latest release of KeePassXC installed, as well as an account to generate SSH keys. This KeePassXC feature is available to app-supported platforms (Linux, Windows, macOS). I’ll demonstrate on Elementary OS.
Generating an SSH Key Pair
If you don’t already have an SSH Key Pair, let’s generate one. Open a terminal window on the machine you’ll use to log into the remote servers and issue the command:
ssh-keygen
Make sure to accept the defaults and add a strong/unique password for the key. Once you’ve done that, you’ll have two new files:
- ~/.ssh/id_rsa
- ~/.ssh/id_rsa.pub
Enabling ssh-agent integration
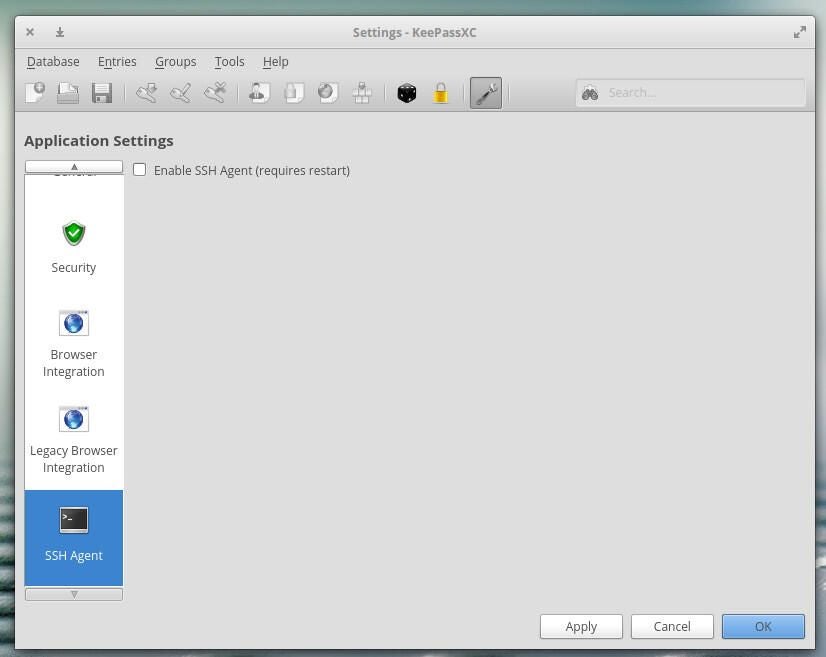
The next step is to enable ssh-agent integration within KeePassXC. Open the app and click Tools | Settings. From the Settings window, click the SSH Agent button, click the check-box for Enable SSH Agent (Figure A), and click OK.
Figure A

You will then have to restart KeePassXC.
Adding your SSH key
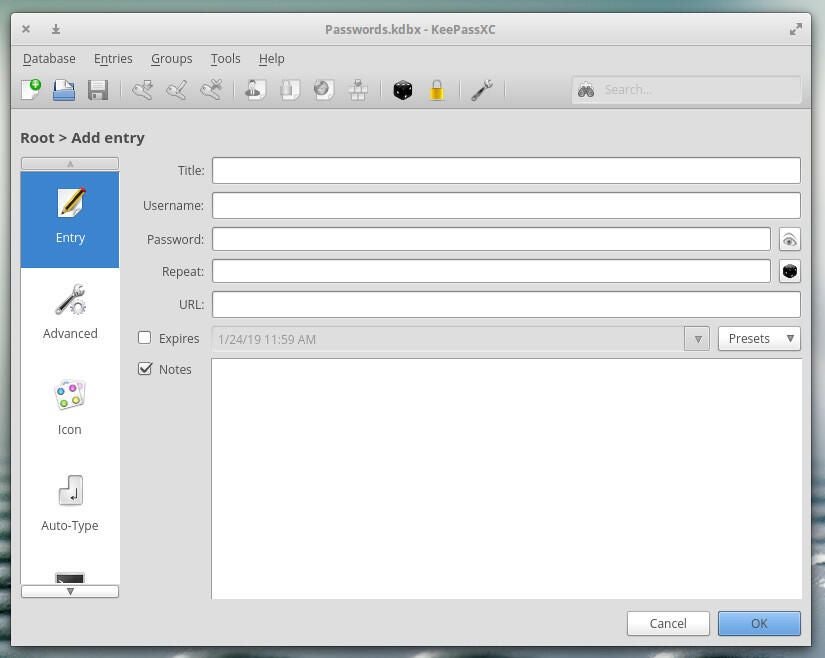
Next, you must add your SSH key to KeePassXC. To do that, click Entries | Add New Entry. In the resulting window (Figure B), give the entry a name (in the Title section) and then type the password for the key pair in the Password field.
Figure B

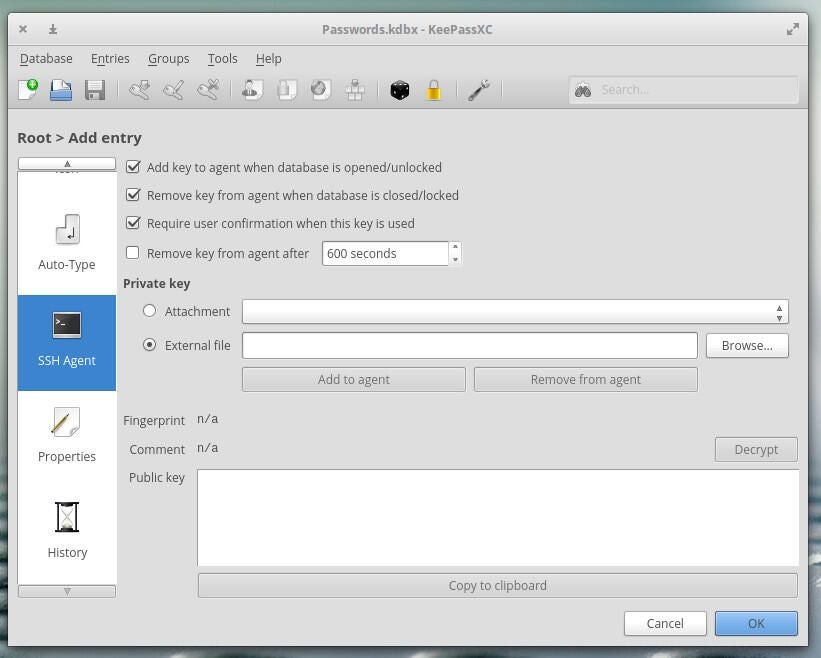
Once you’ve done that, scroll down and click SSH Agent (in the left pane). In this window (Figure C), check the top three boxes, select External file, locate your key, and then click Add to agent.
Figure C

At this point, you should be able to log into any remote machine (that you’ve copied your public key to with the ssh-copy-id command) by way of SSH key authentication. After you’ve successfully authenticated once, you won’t have to authenticate upon the next login, so long as the SSH key is still added to the agent and KeePassXC is open. When you’re done with your session, click the Remove from agent button (in KeePassXC) and the key will be removed from ssh-agent.
One caveat
I’ve found (at least in one instance) that the Add to Agent and Remove from Agent buttons have the opposite effect. This occurred on a Ubuntu 18.04 installation, where the Remove from Agent button actually added the key to ssh-agent and the Add to Agent button actually removed the key. So if you click the Add to Agent button, and you find SSH key authentication not working as expected, click the Remove from Agent button and see if that works. Otherwise, the new feature works like a charm.