


Every network admin knows what DHCP is. Simply put, it’s a means of handing out dynamically-assigned IP addresses to client machines. Most administrators tend to defer the dolling out of those dynamic addresses to a Windows server machine or a provider-deployed router or other pieces of hardware. But what if you want to make Linux your one-stop-shop for IP addresses on your network? Believe it or not, it’s actually quite easy.
Networking: Must-read coverage
- Gartner releases 4 trends that will impact cloud, data centers and infrastructure in 2023
- Support for these Microsoft enterprise products ends in 2023
- Dell Technologies World 2023: Q&A on how Dell sees security at the edge
- Best VPNs for small business in 2023
I’m going to walk through the process of setting up DHCP on Ubuntu Server 18.04. The process is quite simple, so it shouldn’t take much time at all (about five minutes).
SEE: Server deployment/migration checklist (Tech Pro Research)
What you need
The only things you need for this are a running instance of Ubuntu Server 18.04 and a user account with sudo privileges. That’s it. Let’s work.
Installing the DHCP server
The first thing to do is instal the dhcpd Server. Log into your Ubuntu Server and issue the following command:
sudo apt-get install isc-dhcp-server -y
The above command will pick up all of the necessary dependencies and complete the installation without error.
Configuring the DHCP server
Next, the DHCP server must be configured. Issue the command:
sudo nano /etc/dhcp/dhcpd.conf
In that file, you need to modify (to fit your networking needs) a few lines.
Specify the domain name with the following line:
option domain-name "example.com";
Specify the nameserver’s hostname or IP address with the following line:
option domain-name-servers 192.168.1.10, 192.168.1.11;
Specify the default lease times with the following two lines:
default-lease-time 3600;

max-lease-time 7200;
Uncomment out (remove the # character) the following line:
#authoritative;
Next, scroll to the end of the file and add the following (making sure to modify it to fit your networking needs):
# Specify the network address and subnet-mask

  subnet 192.168.1.0 netmask 255.255.255.0 {

  # Specify the default gateway address

  option routers 192.168.1.254;

  # Specify the subnet-mask

  option subnet-mask 255.255.255.0;

  # Specify the range of leased IP addresses

  range 192.168.1.100 192.168.1.200;

}
Save and close that file.
Restart the DHCP server with the command:
sudo systemctl restart isc-dhcp-server.service
At this point, any clients on your network will pick up a DHCP address from this newly configured server. If you had DHCP addresses distributed by another source, you’ll want to shut down that source, otherwise you could wind up with a conflict on your network.
Lease addresses
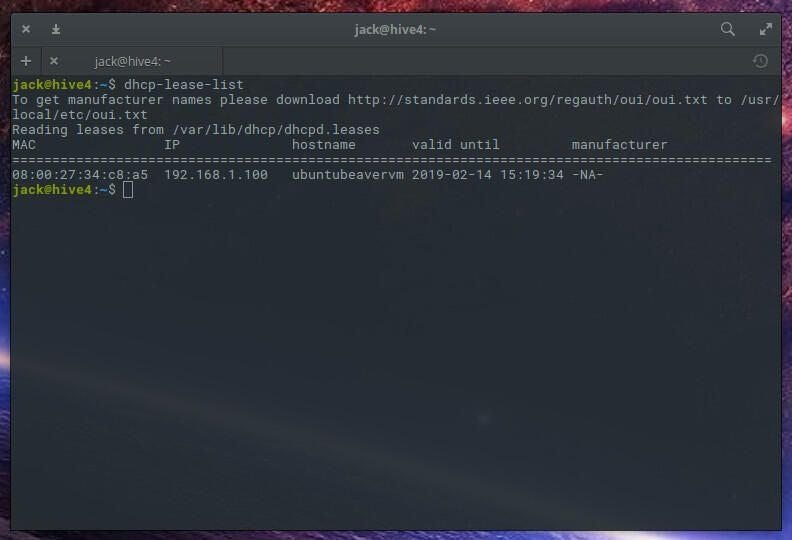
If you want to find out what IP addresses have been given out by the server, issue the command:
dhcp-lease-list
The above command will list out all addresses that have been handed out (Figure A).
Congratulations, you now have a DHCP server up and running. This is a great way to control what addresses are handed out to your network.