
Forcing a picture to fit the space you’ve allotted on a slide can be harder than finding the right picture. Whether you’re stretching or shrinking, problems are inherent–problems that you can’t always fix. When that happens, you have to get a bit creative.
In this article, I’ll show you how two basic skills–resizing and cropping–can help you get that picture in the required spacing. You’ll seldom end up with the picture in your head that you started with, but that’s okay.
First, I’ll show you the basics: How to resize and crop a picture. Then, I’ll show you how to use those basic skills to solve problems when photos don’t fit the space. You’ll need no other specialized skills. You might not learn any new skills if you’re already familiar with resizing and cropping, but you might look at these skills differently–easy is always better.
I’m using Office 365’s (desktop) PowerPoint on a Windows 10 64-bit system, but you can use earlier versions. There’s no demo file; you won’t need one. Insert a few pictures of your own and follow along.
SEE: 20 pro tips to make Windows 10 work the way you want (TechRepublic download)
Resize and crop
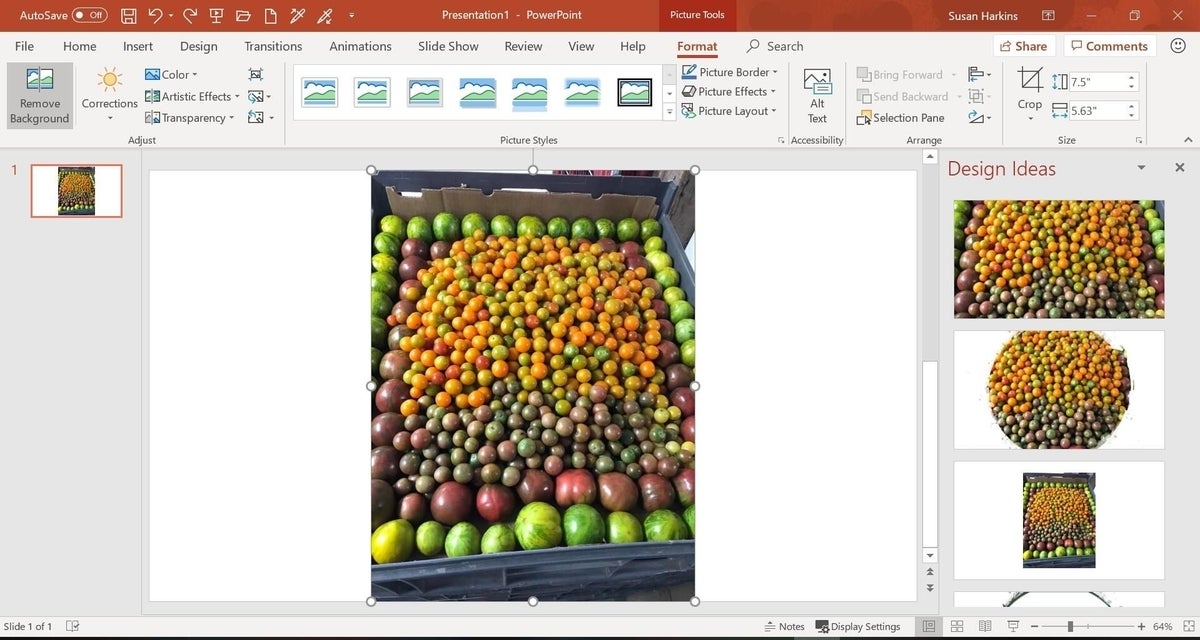
Figure A shows a picture inserted via the Insert tab (choose Pictures option in the Images group). It’s where a lot of us start. To the right, you can see a 365 built-in design feature at work. If you find one you like, click it and be done.
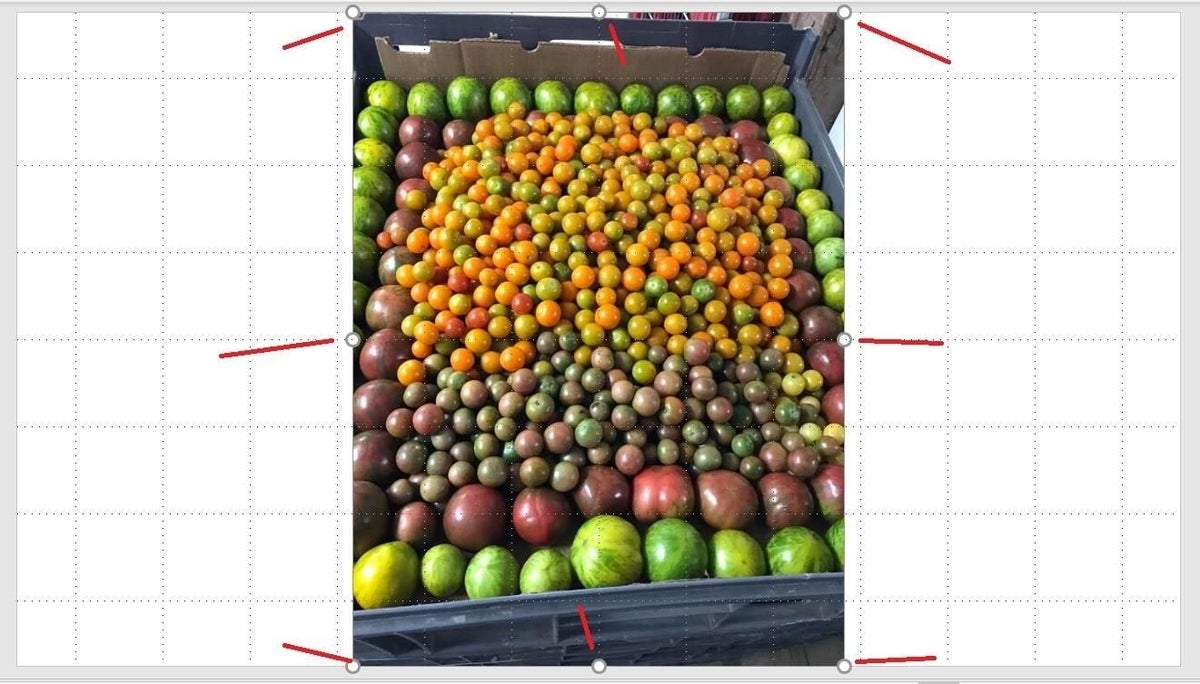
Resizing is simple: With the picture selected, click any of the resize handles–those white circles along the borders and in each corner, as indicated in Figure B. When the double-arrow pointer appears, hold down the mouse button and drag the handle. Doing so makes the picture larger or smaller. Use a corner to maintain aspect ratio; the border handles will distort the image by stretching or shrinking it, but sometimes that’s what you’ll want.
If you’re new to this, you might not know what aspect ratio means. It’s the proportional relationship between the width and height; it’s represented by two values, separated by a colon (x:y). When you maintain aspect ratio, the relationship remains the same between the width and height, regardless of how large or small the picture is. In other words, you enlarge and reduce the original file without distorting it.
Cropping a picture often changes its size, but not in the same way. When cropping, you remove part of the picture, so the outside dimensions become smaller. However, the visual components don’t change size. In other words, the relationship between the height and width stays the same.
Sometimes you want to remove something so you can focus on something else. We can quickly illustrate cropping by removing the vegetable crate around the edges of our example picture as follows:
- Select the picture.
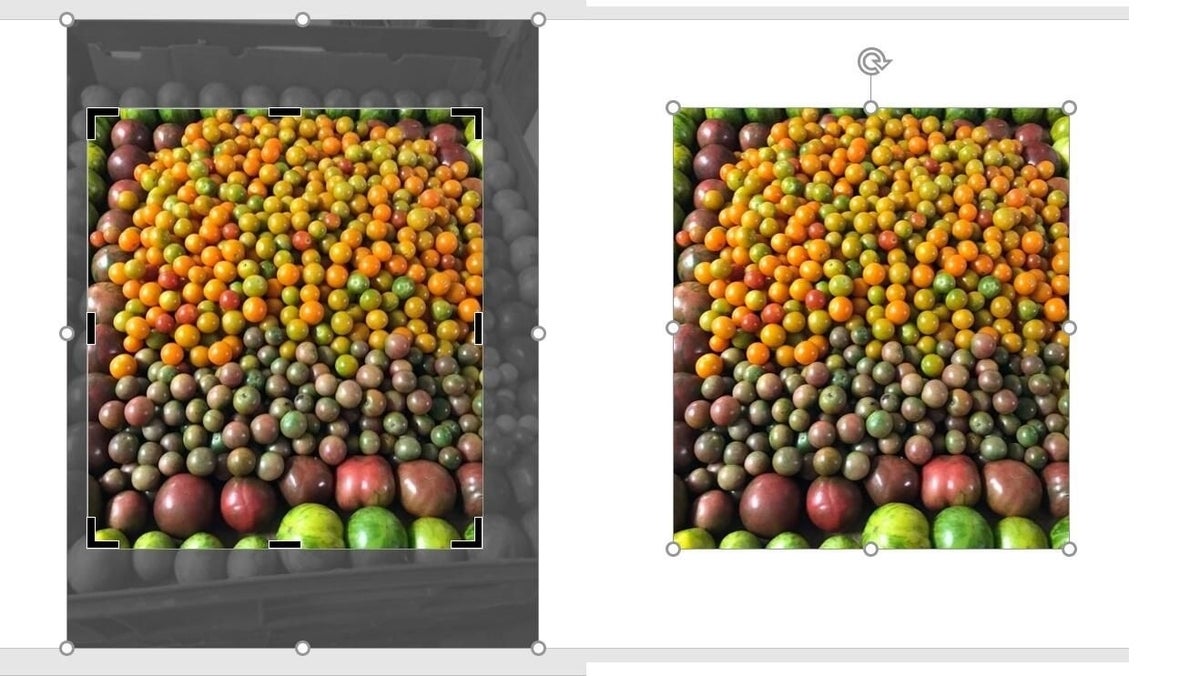
- If necessary, click the contextual Format tab. Then click Crop in the Size group and select Crop from the drop-down list. Doing so displays cropping handles along the borders (Figure C). In the browser edition, right-click the picture and choose Crop.
- Use the handles the same way you use the resizing handles earlier: click, hold, and drag in and out. The picture doesn’t change aspect ratio; you’re removing portions from the edges. The picture to the right (Figure C) shows the results of dragging all four borders toward the center of the picture a bit to remove the crate.
- To finish the job, click Crop again.
Remember, resizing reduces or enlarges everything; cropping removes pieces of the picture. If you don’t like the results when resizing or cropping, press Ctrl+z to undo changes. Both resizing and cropping can offer a quick fix, but sometimes neither will be adequate.
To learn how to crop to a shape and move to crop, read How to crop images in Microsoft PowerPoint.
A quick resizing trick
There wasn’t much to remove from the first picture, and it will easily resize to fit anywhere. For instance, you can quickly fill the entire slide with a picture as follows:
- Select the photo and center it in the slide as best you can. Enable the gridlines if you need to by clicking Gridlines in the Show group on the View menu.
- With the photo still selected, hold down the Ctrl key and drag out any of the corner handles.
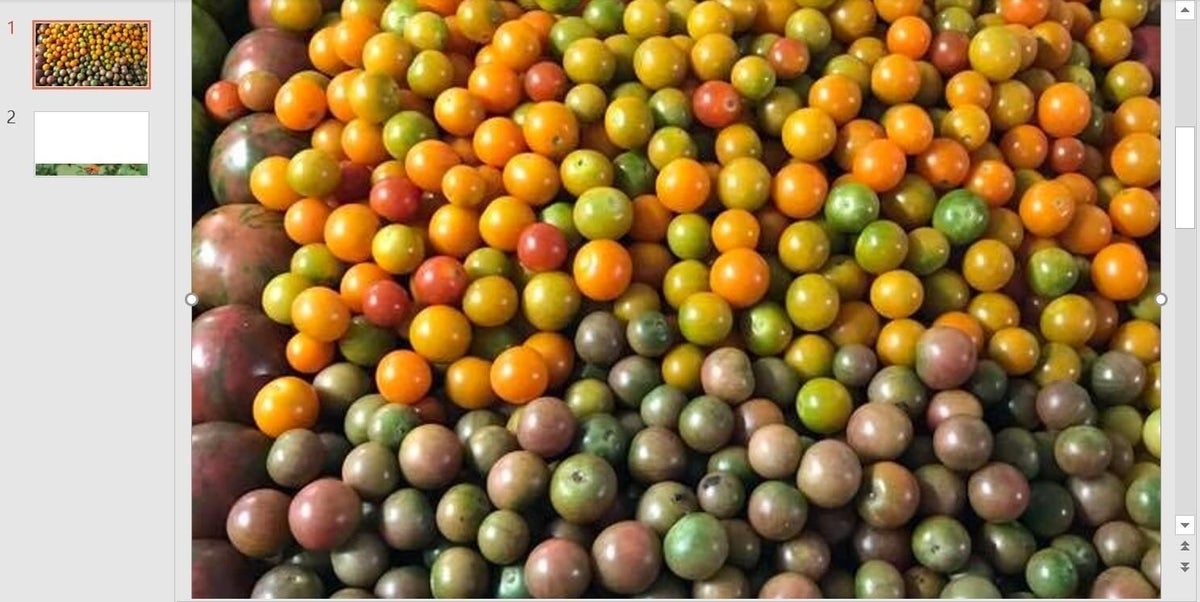
Holding down the Ctrl key keeps the photo centered on the slide. As you can see in Figure D, you’ve lost some of the picture (around the edges), but it’s still a quick easy fix. If you bypass cropping, you can maintain a larger portion of the original picture and remove the crate edges from view by pulling them off the slide and out of sight. It’s a small difference, but it might matter. Next, you’ll learn a new skill–an easy one–to solve a more complex problem.
Sum of its parts–use pieces
Now, let’s consider a problem that at first seems impossible. Let’s suppose you want to create a bottom border with a height of no larger than 1.5 inches using the picture shown in Figure E. Stretching it from the left to right border and resizing it to a height of 1.5 inches is impossible. But you’re not stuck.

You can keep the essence of the picture while separating the parts and reassembling them after a little resizing and cropping. Specifically, we’ll remove the background and reduce the size of the remaining butterfly. Then, we’ll crop a stripe of the background and resize it. Don’t worry if you can’t imagine the finished results yet. (Skip down to Figure I if you’re curious.)
The first step is to remove the butterfly. I said you wouldn’t need any specialized skills but using PowerPoint’s Remove Background tool is easier than ever. (This tool isn’t supported by the online version.) It’s just a few clicks, similar to resizing and cropping, so it isn’t specialized–you don’t need to be an expert.
To remove the background, do the following:
- Select the picture. On the contextual Format tab, click Remove Background (to the far left). PowerPoint will do its best to differentiate between the picture’s focus; its best guess for the background in a dark magenta (Figure F). Sometimes you get lucky and the first attempt is correct.
- Continue by removing the flower: Click the Mark Areas to Remove option in the Refine group and start clicking the orange areas. If you click the orange areas along the wings, PowerPoint will remove more orange with fewer clicks than if you click along the outside edges of the flowers. After a few clicks, the flower should be gone.
- Click Keep Changes.

If you’ve not used this tool, it might take a few tries, but you’ll get the hang of it quickly enough. Figure G shows the butterfly without the background. It’s a bit rough looking, but once you reduce the size you won’t notice the imperfections.
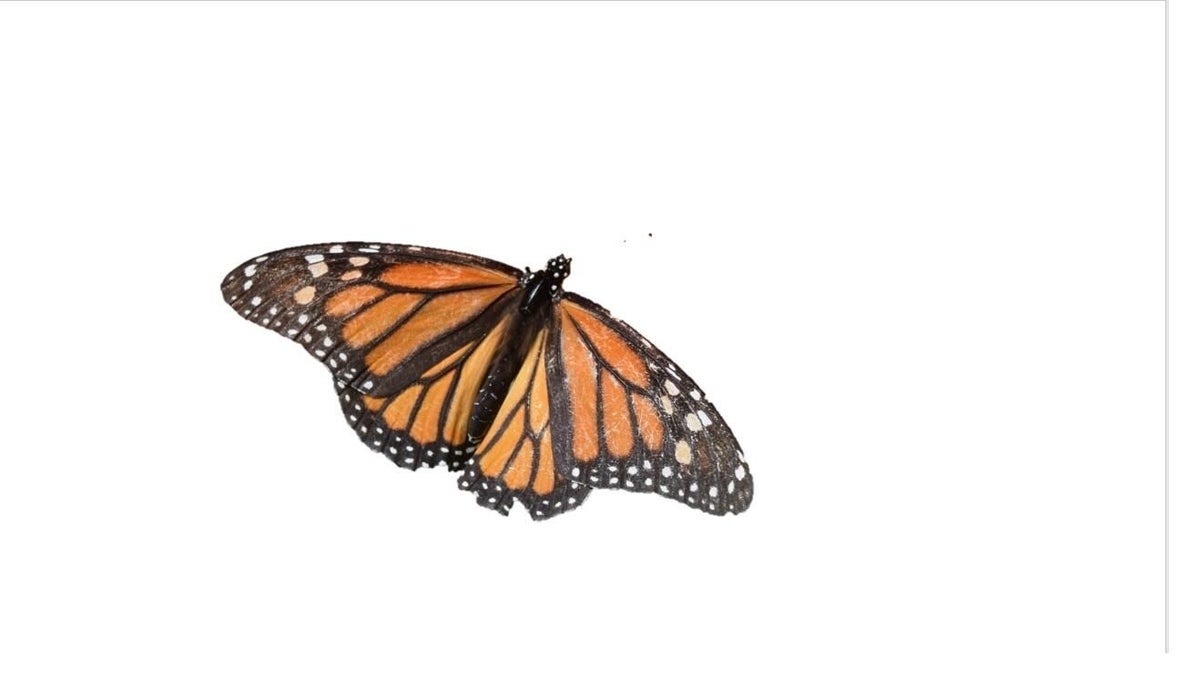
Now let’s crop a bit of the background and resize it as follows:
- Return to the original picture, select it, and click Crop in the Size group on the contextual Format tab.
- Use the bottom handle to remove the bottom portion of the picture until it’s approximately 1.5 in height. If the height needs to be exact, enter 1.5 in the Height control (Figure H). I kept the top 1.5 inches, but you could keep the bottom 1.5 instead.
- Click Crop in the Size group to commit the change.
- Position the stripe by aligning one of its bottom corners with the corresponding bottom corner of the slide. Then, use a side (not a corner) handle to stretch the stripe to the other side. Stretching the background foliage will distort the background, but in this case, it doesn’t matter.

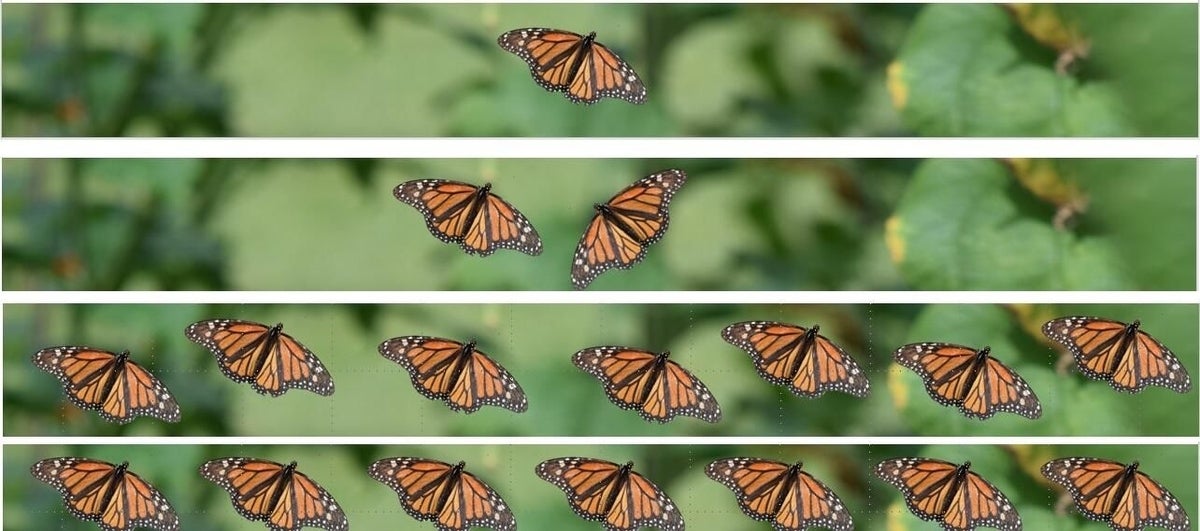
With the border background in place, copy or drag the butterfly into position. Resize the butterfly as necessary. Figure I shows a number of possibilities. It’s not the original picture; it’s better! The lower stripes display white gridlines (look closely): use them when precise placement is required.
Playing around
I used a few alignment options to align and distribute the butterflies equally in the last stripe, but other than that, no special knowledge or skills were required. Alignment options are in the Arrange group on the contextual Format tab. You could soften the butterflies using PowerPoint’s soften and/or glow effects. You could make the butterflies different sizes. You could even have one balancing the edge of the border–half in and half out. It’s entirely up to you, but you don’t need special skills. You only need a few basic skills and a little time to experiment.
Photos are my own. Please don’t reuse them without permission.
Send me your question about Office
I answer readers’ questions when I can, but there’s no guarantee. Don’t send files unless requested; initial requests for help that arrive with attached files will be deleted unread. You can send screenshots of your data to help clarify your question. When contacting me, be as specific as possible. For example, “Please troubleshoot my workbook and fix what’s wrong” probably won’t get a response, but “Can you tell me why this formula isn’t returning the expected results?” might. Please mention the app and version that you’re using. I’m not reimbursed by TechRepublic for my time or expertise when helping readers, nor do I ask for a fee from readers I help. You can contact me at susansalesharkins@gmail.com.
See also
- How to use Office Picture Layout options to quickly arrange pictures (TechRepublic)
- Office Q&A: How to share Outlook 365 contacts (TechRepublic)
- Office Q&A: How to anchor image files in Microsoft Word (TechRepubic)
- System update policy template download (Tech Pro Research)
- Microsoft Office 365 for business: Everything you need to know (ZDNet)
- The 10 most important iPhone apps of all time (Download.com)
- It takes work to keep your data private online. These apps can help (CNET)
- Programming languages and developer career resources coverage (TechRepublic on Flipboard)


