


Image: iStock/AndreyPopov
Collaboration is the latest Microsoft 365 push, and it’s easier now than ever before to share a document in real time. Now that users can easily collaborate on the same document, you might have run into a new problem.
Have you ever been working in a shared sheet when suddenly—without any input from you—the data you were viewing was gone, replaced by a different display of the same data? It’s a real-time problem, but there’s a quick and easy solution: Use sheet views. In this article, we’ll review the problem a bit and then learn how to use sheet views to solve it. Even if you don’t collaborate, you can use this feature to create custom views for yourself or your users.
SEE: 60 Excel tips every user should master (TechRepublic)
I’m using Microsoft 365 on a Windows 10 64-bit system, but you can work with older versions back to 2007. You can work with your own data or download the demonstration .xlsx file. This feature was available first in the browser, so it is totally appropriate for the browser version, and it should be available now to most users in the desktop version.
About sheet view in Excel
Sheet views allow you to customize the way you view data in a shared sheet, without being interrupted by others sharing the same sheet. For instance, if you’ve applied a filter, you won’t suddenly lose its results when another user sorts or filters the same data in a different way. If necessary, you can create multiple sheets based on the same data.
SEE: How to copy expressions without changing cell references in Excel (TechRepublic)
In a nutshell, sheet views are different views of the same data that allow you and other collaborators to view the same data in different ways at the same time. Now, let’s learn how to protect the way you work by applying a sheet view.
How to add a sheet view in Excel
Before you can apply a view, you need a shared workbook. Click the Share button in the top-right corner and follow the prompts. It couldn’t be easier. I’m not offering specific instructions because there’s more than one option, and Excel walks you through it. After you click Share, Excel will prompt you with possible server locations (I’m using OneDrive) and a file type. For our purposes, choose an Excel file, not a PDF file. If you have trouble, you might need to make a quick call to you Microsoft 365 administrator.
SEE: How to expose expressions that return a defined error value in Microsoft Excel (TechRepublic)
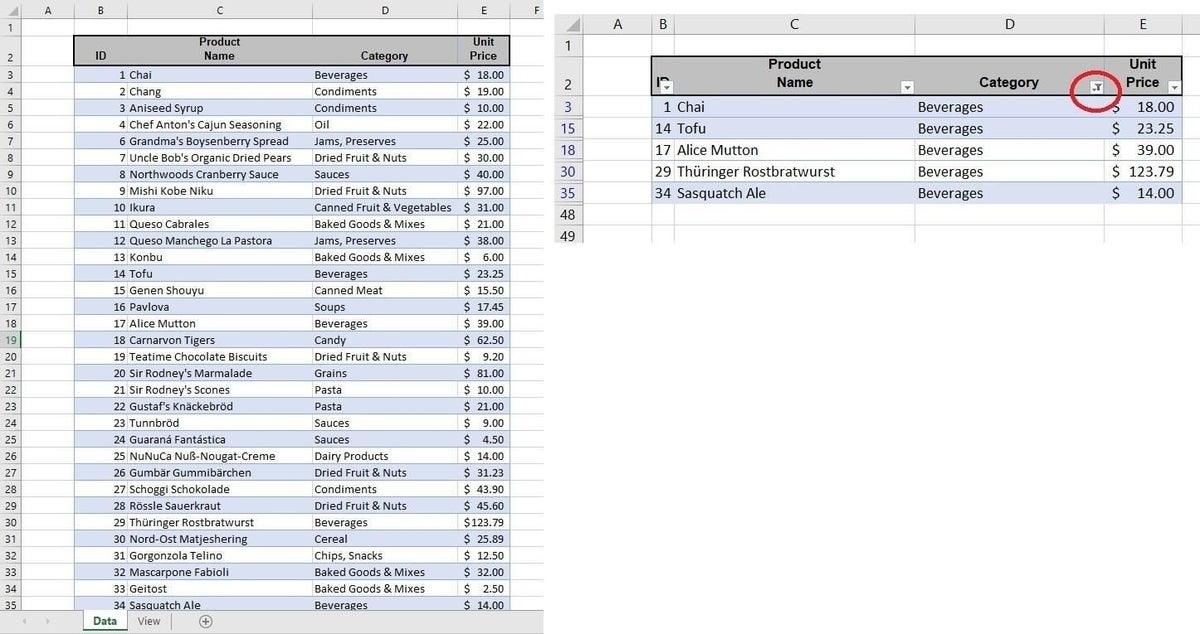
Next, we need a custom view of your data on which we’ll base the sheet view. To illustrate both, we’ll add a simple filter to the sheet in Figure A that displays only beverages:
- Click anywhere inside the data set and then click the Data tab. (This works with a Table object as well.)
- In the Sort & Filter group, click Filter. Doing so will add filtering drop-downs to all fields (Figure A).
- To set a filter, click the Category dropdown, deselect Select All, click Beverages, and then click OK.
Figure A
Now that we have a custom data set, let’s create a custom view for it.
Select the sheet in question and then do the following:
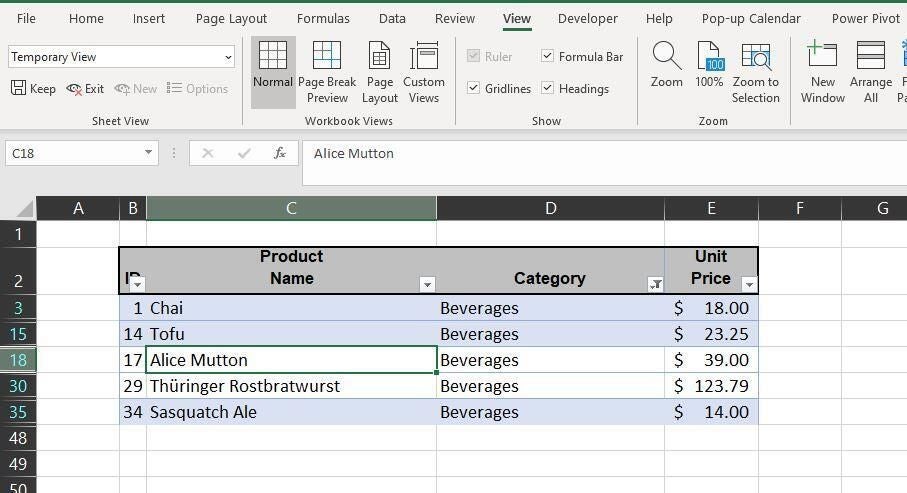
- Click the View tab.
- In the Sheet View group, click New. Notice that the sheet view dropdown displays Temporary View (Figure B).
- Make the necessary changes—sorts, filters, and so on—to create the view of the data that you need to do your work. You’ll know you’re in sheet view by the eye icon in the sheet tab and the different colored headers.
Figure B
This view is temporary. To make it permanent, replace Temporary View in the sheet view dropdown with a name and press Enter or click Keep. For example, I named the filtered view Beverages (Figure C).
Figure C
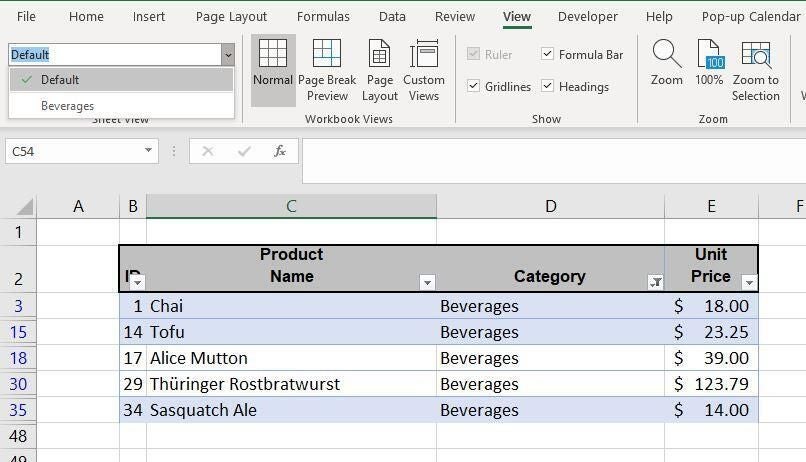
The remaining mechanics are easy. To apply the Beverages sheet view or any other sheet view, simply choose it from the sheet view drop-down. To leave sheet view, click Exit in the Sheet View group. Using the Options drop-down, you can also rename, duplicate, or delete a sheet.
When you create a new sheet view, Excel remembers where you are and names the initial view Default, which you can choose from Options to return quickly to your earlier working data set before you created the sheet view. Managing sheet views couldn’t be easier.
Good things to know about sheet view in Excel
Creating and managing sheet views is easy, but there’s more to them than meets the eye. To get the most from there, there are a few things you’ll want to know:
- There’s no such thing as a private view. Everyone sharing the workbook can see all sheet views.
- Excel limits you to 256 sheet views; I hate to use the word limit though—that number hardly seems limiting!
- The sheet view drop-down displays only sheet views for the active sheet.
- While sheet views allow individuals to control what they see, changes made to cells are shared with everyone, almost immediately, which makes sense.
- You can use this feature to create custom views for yourself or users, even if no one is collaborating.
- If the New option is dimmed, share the sheet with another account of your own or a co-worker.
- Before setting up custom views, consider saving the data set as a custom view so you can easily move back and forth.
- Even if you’re not collaborating, consider setting views for quick print-outs and specialized reports.