


Image: Aajan, Getty Images/iStockphoto
Must-read Windows coverage
- CrowdStrike Outage Disrupts Microsoft Systems Worldwide
- 10 Best Project Management Software for Windows in 2024
- Windows 10 Extended Security Updates Promised for Small Businesses and Home Users
- Securing Windows Policy
Sorting data is easy and for the most part, Microsoft Excel offers a number of ways, including keyboard shortcuts, to get the job done. For the most part, we run so many simple sorts that we think nothing of it. However, once you get into sorting multiple columns, a sort requires more clicks and choices. It’s still easy, but it can stop you in your tracks and some users don’t like to slow down that much. First, I’ll show you how to find some keyboard shortcuts for one-column sorts. Then, we’ll look at a macro that runs a two-column sort.
SEE: 60 Excel tips every user should master
I’m using Microsoft 365 on a Windows 10 64-bit system, but you can use older versions. You can work with your own data or download the demonstration .xlsm and .bas files. This article isn’t appropriate for the browser version.
How to do a single-column sort in Excel
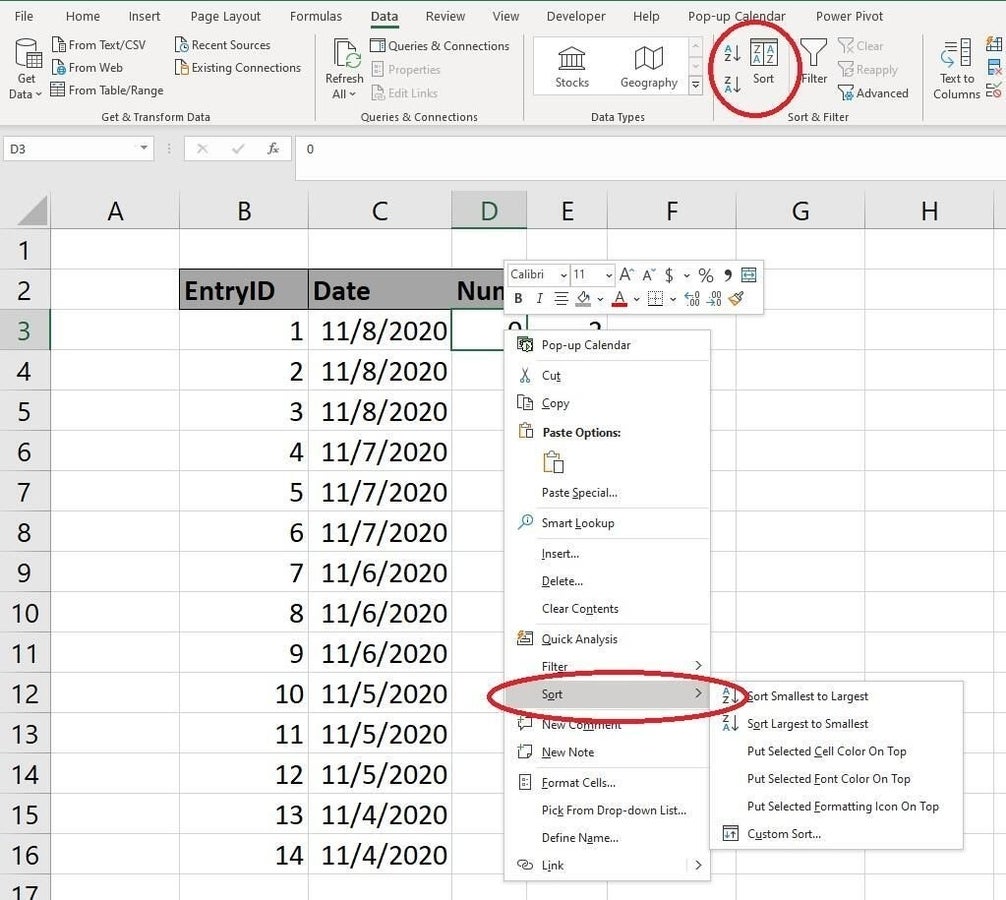
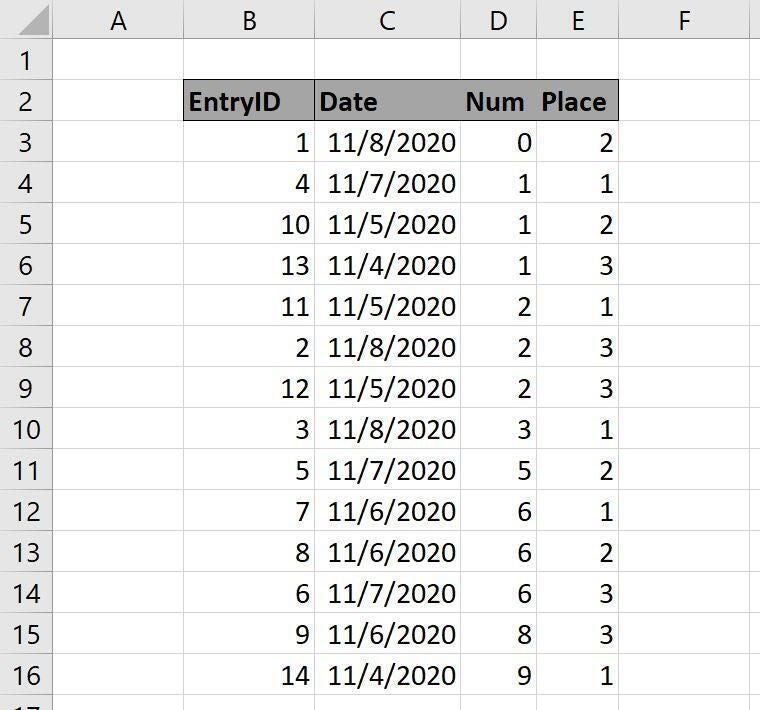
Even the newest of users can run a simple ascending or descending sort on a single column. Click anywhere inside the column you want to sort by and click one of the Sort options in the Sort & Filter on group on the Data tab. On the Home tab, you can click Sort & Filter in the Editing group. Or you can right-click the cell, click Sort, and then click the appropriate option from the resulting submenu. Figure A shows an ascending sort on the Num field.
Figure A
Sorting shortcuts can do the same thing without removing your hands from the keyboard: With the cursor anywhere in the column you want to sort by (within the data set, of course), press Alt-A-S-A for an ascending sort and Alt-A-S-D for a descending sort. To take the Home tab route, press Alt-H-S-S and Alt-H-S-O. (These shortcuts are harder to remember.) Now that you know the basics, we can move on to multi-column sorts.
SEE: How to easily include dynamic dates in a Word doc using Excel (TechRepublic)
How to do a multi-column sort in Excel
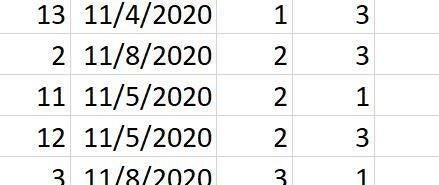
When sorting by multiple columns, you’re grouping. For instance, to sort our demonstration sheet by Num and then Place means to sort the Num values and then sort the Place values within the Num group. Review Figure A and you can see that the values in the Place field are not sorted within each group—any time they are, it’s a coincidence. Figure B shows the 2 group in the Num field, the Place values are 3, 1, 3, in that order, which is no order at all.
Figure B
You need a sort for more than one column. You can open the Sort dialog by clicking the Sort option in the Sort & Filter group on the Data tab, or by clicking Sort & Filter in the Editing group on the Home tab. Fortunately, the shortcut keystrokes are easy to remember: Alt-A-S-S and Alt-H-D-U. Both open the dialog shown in Figure C.
Figure C
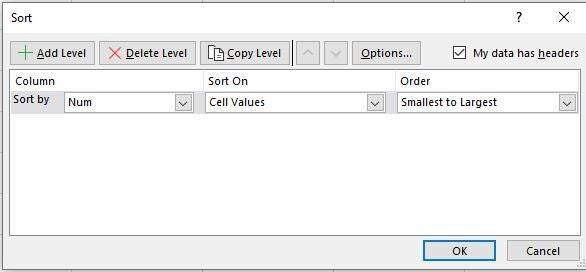
Using this dialog, you can sort by multiple columns. First, you should take a look at the My Data Has Headers option. You must set this option properly to get the expected results. If you don’t set it and the data set has headers, Excel sorts the header text with the values.
SEE: 3 ways to suppress zero in Excel (TechRepublic)
Now, let’s work out our two-column sort using this dialog:
- The My Data Has Headers option is checked. (Excel tries to discern this value for you, but sometimes you will have to reset it.)
- As you can see in Figure C, the settings are already correct. That’s because Excel remembers the last sort, which in our case, was an ascending sort on the Num field. If necessary, choose Num from the Sort by dropdown.
- Click Add Level to add the Place field.
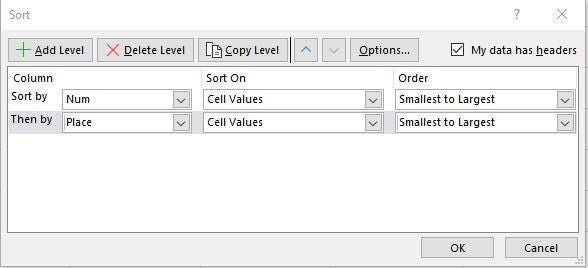
- From the Then By dropdown choose Place. Again, Excel does a good job of choosing the other options, which we’ll retain (see Figure D). Notice that you could change the order to descending. The language—Then By—makes it clear that you’re adding a subset, or group, to the sort.
- Click OK.
Figure D
As you can see in Figure E, the Places values to the right of the 2 group in the Num values are now in ascending order—1, 3, and 3. In our simple data set, there’s not much else to sort by other than the dates, but we could do so—sorting by three columns. How you add them to the sort will determine the results. Remember that each Then By level is a subset of the previous sort or grouping.
Figure E
You might have noticed that I didn’t use any kind of keystroke to add the Place column to the original sort. That’s because you can’t. To the best of my knowledge, what I’ve shown you is as far as you can get with shortcuts. However, I did promise a keyboard shortcut solution and for that, you’ll need a macro.
How to use a macro to sort in Excel
If a multi-column sort is a frequent task for you, consider a macro and then assign a keyboard shortcut to run it, or add it to a custom group or even the Quick Access Toolbar (QAT). I’ll show you the macro and you can decide how to run it.
SEE: How to use Find All to manipulate specific matching values in Excel (TechRepublic)
Listing A shows a macro that automates the simple two-column sort that we ran in the last section. It’s not dynamic—it only runs this one simple sort. But you can easily adapt it to suit your needs. To enter the VBA procedure, open the Visual Basic Editor (VBE) window by pressing Alt+F11. From the Insert menu, choose Module and enter the code. Don’t copy and paste the code from this web page—it won’t work. Enter it manually or copy from the .bas file included with the downloadable demonstration files. If you must copy from this web page, paste it into Word or another word editor and the paste from there into the VBE; doing so removes web characters that you can’t see.
Listing A
Sub SortMultipleColumns()
‘Sort columns D and E; Num (D) is the primary sort; Place (E) is the first grouped sort).
With ActiveSheet.Sort
.SortFields.Clear
.SortFields.Add Key:=Range(“D2”), Order:=xlAscending
.SortFields.Add Key:=Range(“E2”), Order:=xlAscending
.SetRange Range(“B2:E16”)
.Header = xlYes
.Apply
End With
End Sub
When you return to Excel, save the workbook as a macro-enabled file (.xlsm). If you’re using an older menu version (.xls), this step isn’t required.
The macro itself needs little explanation, but you can add levels using the Add method. In addition, you must run the Clear method at the beginning to remove the previous sort. You can add one afterward, too (after the Apply method), if you don’t want Excel to remember it. The commented line uses the Table reference if you want to go that route; a Table will allow you to add and delete rows of data without updating the data range in the macro.
Right now, the macro isn’t accessible with a keystroke shortcut, so let’s take care of that next:
- Click the Developer tab and then click Macros in the Code group.
- Select the procedure, SetMultipleColumns, if necessary.
- Click the Options button.
- In the resulting window, create a macro shortcut, by entering a key to press, along with Ctrl. As you can see in Figure F, I entered S, for sort.
- Click OK and then Cancel.
Figure F
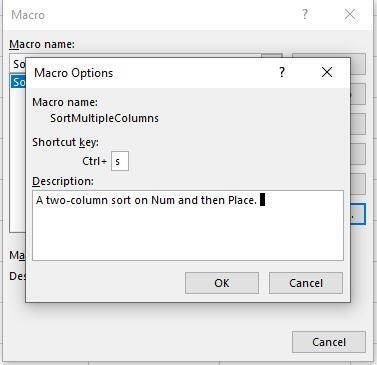
Before running the macro, sort the data set by the EntryID values. Then, press Ctrl+S to run the macro. The results are the same as the manual two-column sort preformed earlier. It doesn’t matter what cell is selected when you run the macro because the cell references and ranges are explicit.
When to use them
In some cases, the macro might be overkill. If you run only the one sort, you can press Alt-D-S to rerun it over and over. But the fact that you might need keyboard shortcuts does imply that you’re frequently changing the sort. However, it could also mean that you’re deleting or adding records, or modifying values. If it’s the former, convert the data range to a Table range and use the commented line that references the Table and comment out the data range reference statement in the VBA procedure. That way, you can change the number of rows without modifying the macro to accommodate those changes.
You can add the macro to a group tab or to the QAT. When using the later, you can use the Alt key to run the macro using Alt+N, where N is an integer that identifies the macro’s position on the QAT. For example, if it’s the first option, you’d press Alt+1. If it’s the third, you’d press Alt+3, and so on.
To learn how to do either, read How to add Office macros to the QAT toolbar for quick access.