


Image: DenEmmanuel, Getty Images/iStockPhotos
Must-read Windows coverage
- CrowdStrike Outage Disrupts Microsoft Systems Worldwide
- 10 Best Project Management Software for Windows in 2024
- Windows 10 Extended Security Updates Promised for Small Businesses and Home Users
- Securing Windows Policy
Everyone likes a time-saving trick or two—we all have a few in our bag. For instance, you might need a contract group or distribution list to send the same email to multiple recipients. Instead of entering all those email addresses manually, you enter only the name of the group or list. A list is older technology but is essentially the same as a contact group in newer versions. You use both to send email to multiple people.
There’s another group though, Microsoft 365 Groups, and they’re about collaborating. Before we get to the real how-to, we’ll discuss the differences briefly.
SEE: How Apple users can make the most of Microsoft 365 at work (TechRepublic Premium)
I’m using Microsoft 365 on a Windows 10 64-bit system, but you can use older versions. There’s no demonstration file; you won’t need one. This article doesn’t apply to Mail.
Terminology
If you’ve been around a long time, you know that a distribution list is used to send or forward the same message to a group of recipients. The group members might be all of the people on your project team, all managers, or all of the people in your book club. Microsoft 365 totally supports lists, but calls the contact groups. Microsoft 365 Groups are different, and I don’t want you to confuse them. The terms list and contact group are used interchangeably. Microsoft 365 Groups are about collaborating with members of your own organization. While we’re on the subject, there’s no difference between Microsoft 365 Groups and Office 365 Groups. The former is only a new name for the product.
SEE: Top Windows 10 run commands (free PDF) (TechRepublic)
Outlook’s collaboration features are now the driving force behind new features, and that’s where lists and groups part ways. ; Microsoft 365 Groups give you a lot of sharing functionality and options: A shared mailbox and calendar and collaboration options with SharePoint library, OneNote, Teams, Yammer, Planner, and PowerBI.
Furthermore, you can define a 365 Group as public or private: Anyone can see the conversations in a public group, and anyone can join that group. Private groups are limited to those in the group, and anyone joining the group needs approval from the group owner. You can’t join a distribution list or contact group. You might never need any of the new collaborative options, but you should know they exist, but they’ve noting to do with distributive lists or contact groups.
Now that we have that out of the way, let’s add a new contact group so we can send the same email to multiple people.
How to create a contract group
Contract groups are handy whether you’re creating one for your family or a project at work. Let’s create a group that we’ll name Softball Team, as follows:
- Click Contacts in the Navigation bar.
- Once you’re in the Contacts view (window), click New Contact Group in the New group on the Home tab.
- In the resulting dialog, enter Softball Team in the Name control.
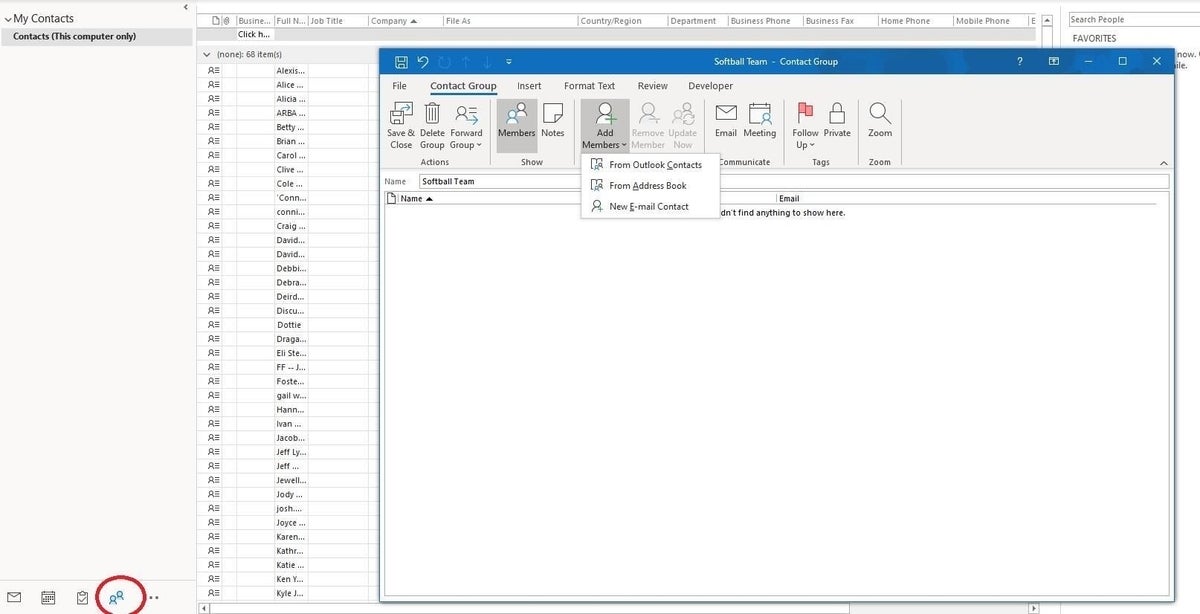
- To add members to the group, click Add Members in the Members group and then choose the right source, Outlook Contacts, Address Book, or a new email contact (Figure A). The first two will populate the bottom pane with members in the source. Use email contact when the person isn’t in an existing source. You can add the email to the group and the source at the same time, or you can choose not to add the email address to the source. We won’t use this option in our example.
- Double-click the members you want to add to the Softball Team group. Doing so will add them to the Members control at the bottom.
- When you’ve added all the members, click OK.
- Click Save & Close.
Figure A
Have you ever wondered about the different sources (mentioned in Step 4)? Most of us have at least two: Contacts and Address Book. If you’re operating alone, there’s really no difference, unless you implement one on purpose. When an organization is on Exchange, the Address Book (usually) contains in-house contact information and Contacts is personal to you, usually containing information about contacts outside of your organization.
SEE: How to apply both left and right alignment to text without using a table in Word (TechRepublic)
At this point, we have a new contact group named Softball Team. Let’s put it to use.
How to use the contract group
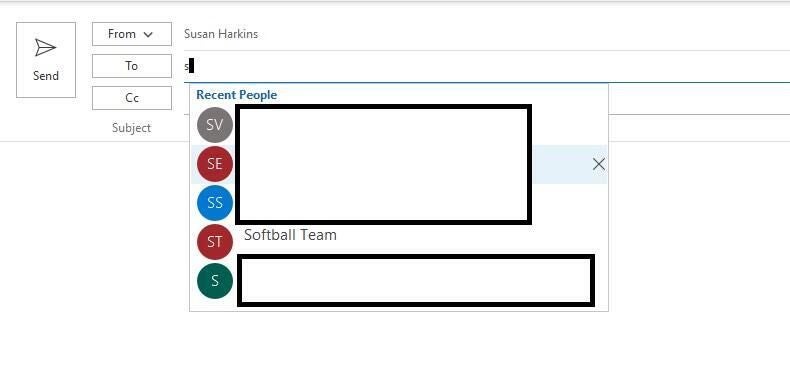
As we discussed in the first part of this article, you can use a group for a lot of tasks, but we’re going to send an email—that’s what groups have in common with distribution lists. To do so, click the Mail icon in the Navigation bar to return to the Mail view. In the New group on the Home tab, click New Email. In the resulting message window, enter s, o, f—as many characters as necessary to force the AutoComplete list to display Softball Team, as shown in Figure B. In my case, I only had to type s! (AutoComplete won’t work if you add members through the email contact option.) Enter a subject, a message, and click Send. Outlook sends the message to everyone in the group.
Figure B
Now, let’s suppose there’s a person or two in that group who shouldn’t get the message. What can you do?
Before sending the email, right-click the group name in the To control and choose Edit Contact. Doing so will open the member list. Select the member(s) and press Delete. Then, close the dialog and send the email.
SEE: How to easily switch main entry and subentry terms in a Word index (TechRepublic)
Now, go back to the Contacts view and check the Softball Team group. Oops… you deleted that member from the group! Editing the contact is a done deal—you can’t remove members that way unless you intend to also delete them from the group, so be careful!
Adding or deleting members from an existing list is similarly easy. Simply open the Softball Team contact in the Contacts view, select names, press Delete, and save.
Warning
When using a contact group created in a local source (Contacts most likely), the group will always expand when sending the email. That means all recipients will see everyone in the group. Groups created in Exchange Server don’t behave this way, but you’ll need administrative permission to create a group in Exchange.
There’s a quick and easy fix for this though. In the To control, enter your own address, or the address you’re sending the group mail from. Then, enter the contract group’s name in the Bcc control. If the control isn’t visible, check it on the View tab. Recipients in the Bcc control will all receive the same email, but they will not see each other’s addresses.