


Image: undefined undefined, Getty Images/iStockPhoto
Must-read Windows coverage
- CrowdStrike Outage Disrupts Microsoft Systems Worldwide
- 10 Best Project Management Software for Windows in 2024
- Windows 10 Extended Security Updates Promised for Small Businesses and Home Users
- Securing Windows Policy
Microsoft Word offers four alignment choices: Left, center, right, and flush. Because they’re paragraph properties, you can’t assign more than one to the same paragraph or line, at least not in the usual way. If you try, the last assigned alignment will take precedence.
In the article, How to apply both left and right alignment to text without using a table in Word, I showed you how to reconcile right and left aligned text on the same line using a tab. It’s a quick and easy solution that can be applied throughout the document once the tab is created. In this article, I’ll show you how to use a table to apply more than one alignment to a single line of text.
SEE: How to add a drop down list to an Excel cell (TechRepublic)
I’m using Microsoft 365 on a Windows 10 64-bit system, but you can use older versions. This technique isn’t appropriate for the browser edition: It won’t let you set a tab, and it won’t display pre-existing tabs correctly, within the context of this technique.
If you’re not familiar with tabs, try reading Learning how to use tabs correctly is the best way to ensure that columnar data stays where you put it. However, you won’t need to read it to work through this article.
How to insert the table into Word
Inserting a table is easy. You probably enter a line or two of content and then convert the text to a table. However, when trying to add more than one alignment to the same line of text, you’ll probably want to start by creating the table first and then entering the aligned text. This works because you can apply any alignment to any cell in a table. Then, removing the borders, the line will look line a normal line, but will really be a table.
SEE: TechRepublic Premium editorial calendar: IT policies, checklists, toolkits, and research for download (TechRepublic Premium)
I want to mention quickly that the table solution used to be applied to the header and footers section, but this is no longer necessary as the default tabs are set to center and right align automatically. However, if you’re working with a very old version, you may find this feature missing.
Now, let’s suppose you want to enter the highlighted line in Figure A, using a table. First, let’s enter the table, as follows:
- Position the cursor at the left margin of a blank line.
- Click the Insert tab, and then click Table in the Tables group and use the grid to create a table that’s two columns wide and one row deep (Figure B).
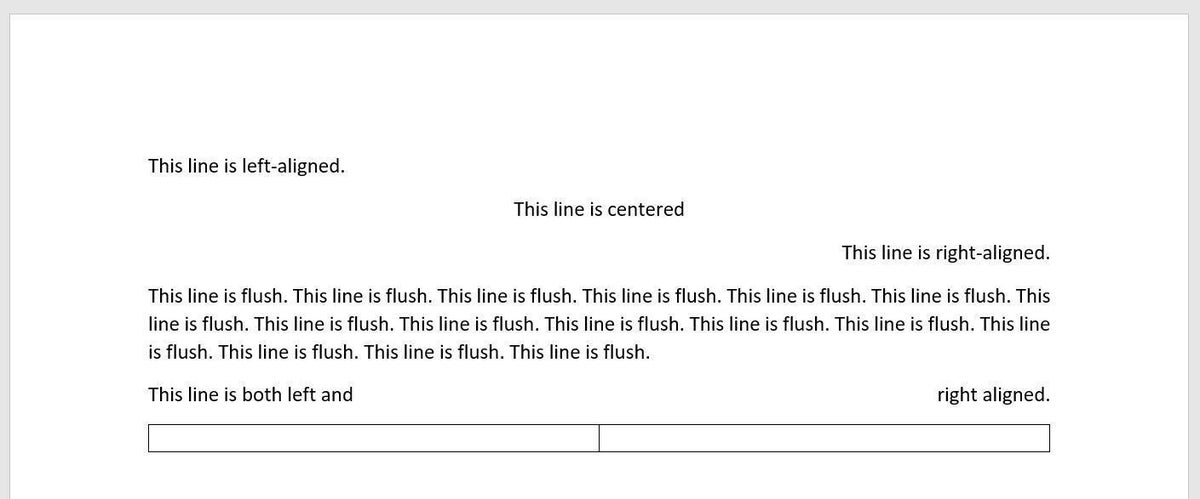
- Click to insert the table shown in Figure C.
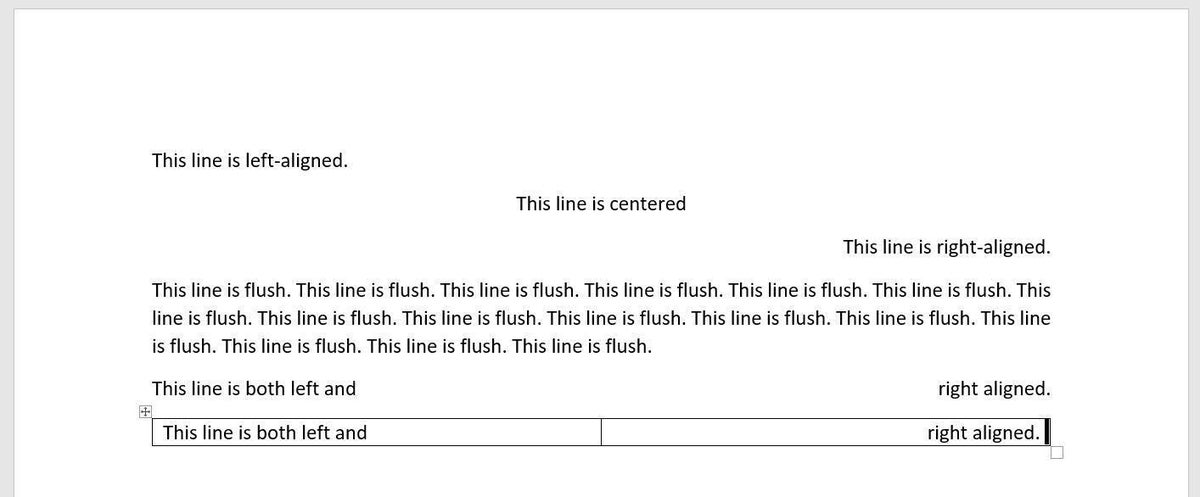
Figure A
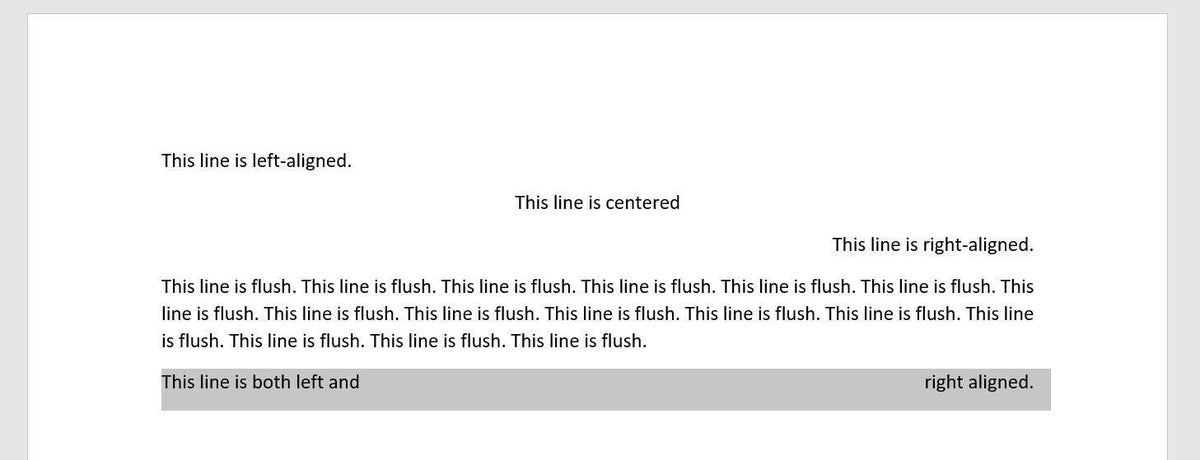
Figure B
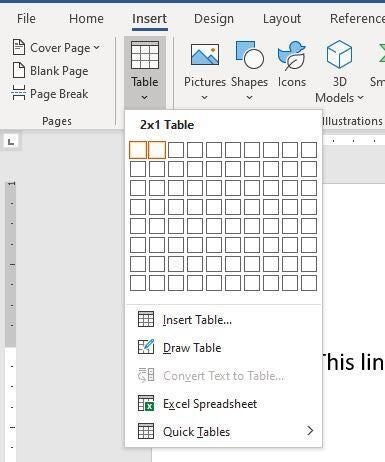
Figure C
You could add more cells. For instance, you might add three cells and center the text in the second cell. Now, let’s enter the text.
How to align the text in a table in Word
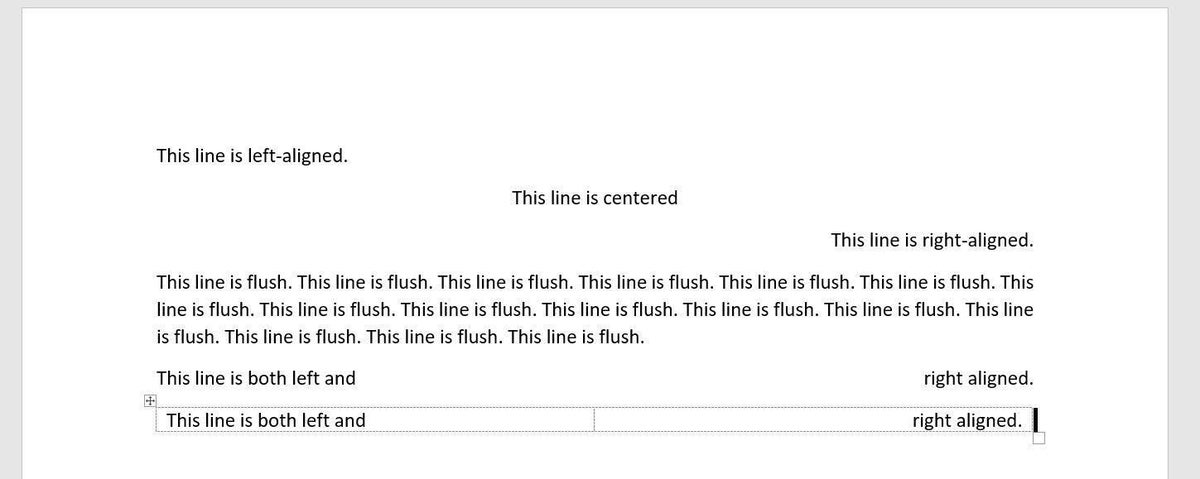
Once you have a table, you can enter the text, as shown in Figure D. Right now, both cells are left-aligned, and we want the second cell to be right-aligned. To change the alignment, simply click inside that cell and click Align Right in the Paragraph group on the Home tab. Figure E shows the results. If you want centered text as well, add a cell between the two existing cells, add the text, and apply the center alignment.
Figure D
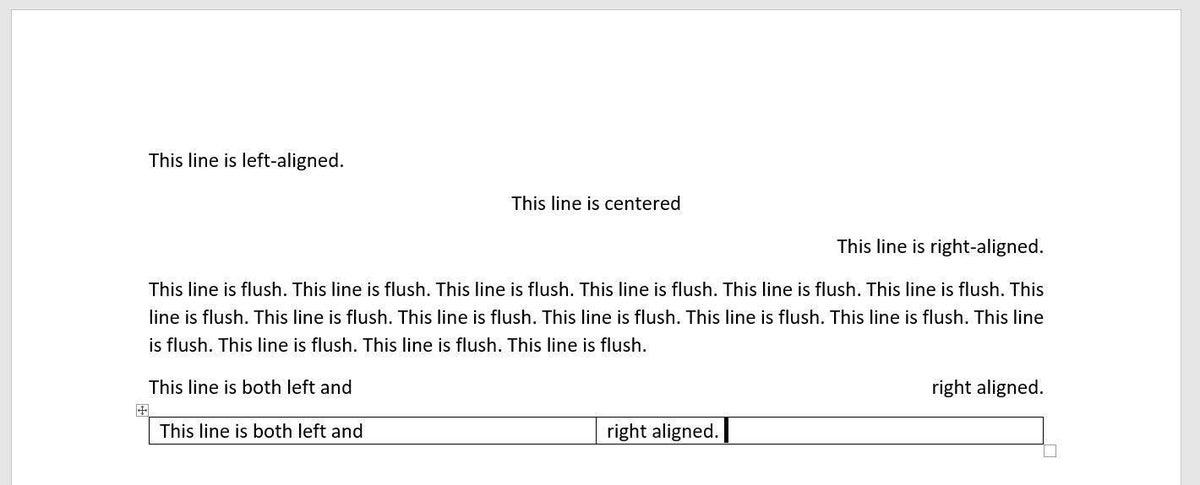
Figure E
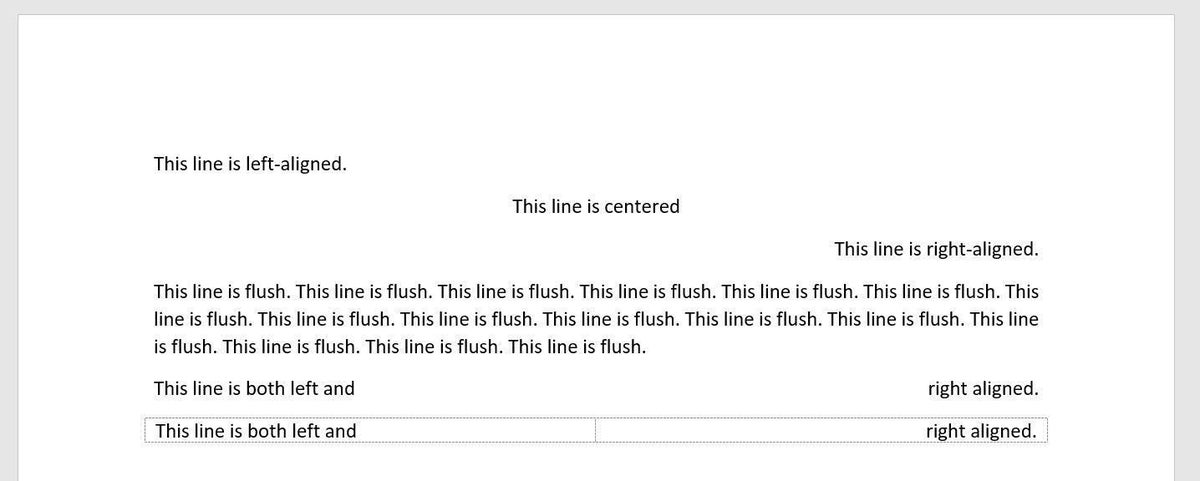
Remove the borders from your table
Most likely, you won’t want to leave the table borders, so let’s remove them. First, select the entire table. The easiest way to do so is to click the table icon at the top-left of the table. With the entire table selected, click the contextual Table Design tab. Then, in the Borders group, click the Border dropdown and choose No Borders from the dropdown list, as shown in Figure F. The borders won’t print, but you can still see the gridlines (Figure G). To disable those, select the entire table and click the contextual Layout tab. In the Table group, uncheck View Gridlines.
Figure F

Figure G
One monkey wrench to watch for
Did you notice that the margins are just a bit off? Depending on where the text is, this might not matter. If it does, the solution is simple. Drag the left and right borders of the table out, just a bit, until the text is aligned, as shown in Figure H. Working with this table is easier if you leave the gridlines on until the document is completed.
Figure H
If you plan to use a table multiple times, you can save it as a quick table and then insert it when needed rather than re-creating it each time. For instructions, read section the Quick Tables section in the article Office Q&A: How to save time formatting Word tables.