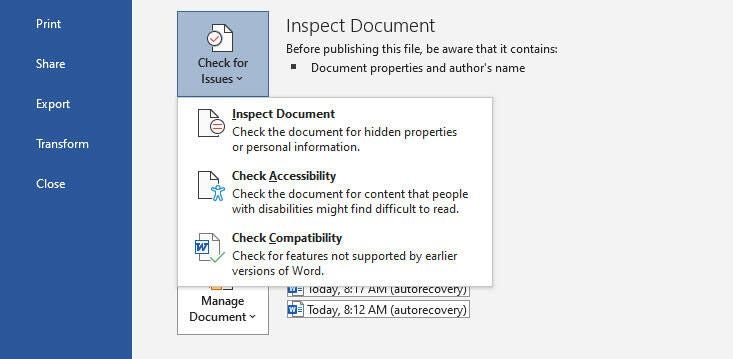
You’ve just created a Microsoft Word document that you plan to share with other people. But before you do, you want to make sure it’s suitable for sharing. That means it doesn’t contain any hidden personal information, that it will be readable by people with certain disabilities, and that it’s compatible with older versions of Word. You can perform all those tasks with the built-in document inspector.
SEE: Office 365: A guide for tech and business leaders (free PDF) (TechRepublic)
In one form or another, the document inspector has been available in Word since 2010, so you’ll be able to use it in any existing and supported version except the free online edition. The steps are the same for all the latest versions. Here’s how it works.
How to inspect your Microsoft Word document
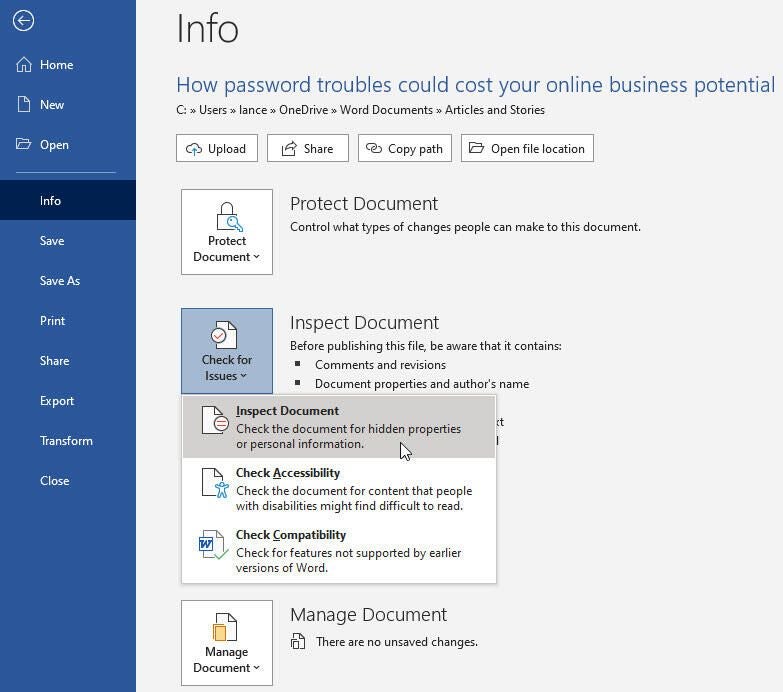
As the first step, you may want to hunt for hidden or invisible content that you don’t want other people to be able to view. With your document completed and saved, click the File menu, select Info, and then click the button for Check for Issues. From there, click the first option for Inspect Document (Figure A).
Figure A
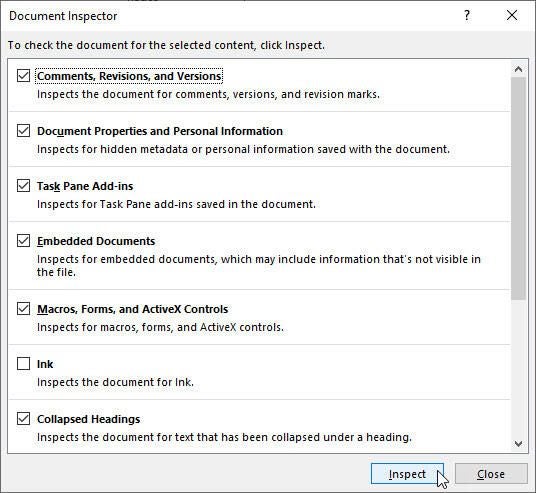
At the Document Inspector window, check or uncheck the different types of contents based on what you’d like the tool to find. Then click the Inspect button (Figure B).
Figure B
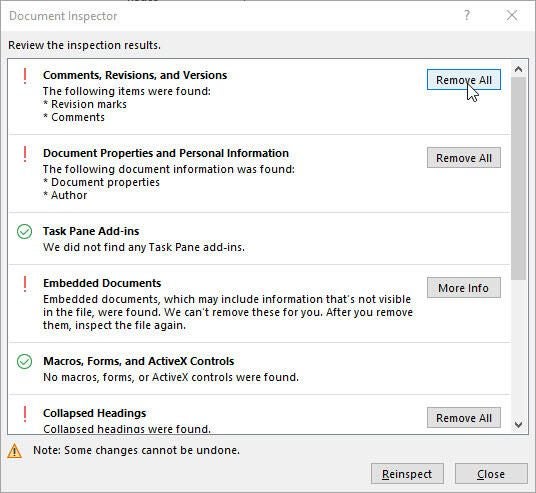
The inspection flags any of the content types it discovered in your document. To remove a specific type of content, click the Remove All button next to it (Figure C).
Figure C
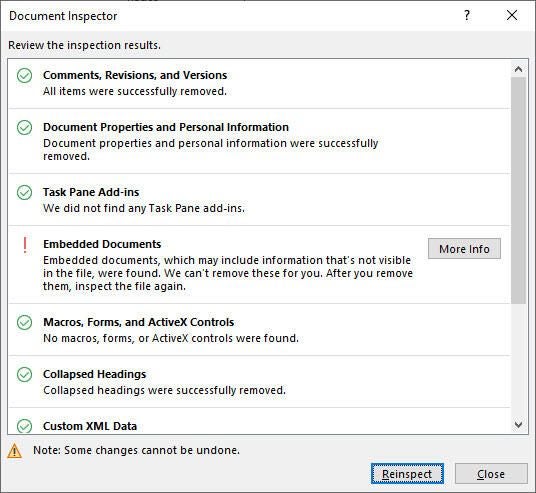
The inspector can’t remove all types of content. In that event, the tool tells you what it can’t remove. Close the inspector and return to the document if you wish to review or remove the specified content yourself or leave it as is (Figure D).
Figure D
How to check accessibility in a Word document
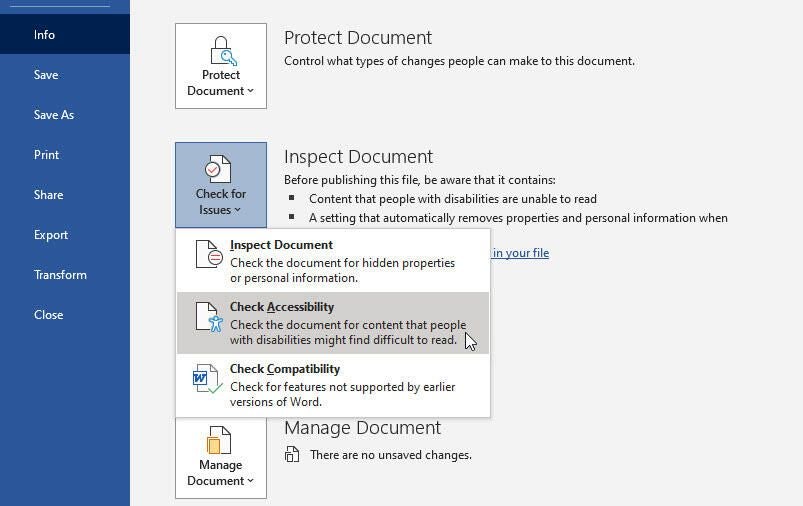
Next, you can check your document to make sure it’s readable by your intended audience, especially by someone who has a certain disability, for example, a person who is blind and uses a screen reader. Again, click the File menu, select Info, and then click the button for Check for issues. Click the second option for Check Accessibility (Figure E).
Figure E
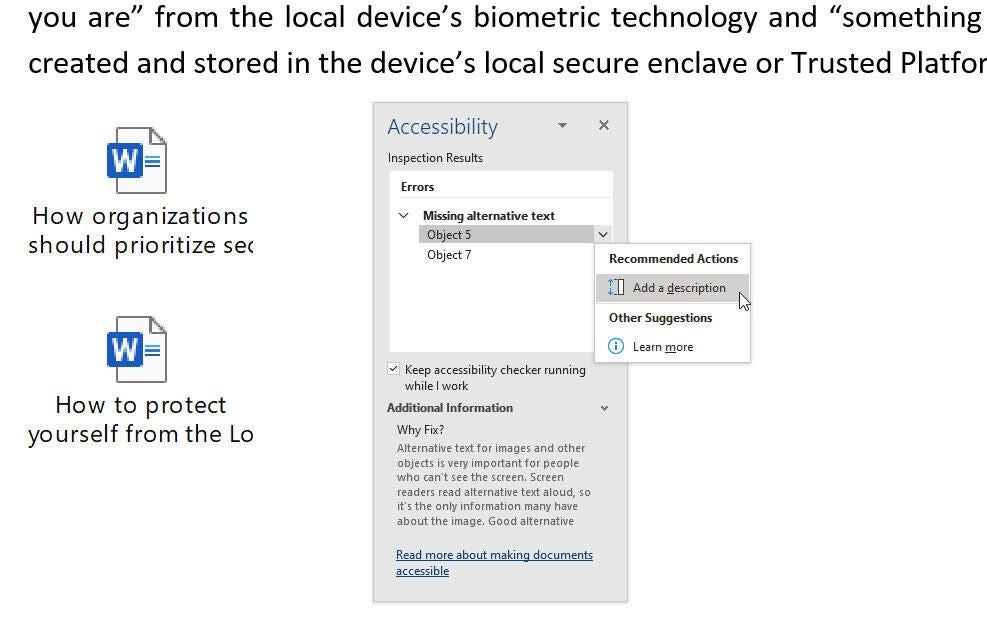
The inspection flags any accessibility issues, such as an image that doesn’t contain a description. Click the specific issue, and the tool explains why the issue was flagged and suggests a recommended action (Figure F).
Figure F
How to check compatibility in Word
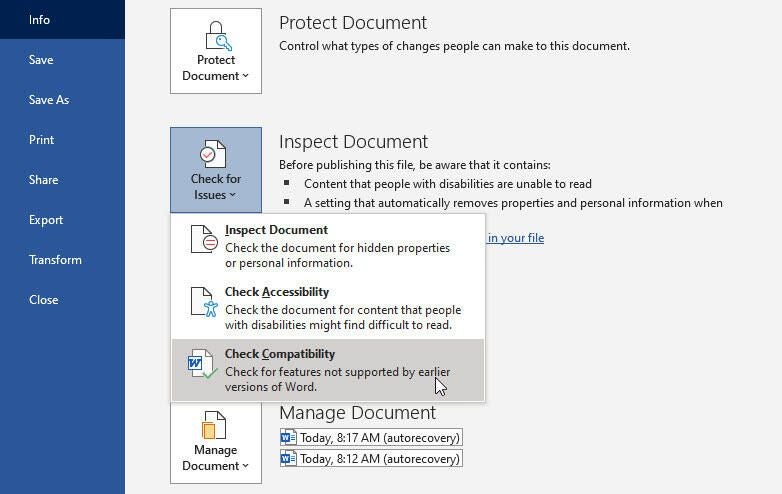
Finally, you can examine your document to make sure it can be viewed and edited in the last several versions of Microsoft Word. Return to the Info screen, click the button for Check for issues, and select the third option for Check Compatibility (Figure G).
Figure G
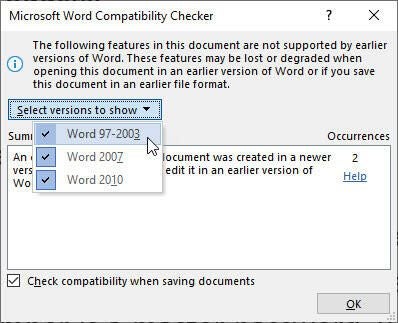
The Microsoft Word Compatibility Checker displays any content or features in the document that would be problematic in an older version of Word. Click the button for Select Versions, and you can uncheck different past versions of Word to see which specific version would be affected (Figure H).
Figure H
You can then change or remove the affected feature if you know one of the recipients of the document has the older version of Word. When done, save the document, and you now can share it with your intended audience.
